Introduzione
Grazie per l'acquistoasing the Sharp XL-70-H Compact Stereo System. This manual provides essential information for the safe and efficient operation of your audio system. Please read it thoroughly before use and keep it for future reference.
Informazioni sulla sicurezza
Per garantire un funzionamento sicuro ed evitare danni, osservare le seguenti precauzioni:
- Non esporre l'unità alla pioggia o all'umidità per evitare incendi o scosse elettriche.
- Non ostruire le aperture di ventilazione. Assicurarsi che vi sia spazio sufficiente attorno all'unità per un corretto flusso d'aria.
- Posizionare l'unità su una superficie stabile e piana.
- Non collocare sull'unità oggetti contenenti liquidi, come vasi.
- Scollegare l'unità dalla presa a muro durante i temporali o quando non viene utilizzata per lunghi periodi.
- Affidare tutti gli interventi di assistenza a personale qualificato.
Contenuto della confezione
Verificare che tutti gli articoli siano presenti nel pacco:
- Sharp XL-70-H Main Unit (Tower)
- Two 2-way MDF Speakers
- Cavo di alimentazione
- Remote Control (if included, not explicitly mentioned but common)
- Cavi per altoparlanti
Prodotto finitoview
The Sharp XL-70-H is a compact stereo system designed for versatile audio playback. It features a CD player with a glass lid, a full logic cassette deck, and an auxiliary input for connecting external devices. The system includes two 2-way MDF speakers for clear sound reproduction.
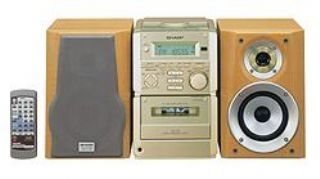
Figura 1: Davanti view of the Sharp XL-70-H Compact Stereo System, showing the main unit and two speakers. The main unit features a central display, control buttons, and the CD tray.
Impostare
1. Collegamento degli altoparlanti
Connect the included 2-way MDF speakers to the main unit. Ensure that the positive (+) and negative (-) terminals on the speakers match the corresponding terminals on the main unit. Incorrect polarity can affect sound quality.
2. Collegamento elettrico
Plug the AC power cord into the power input on the rear of the main unit, then plug the other end into a standard wall outlet (AC 230V, 50Hz).
3. Accensione iniziale
Press the Power button on the main unit or remote control to turn on the system. The display will illuminate.
Istruzioni per l'uso
Funzionamento del lettore CD
- Premere il tasto CD pulsante per selezionare la funzione CD.
- Premere il tasto APRI/CHIUDI button. The glass lid will open via motor assistance.
- Place a CD (CD-DA format) with the label side up on the disc tray.
- Premere il tasto APRI/CHIUDI button again to close the lid.
- Premere il tasto RIPRODUCI/PAUSA pulsante per avviare la riproduzione.
- Utilizzare il SALTARE pulsanti per navigare tra le tracce.
Funzionamento del lettore di cassette
- Premere il tasto NASTRO pulsante per selezionare la funzione cassetta.
- Premere il tasto OPEN/EJECT button to open the cassette deck.
- Inserire una cassetta.
- Premere il tasto GIOCARE pulsante per avviare la riproduzione.
- Utilizzare il RIAVVOLGERE E AVANTI VELOCE pulsanti per la navigazione.
- Premere il tasto STOP/ESPULSIONE button to stop playback and eject the tape.
Funzionamento dell'ingresso AUX
Connect an external audio device (e.g., smartphone, MP3 player) to the AUX input jack on the main unit using a 3.5mm audio cable. Press the AUSILIARIO button to select the auxiliary input. Audio from the connected device will play through the system speakers.
Controllo del volume e del tono
- Volume: Rotate the motorized SERVO VOLUME manopola o utilizzare i pulsanti del volume sul telecomando per regolare il livello del suono.
- Bassi/Alti: Utilizza l'apposito BASS E ALTI controls to adjust the low and high frequency response of the audio.
Clock, Timer, and Sleep Functions
The system includes a clock display, a timer function for scheduled operations, and a sleep function to automatically turn off the system after a set period. Refer to the on-screen menu and Multi Jog Control for setting these features.
Manutenzione
Pulizia dell'unità
Wipe the exterior of the unit with a soft, dry cloth. Do not use abrasive cleaners, waxes, or solvents as they may damage the finish. For stubborn stains, lightly dampen the cloth with water and mild detergent, then wipe dry.
Cura del lettore CD
Handle CDs by their edges to avoid fingerprints. If a CD is dirty, wipe it gently from the center outwards with a soft, lint-free cloth. Do not use solvents or abrasive cleaners on CDs.
Cura del registratore a cassette
Periodically clean the tape heads and pinch rollers using a specialized cassette head cleaning kit to ensure optimal sound quality and prevent tape damage.
Risoluzione dei problemi
| Problema | Possibile causa | Soluzione |
|---|---|---|
| Nessun potere | Cavo di alimentazione non collegato; presa di corrente non attiva. | Ensure power cord is securely plugged in; Check the wall outlet with another device. |
| Nessun suono | Volume too low; Speakers not connected; Incorrect input selected. | Increase volume; Check speaker connections; Select the correct input source (CD, TAPE, AUX). |
| Il CD non funziona | CD inserito in modo errato; CD sporco o graffiato; formato disco non supportato. | Insert CD with label side up; Clean or replace CD; Ensure CD is CD-DA format. |
| La cassetta non funziona | Tape inserted incorrectly; Tape heads dirty. | Ensure tape is inserted correctly; Clean tape heads. |
Se il problema persiste dopo aver provato queste soluzioni, contattare l'assistenza clienti.
Specifiche
- Modello: XL-70-H
- Marca: Affilato
- Output Power (DIN 45324):
- Peak Music Power: 120W (Total)
- Music Power: 60W (30W + 30W)
- Sine Wave Power: 40W (20W + 20W)
- Dimensioni (L x A x P):
- Main Unit (Tower): 160mm x 241mm x 298mm
- Speakers: 160mm x 240mm x 189mm
- Peso dell'articolo: 8 kg
- Connettività: Ausiliario
- Tipo di altoparlante: 2-way MDF speaker system
- Fonte di energia: AC-adapter (connected to a standard wall outlet)
- Dispositivi compatibili: Cassette player, AUX device
- Formato audio supportato: CD-DA
- Numero di relatori: 2
- Modalità di uscita audio: Stereo (2.0 canali)
- Colore: Argento
- Supporto Bluetooth: SÌ
Garanzia e supporto
This product comes with a standard manufacturer's warranty. For detailed warranty information, please refer to the warranty card included with your purchase or visit the official Sharp website. For technical support or service inquiries, please contact Sharp customer service.