
Introduzione
This manual provides detailed instructions for the installation, operation, and maintenance of your DB DRIVE A3 2250.5 Okur Series A3 Class AB 1000 Watt 5-Channel Amplificatore. Leggere attentamente questo manuale prima di procedere all'installazione o all'utilizzo per garantire un utilizzo corretto ed evitare danni all'unità o al sistema audio del veicolo.
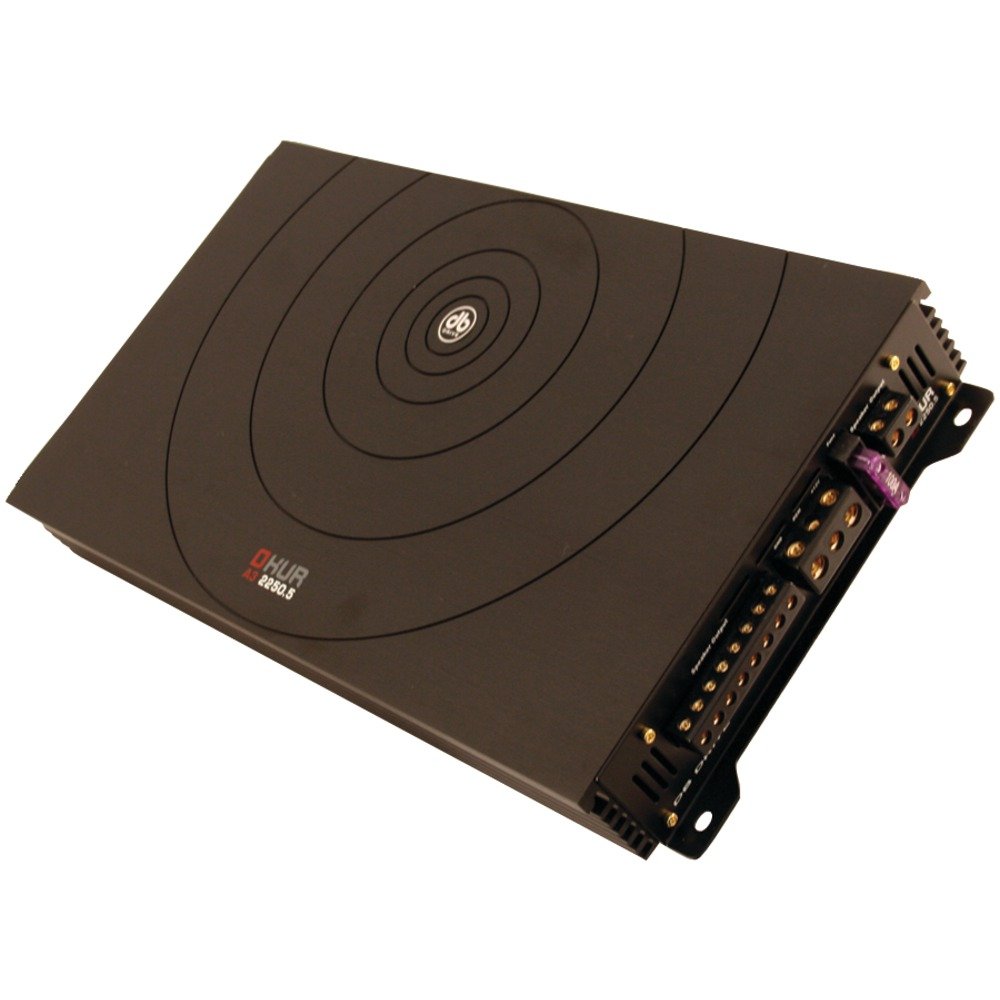
Image: DB DRIVE A3 2250.5 Okur Series A3 Class AB 1000 Watt 5-Channel Amplifier. This image shows the amplifier's top view, highlighting its compact design and branding.
Informazioni sulla sicurezza
Per evitare lesioni o danni, osservare sempre le seguenti precauzioni di sicurezza:
- Disconnect the vehicle's battery negative terminal before making any power connections.
- Assicurarsi che tutti i cavi siano correttamente instradati e fissati per evitare schiacciamenti o cortocircuiti.
- Utilizzare cavi di calibro appropriato per i collegamenti di alimentazione e di terra, come specificato nella sezione di installazione.
- Installare il amplificatore in un luogo che consenta un'adeguata ventilazione per evitare il surriscaldamento.
- Evitare di installare il amplificatore in aree esposte a umidità o vibrazioni eccessive.
- Se non sei sicuro di una qualsiasi fase del processo di installazione, rivolgiti a un installatore professionista di sistemi audio per auto.
Configurazione e installazione
1. Disimballaggio e ispezione
Rimuovere con attenzione il file amplifier from its packaging. Inspect the unit for any signs of damage that may have occurred during shipping. Contact your dealer immediately if any damage is found.
2. Montaggio del Amppiù vivace
Choose a mounting location that is dry, well-ventilated, and secure. Common locations include under a seat, in the trunk, or behind a panel. Ensure there is sufficient airflow around the ampdissipatore di calore del dissipatore.
- Mark the mounting holes using the amplifier come modello.
- Drill pilot holes if necessary, being careful not to damage any vehicle components.
- Mettere in sicurezza il amplifier utilizzando le viti di montaggio fornite.
3. Collegamenti elettrici
Proper wiring is crucial for performance and safety. Refer to the following guidelines:
- Potenza (BATT+): Connect a heavy-gauge wire (e.g., 4 AWG or 8 AWG depending on total power) directly from the positive terminal of the vehicle's battery. Install an inline fuse holder within 18 inches (45 cm) of the battery.
- Terra (GND): Connect a heavy-gauge wire of the same size as the power wire to a clean, unpainted metal surface of the vehicle's chassis. Ensure a solid, low-resistance connection.
- Remoto (REM): Connect a smaller gauge wire (e.g., 18 AWG) from the amplifier's remote terminal to the remote output of your head unit. This turns the amplifier acceso e spento con l'unità principale.
- Ingressi RCA: Collega i cavi RCA dal pre-amplificatore dell'unità principaleamp uscite al amplifier's RCA input jacks. Ensure correct channel matching (Front L/R, Rear L/R, Sub).
- Uscite degli altoparlanti: Connect speaker wires from the amplifier's speaker terminals to your speakers. Observe correct polarity (+ to + and - to -). This is a 5-channel amplifier, typically 4 channels for full-range speakers and 1 channel for a subwoofer.
4. Gain, Crossover, and Bass Boost Settings
These settings allow you to fine-tune the amplifier's output to match your audio system and preferences.
- Ottieni il controllo: Adjust the gain to match the output voltage of your head unit. Start with the gain at minimum, then slowly increase it until you hear distortion, then back off slightly. This is not a volume control.
- Crossover (LPF/HPF):
- Filtro passa basso (LPF): For the subwoofer channel, set the LPF to allow only low frequencies to pass (e.g., 80-120 Hz).
- Filtro passa alto (HPF): For the full-range channels, set the HPF to block low frequencies from reaching your main speakers (e.g., 80-100 Hz) to prevent distortion and improve sound clarity.
- Aumento dei bassi: Use the bass boost sparingly. Excessive bass boost can lead to distortion and speaker damage. Adjust to taste, ensuring sound remains clear.
Istruzioni per l'uso
Una volta installato e configurato, il amplifier will power on automatically with your head unit via the remote turn-on wire. Adjust volume and tone controls primarily from your head unit. The amplifier's settings (gain, crossover) are set during installation and generally do not require frequent adjustment.
Manutenzione
The DB DRIVE A3 2250.5 amplifier richiede una manutenzione minima.
- Pulizia: Periodically wipe the ampPulire l'esterno del filtro con un panno morbido e asciutto per rimuovere la polvere. Non utilizzare prodotti chimici aggressivi o detergenti abrasivi.
- Ispezione: Occasionally check all wiring connections to ensure they are secure and free from corrosion. Ensure the amplifier's ventilation fins are not obstructed.
Risoluzione dei problemi
Se riscontri problemi con il tuo amplifier, fare riferimento ai seguenti problemi comuni e alle relative soluzioni:
| Problema | Possibile causa | Soluzione |
|---|---|---|
| Nessun potere / Amplifier non si accende |
|
|
| Nessuna uscita audio |
|
|
| Suono distorto |
|
|
| AmpSurriscaldamento del lifier (modalità di protezione) |
|
|
Specifiche
| Caratteristica | Dettaglio |
|---|---|
| Numero di modello | A3 2250.5 |
| Potenza massima in uscita | 1000 Watt |
| Canali | 5-Channel (4 stereo, 1 mono for subwoofer) |
| Ampclasse lifier | Classe AB |
| Componenti | Audiophile Grade |
| Dimensioni (L x P x A) | Dimensioni: 53.59 x 30.48 x 10.92 cm |
| Peso | 6.53 kg |
| Gestione del calore | DRIVESINK (Okur Series A3 feature) |
Garanzia e supporto
DB Drive products are designed for reliability and performance. This product is covered by a limited warranty. Please refer to the warranty card included with your product or visit the official DB Drive websito per termini e condizioni di garanzia dettagliati.
For technical support, service, or warranty claims, please contact your authorized DB Drive dealer or visit the DB Drive official websito per informazioni di contatto e risorse di supporto.