1. Introduzione
This manual provides comprehensive instructions for the safe and effective installation, operation, and maintenance of the Ranco O16-108 Pressure Control Switch. Please read this manual thoroughly before attempting to install or operate the device. Retain this manual for future reference.
2. Informazioni sulla sicurezza
AVVERTIMENTO: Electrical shock hazard. Disconnect power before installation or servicing. Installation and servicing must be performed by qualified personnel only. Failure to follow these instructions could result in serious injury or death.
- Indossare sempre dispositivi di protezione individuale (DPI) adeguati.
- Assicurarsi che tutti i cablaggi siano conformi alle normative elettriche locali e nazionali.
- Non superare i valori elettrici nominali specificati per il dispositivo.
- Verificare la corretta messa a terra per prevenire rischi elettrici.
3. Prodotto finitoview
The Ranco O16-108 is a robust pressure control switch designed for industrial applications. It features a durable housing, a clear pressure scale for precise adjustments, and a capillary tube for remote pressure sensing. This device is engineered to provide reliable switching based on detected pressure changes.
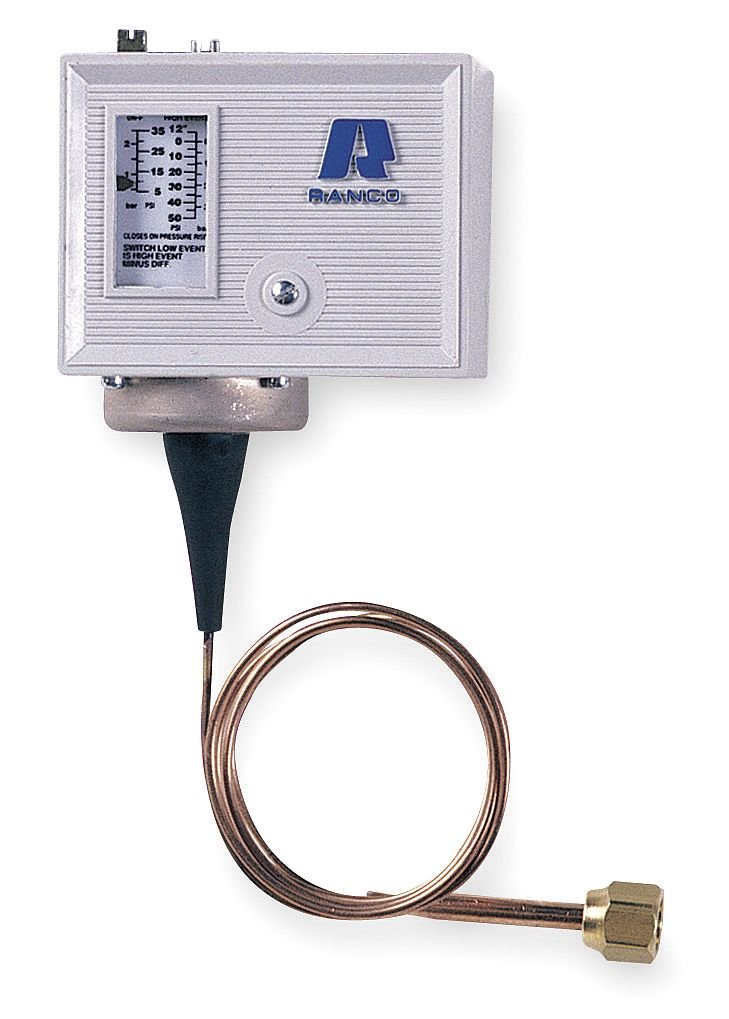
Figura 1: Ranco O16-108 Pressure Control Switch. The image displays the main control unit with a visible pressure scale (showing values like 10, 15, 20, 30, 40, 50 in PSI and bar), the Ranco logo, and a capillary tube extending from the bottom, coiled, and terminating in a brass fitting. The scale indicates "CLOSES ON PRESSURE RISE" and "SWITCH LOW EVENT".
4. Configurazione e installazione
Proper installation is crucial for the optimal performance and longevity of the Ranco O16-108. Consult a qualified technician for installation if you are not experienced with electrical and pressure systems.
4.1 Montaggio
- Mount the control unit in a location free from excessive vibration, moisture, and extreme temperatures.
- Garantire uno spazio adeguato per il cablaggio e le regolazioni.
- Use appropriate fasteners to secure the unit firmly to a stable surface.
4.2 Collegamento di pressione
- Connect the capillary tube's brass fitting to the pressure source.
- Ensure a leak-free connection. Do not bend the capillary tube sharply, as this can damage the sensing element.
- The capillary tube transmits pressure changes to the control unit.
4.3 Cablaggio elettrico
- Refer to the wiring diagram provided with the product (not included in this manual) for specific connections.
- Connect power supply and load wires to the appropriate terminals. The contact type is Normally Open (NO) and the terminal is SPDT (Single Pole Double Throw).
- Assicurarsi che tutti i collegamenti siano sicuri e isolati.
5. Istruzioni per l'uso
The Ranco O16-108 operates automatically based on the set pressure points. Adjustments are made via the visible scale on the front of the unit.
5.1 Impostazione dei punti di pressione
- Identify the desired cut-in and cut-out pressure values for your application.
- Use a small screwdriver or adjustment tool (if required) to move the indicators on the pressure scale to the desired settings. The scale shows values in both bar and PSI.
- The device is designed to close on pressure rise, meaning the switch will activate when the pressure reaches the set point.
- The "SWITCH LOW EVENT" and "MINUS DIFF" markings on the scale relate to setting the differential pressure.
5.2 Manual Operation / Reset (if applicable)
While the primary operation is automatic, some Ranco pressure controls may feature a manual reset or test button. If present, this button allows for manual activation or resetting of the switch. Consult the specific product labeling for details on any manual functions.
6. Manutenzione
The Ranco O16-108 is designed for minimal maintenance. Regular inspections are recommended to ensure continued reliable operation.
- Ispezione visiva: Controllare periodicamente l'unità per individuare eventuali segni di danni fisici, corrosione o collegamenti allentati.
- Pulizia: Keep the exterior of the control unit clean and free of dust and debris. Use a soft, dry cloth. Do not use abrasive cleaners or solvents.
- Tubo capillare: Inspect the capillary tube for kinks, damage, or leaks. Ensure it is securely connected at both ends.
7. Risoluzione Dei Problemi
If the Ranco O16-108 is not functioning as expected, review i seguenti problemi comuni prima di contattare l'assistenza.
- Dispositivo non commutante:
- Check power supply to the unit.
- Verificare che i collegamenti elettrici siano corretti e sicuri.
- Ensure the pressure is within the set operating range.
- Inspect the capillary tube for damage or blockages.
- Letture di pressione imprecise:
- Confirm the capillary tube is properly installed and free of leaks.
- Check for external factors affecting pressure sensing (e.g., temperature fluctuations at the sensing point).
- Unit appears damaged:
- Do not attempt to repair internal components. Contact a qualified service technician.
8. Specifiche
| Caratteristica | Dettaglio |
|---|---|
| Marca | Ranco |
| Numero di modello | O16-108 |
| Dimensioni del prodotto (L x P x A) | 4.25 x 6.5 x 2.5 pollici |
| Peso dell'articolo | 1.3 libbre |
| Numero di magazzino nazionale | Numero di parte 5930-00-708-1968 |
| Modalità di funzionamento | Auto |
| Tipo di contatto | Normalmente aperto |
| Tipo di connettore | Terminale a vite |
| terminale | SPDT (polo singolo doppio lancio) |
| Tipo di circuito | 1 vie |
| Tipo di attuatore | Push Button (likely for reset/test or internal mechanism) |
| Materiale di contatto | Rame |
| Valutazione internazionale di protezione | Grado di protezione IP00 |
9. Garanzia e supporto
For warranty information, technical support, or service inquiries regarding your Ranco O16-108 Pressure Control Switch, please contact Ranco customer service or your authorized Ranco distributor. Keep your purchase receipt and model number handy when contacting support.
Produttore: RANCO