
1. Introduzione
This manual provides comprehensive instructions for the installation, operation, and maintenance of your Chieftec Mesh MidiTower LCX-01SL-SL-B PC case. Please read this manual thoroughly before beginning any installation to ensure proper setup and safe handling of your components.
2. Prodotto finitoview
The Chieftec Mesh MidiTower LCX-01SL-SL-B is a versatile computer chassis designed for ATX 2.0 power supplies and Micro ATX motherboards. It features a mesh design for optimal airflow and includes multiple drive bays for storage and optical devices. The case provides convenient front panel connectivity with two USB 2.0 ports and two USB 3.0 ports.

Immagine: Interna view of the Chieftec Mesh MidiTower LCX-01SL-SL-B PC case, highlighting the drive bays and general layout.
3. Configurazione e installazione
3.1 Precauzioni di sicurezza
- Scollegare sempre l'alimentatore dalla presa a muro prima di installare o rimuovere qualsiasi componente.
- Indossare un braccialetto antistatico per evitare danni causati dalle scariche elettrostatiche (ESD) ai componenti sensibili.
- Maneggiare i componenti con cura per evitare danni fisici.
3.2 Apertura del caso
- Posizionare la custodia su una superficie piana e stabile.
- Locate and remove the thumbscrews or standard screws securing the side panel(s) at the rear of the case.
- Gently slide the side panel(s) backward and lift them away from the chassis.
3.3 Installazione della scheda madre
- Install the I/O shield into the opening at the rear of the case.
- Align the motherboard with the pre-installed standoffs. If necessary, install additional standoffs according to your motherboard's form factor.
- Posizionare con attenzione la scheda madre sui distanziatori, assicurandosi che le porte I/O siano allineate con la schermatura I/O.
- Fissare la scheda madre con le viti fornite. Non serrare eccessivamente.
3.4 Installazione dell'alimentatore
- Position the ATX 2.0 power supply unit (PSU) in the designated bottom-mount bay.
- Align the screw holes on the PSU with those on the case's rear panel.
- Secure the PSU with the provided screws.
3.5 Installazione del disco rigido
The Chieftec Mesh MidiTower features tool-less drive trays for easy installation of 3.5-inch hard drives.
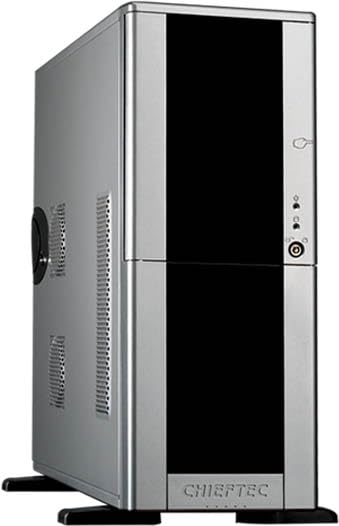
Image: Installation of a 3.5-inch hard drive into a tool-less drive bay.
- Gently pull out an empty drive tray from the drive cage.
- Flex the sides of the tray to fit the 3.5-inch hard drive, aligning the screw holes on the drive with the pins on the tray.
- Once the drive is secured in the tray, slide the tray back into the drive cage until it clicks into place.
- Connect the SATA data and power cables to the installed hard drive.
3.6 Optical Drive Installation (5.25-inch bays)
- Remove the desired 5.25-inch bay cover from the front panel.
- Slide the optical drive into the bay from the front of the case until it is flush with the front panel.
- Secure the drive using the provided tool-less clips or screws on both sides.
- Connect the SATA data and power cables to the optical drive.
3.7 Installazione della scheda di espansione
- Remove the appropriate expansion slot cover(s) from the rear of the case.
- Insert the expansion card (e.g., graphics card, sound card) into the corresponding PCIe slot on the motherboard.
- Secure the card with a screw or the case's retention mechanism.
3.8 Gestione dei cavi
Utilizzare i fori per il passaggio dei cavi e i punti di fissaggio dietro il vassoio della scheda madre per organizzare i cavi. Questo migliora il flusso d'aria e l'estetica.
3.9 Chiusura del caso
- Ensure all components are securely installed and all necessary cables are connected.
- Slide the side panel(s) back into place and secure them with the thumbscrews or standard screws.
4. Operativo
Once all internal components are installed and the case is closed, connect your monitor, keyboard, mouse, and other peripherals to the appropriate ports on your motherboard's I/O panel. Connect the power cable to the power supply unit and then to a wall outlet. Press the power button on the front of the case to start your system.
5. Manutenzione
5.1 Pulizia
- Regularly clean dust filters (if present) to maintain optimal airflow.
- Use compressed air to remove dust from inside the case and components. Ensure the system is powered off and unplugged before cleaning.
- Pulisci l'esterno della custodia con un panno morbido eamp stoffa. Evitare prodotti chimici aggressivi.
5.2 Flusso d'aria
Ensure the case has adequate clearance around its intake and exhaust vents to allow for proper airflow and cooling of internal components.
6. Risoluzione Dei Problemi
6.1 Il sistema non si accende
- Verificare che il cavo di alimentazione sia collegato saldamente sia all'alimentatore sia alla presa a muro.
- Assicurarsi che l'interruttore di alimentazione sul retro dell'alimentatore sia in posizione "ON".
- Check that the front panel power button cable is correctly connected to the motherboard.
- Confirm all internal power connections (24-pin ATX, 8-pin CPU, PCIe power) are firmly seated.
7. Specifiche
| Caratteristica | Specificazione |
|---|---|
| Nome del modello | Mesh MidiTower LCX-01SLSLB |
| Numero modello articolo | LCX-01SL-SL-B |
| Tipo di caso | MidiTower |
| Compatibilità della scheda madre | Micro-ATX |
| Compatibilità dell'alimentatore | ATX 2.0 (Bottom Mount) |
| Dimensioni (LxWxH) | 21.26 x 8.07 x 20.63 pollici |
| Peso dell'articolo | 11.66 libbre |
| Porte USB 2.0 | 2 |
| Porte USB 3.0 | 2 |
| Alloggiamenti per unità da 5.25" | 4 |
| Metodo di raffreddamento | Aria |
| Colore | Nero |
| Materiale | Metallo |
8. Garanzia e supporto
For warranty information and technical support, please refer to the official Chieftec webo contatta il tuo rivenditore locale. I termini e le condizioni della garanzia possono variare in base alla regione e al prodotto. Conserva la prova d'acquisto per eventuali reclami in garanzia.