1. Introduzione
The Marshall Acoustic Soloist AS50D is a 50-watt acoustic guitar amplifier designed to provide clear and expressive amplification for acoustic instruments and vocals. It features two independent channels, digital chorus, and reverb effects, making it suitable for various performance and practice environments. This manual provides essential information for the proper setup, operation, and maintenance of your AS50D amppiù vivace.
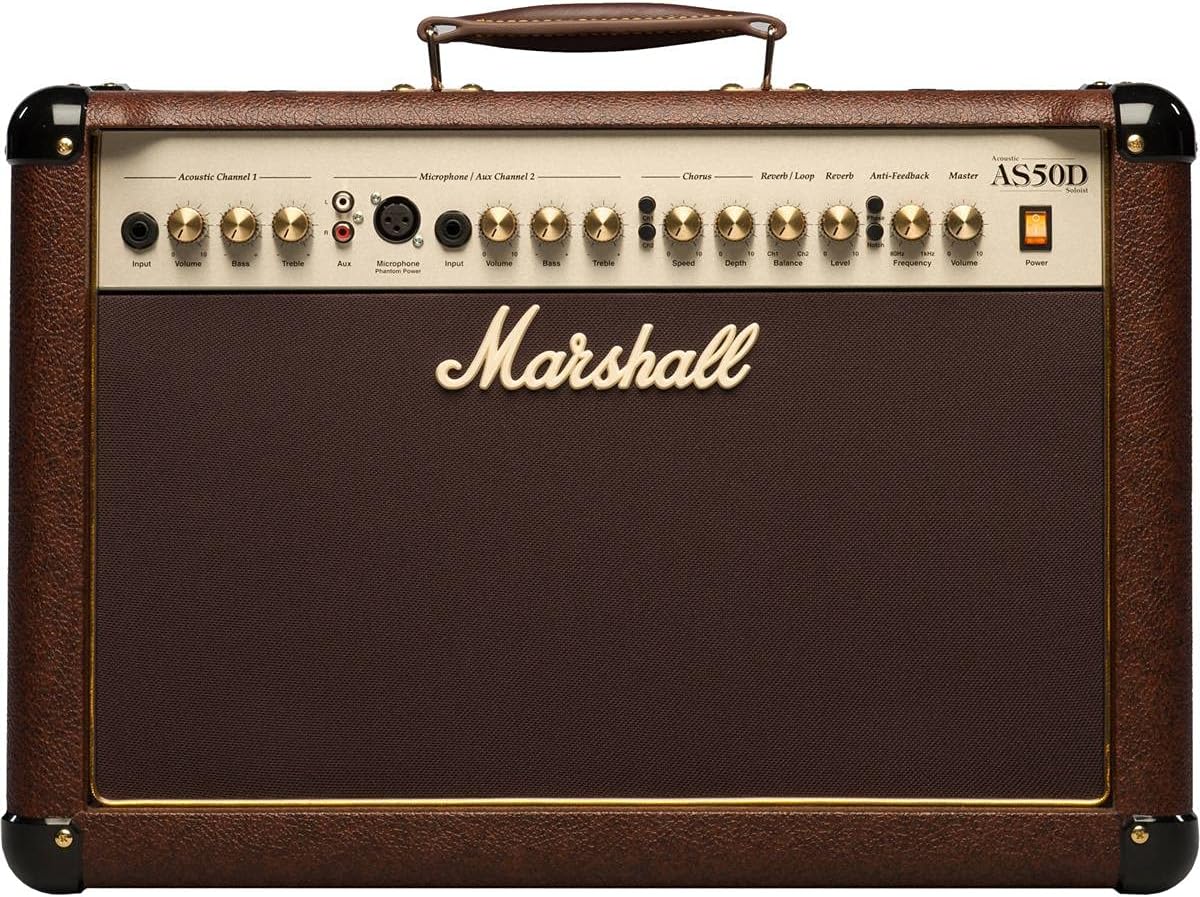
Immagine 1.1: anteriore view of the Marshall AS50D Acoustic Soloist Amplificatore, showcasing its control panel and speaker grille.
2. Impostazione
- Disimballaggio: Rimuovere con attenzione il file amplificatore dal suo imballaggio. Conservare tutti i materiali di imballaggio per il trasporto o lo stoccaggio futuri.
- Posizionamento: Posizionare il amplifier on a stable, flat surface. Ensure adequate ventilation around the unit to prevent overheating. Avoid placing it near heat sources or in direct sunlight.
- Collegamento elettrico: Assicurare il amplifier's power switch is in the 'OFF' position. Connect the supplied power cord to the amplifier's IEC inlet on the rear panel and then to a suitable grounded AC power outlet. The AS50D operates on 220-240V ~ 50Hz or 120V ~ 60Hz depending on the region.
- Collegamenti iniziali:
- For acoustic guitars or other instruments, connect a standard 1/4" (6.35mm) instrument cable from your instrument to the 'Input' jack of 'Acoustic Channel 1'.
- For microphones, connect an XLR cable from your microphone to the 'Microphone Input' of 'Microphone / Aux Channel 2'.
- For external audio devices like MP3 players or drum machines, connect them to the 'Aux Input' RCA phono jacks on 'Microphone / Aux Channel 2'.
- Accensione: Once all connections are secure, switch the amplifier's power switch to the 'ON' position. The power indicator light will illuminate.
3. Istruzioni per l'uso
The AS50D features a comprehensive control panel designed for intuitive operation. Familiarize yourself with each section:
3.1. Acoustic Channel 1
- Ingresso: 1/4" (6.35mm) jack for connecting acoustic instruments.
- Volume: Controls the overall output level of Channel 1.
- Basso: Adjusts the low-frequency response of Channel 1.
- Alti: Adjusts the high-frequency response of Channel 1.
3.2. Microphone / Aux Channel 2
- Ingresso microfono: XLR input for connecting condenser or dynamic microphones.
- Potenza fantasma: Switch to activate +48V phantom power for condenser microphones. Ensure microphone is connected before activating.
- Input (Aux): 1/4" (6.35mm) jack for connecting instruments.
- Volume: Controls the overall output level of Channel 2.
- Basso: Adjusts the low-frequency response of Channel 2.
- Alti: Adjusts the high-frequency response of Channel 2.
- ausiliario: Stereo RCA phono inputs for connecting external audio devices (e.g., MP3 players).
3.3. Effects Section
- Chorus Speed: Adjusts the rate of the digital chorus effect.
- Chorus Depth: Adjusts the intensity of the digital chorus effect.
- Reverb / Loop Balance: Blends the dry signal with the effects loop return signal.
- Reverb / Loop Level: Controls the overall level of the effects loop and reverb.
- Livello di riverbero: Controls the intensity of the digital reverb effect.
3.4. Sezione Master
- Anti-Feedback Notch: Activates the notch filter to reduce feedback.
- Anti-Feedback Frequency: Adjusts the frequency range targeted by the notch filter. Rotate to find and eliminate problematic feedback frequencies.
- Volume principale: Controlla il volume di uscita complessivo del amppiù vivace.
- Energia: Interruttore di alimentazione principale per il amppiù vivace.
3.5. Collegamenti del pannello posteriore

Immagine 3.5.1: posteriore view of the Marshall AS50D Acoustic Soloist Amplifier, showing the power input, footswitch, DI out, and effects loop connections.
- Interruttore a pedale: Ingresso per un interruttore a pedale opzionale per controllare gli effetti.
- Uscita DI: XLR output for direct connection to a mixing console or recording device.
- Effects Loop Send: Output to send signal to external effects processors.
- Effects Loop Return: Input to receive signal from external effects processors.
4. Manutenzione
- Pulizia: Scollegare il amplifier from power before cleaning. Use a soft, dry cloth to wipe down the exterior. Do not use abrasive cleaners or solvents.
- Magazzinaggio: Conservare il amplifier in a dry, temperate environment, away from extreme temperatures and humidity. If possible, use a protective cover to prevent dust accumulation.
- Trasporti: Quando si sposta il amplifier, ensure it is powered off and disconnected. Use the integrated handle for carrying.
- Manutenzione: Refer all servicing to qualified service personnel. Do not attempt to open the amptelaio lifier.
5. Risoluzione Dei Problemi
- Nessun potere:
- Controllare che il cavo di alimentazione sia collegato saldamente a entrambi i amplificatore e la presa a muro.
- Verificare che la presa a muro sia funzionante.
- Assicurare il amplifier's power switch is in the 'ON' position.
- Nessun suono:
- Check all instrument and microphone cables for secure connections and proper functionality.
- Ensure the 'Volume' controls for the active channel and the 'Master Volume' are turned up.
- Verify that your instrument or microphone is working correctly.
- Distortion at High Volumes:
- Reduce the 'Volume' control for the active channel or the 'Master Volume'.
- Ensure your input signal is not too strong. Adjust the output level of your instrument if possible.
- Check the quality of your instrument cables; faulty cables can introduce noise and distortion.
- Feedback (suono ululante):
- Engage the 'Anti-Feedback Notch' switch.
- Slowly rotate the 'Anti-Feedback Frequency' knob to find and eliminate the problematic frequency.
- Reduce the 'Volume' of the affected channel or the 'Master Volume'.
- Move further away from the amplifier or change your position relative to the speakers.
6. Specifiche
| Caratteristica | Specificazione |
|---|---|
| Numero di modello | M-AS50D-U |
| Uscita Wattage | 50 Watt |
| Conteggio parlanti | 2 |
| Dimensioni dell'altoparlante | 8-inch woofers (x2) |
| Canali | 2 (Acoustic, Microphone/Aux) |
| Effetti | Digital Chorus, Digital Reverb |
| Ingressi | 1/4" Jack, XLR, Stereo RCA |
| Risultati | D.I. Out (XLR), Effects Loop Send/Return |
| Potenza fantasma | +48V (commutabile) |
| Anti-feedback | Notch Filter with Frequency Control |
| Peso dell'articolo | 35.3 libbre (16 kg) |
| Dimensioni del prodotto | 21.34 x 10.28 x 16.38 pollici (54.2 x 26.1 x 41.6 cm) |
| Tipo di materiale | Metallo |
| Fonte di alimentazione | Elettrico con cavo |
7. Garanzia e supporto
This Marshall amplifier is covered by a manufacturer's warranty. Please refer to the warranty card included with your product for specific terms and conditions, including coverage duration and limitations. For technical support, service, or warranty claims, please contact your authorized Marshall dealer or visit the official Marshall Amplificazione websito per informazioni di contatto nella tua regione.
Conservare la prova d'acquisto per la convalida della garanzia.