
1. Introduzione
This manual provides comprehensive instructions for the installation, operation, and maintenance of your Chieftec BT-02B-U3 Mesh Mini-ITX PC Case. Please read this manual thoroughly before beginning any installation or operation to ensure proper usage and to prevent damage to the product or other components. Keep this manual for future reference.
2. Informazioni sulla sicurezza
- Scollegare sempre l'alimentatore dalla presa a muro prima di installare o rimuovere qualsiasi componente.
- Handle all components with care to avoid electrostatic discharge (ESD) damage. Consider using an anti-static wrist strap.
- Assicurare una corretta ventilazione attorno al case del PC per evitare il surriscaldamento.
- Non esporre il prodotto all'umidità o a temperature estreme.
- Tenere le parti di piccole dimensioni e i materiali di imballaggio fuori dalla portata dei bambini.
3. Prodotto finitoview
The Chieftec BT-02B-U3 is a compact Mini-ITX PC case designed for standard, cost-effective components. It includes a powerful 250W SFX power supply, making it suitable for ITX motherboards with desktop CPUs. Its mesh design aids in ventilation.

Figura 3.1: Davanti e di lato view of the Chieftec BT-02B-U3 Mesh Mini-ITX PC Case. This image displays the compact form factor, the optical drive bay, and the front panel controls including power and USB ports.

Figura 3.2: Parte superiore anteriore view of the Chieftec BT-02B-U3 PC Case. This perspective highlights the horizontal orientation, the optical drive slot, and the front panel buttons and indicators.
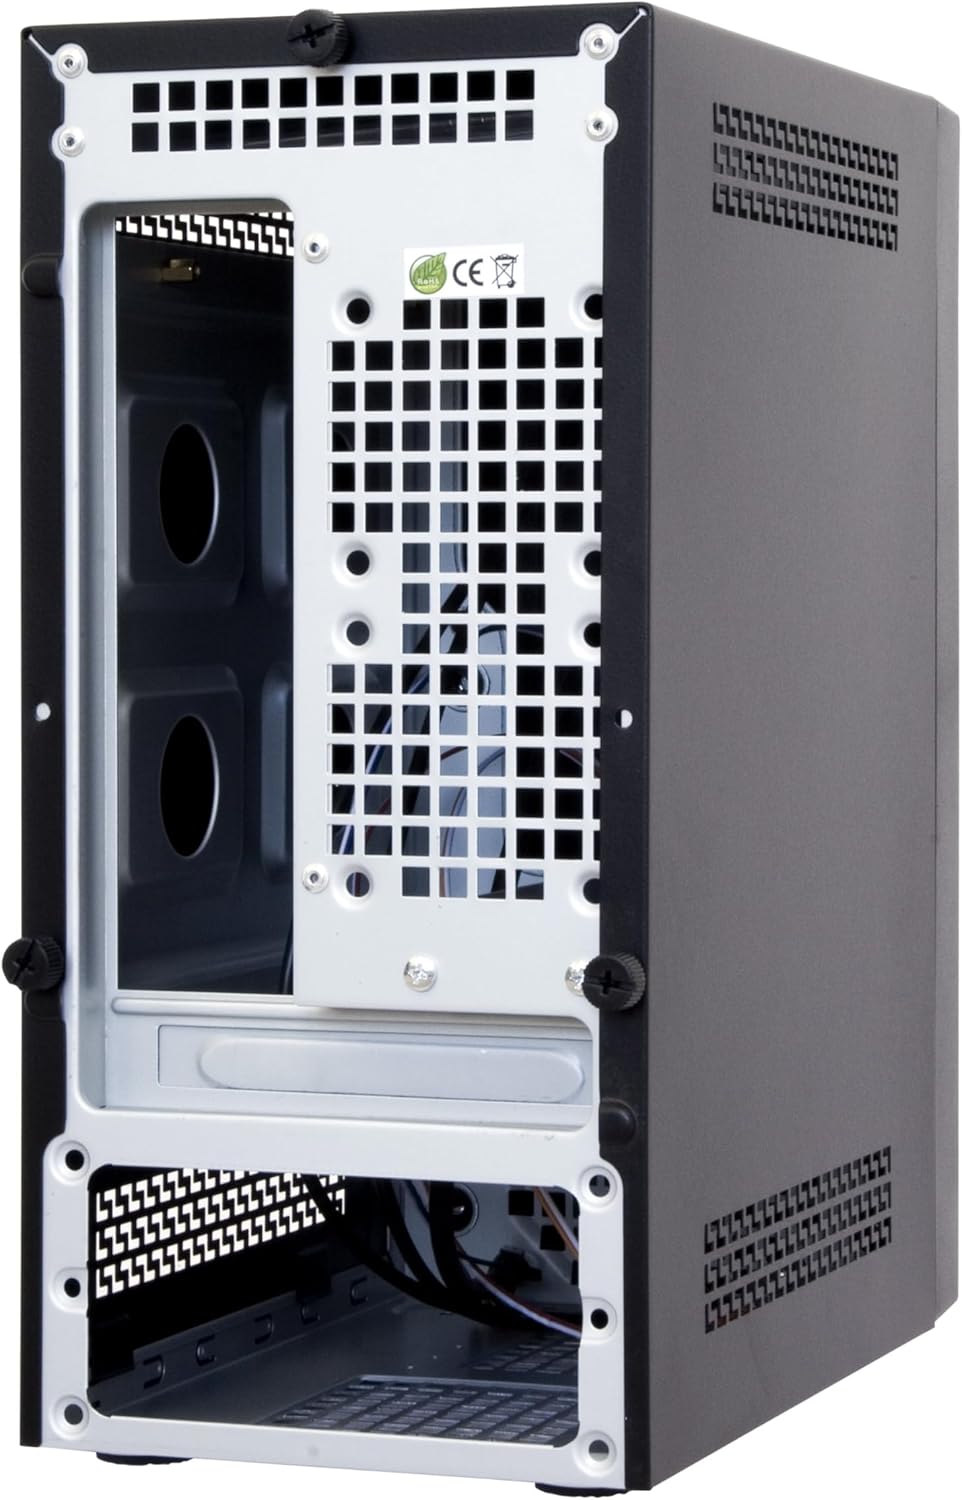
Figura 3.3: Rear and internal view of the Chieftec BT-02B-U3 PC Case. This image shows the internal structure, including the motherboard tray area, expansion slots, and the bottom-mounted power supply bay.
4. Configurazione e installazione
Follow these general steps for installing components into your Chieftec BT-02B-U3 PC case. Specific component installation instructions should be referenced from their respective manuals.
- Preparare il caso: Remove the side panel(s) by unscrewing the thumbscrews at the rear of the case.
- Installa la scheda madre: Secure your Mini-ITX motherboard onto the standoffs provided in the case. Ensure the I/O shield is properly seated.
- Installa unità di archiviazione: Mount your 2.5-inch or 3.5-inch storage drives into the designated bays.
- Install Optical Drive (Optional): If using, install a slim optical drive into the front bay.
- Collegare i cavi del pannello frontale: Connect the power switch, reset switch, USB ports (2x USB 2.0, 2x USB 3.0), and audio jacks to the corresponding headers on your motherboard.
- Collegare l'alimentazione: Connect the 24-pin ATX power connector, 4/8-pin CPU power connector, and SATA power connectors to your components. The case includes a pre-installed 250W SFX power supply.
- Gestione dei cavi: Disporre i cavi in modo ordinato per migliorare il flusso d'aria e l'estetica.
- Chiudi il caso: Reattach the side panel(s) and secure them with the thumbscrews.
5. Istruzioni per l'uso
- Accensione: Connect the power cable to the power supply and a wall outlet. Press the power button located on the front panel of the case.
- Spegni: Shut down your operating system normally. The system will power off automatically. Alternatively, press and hold the power button for 4 seconds to force a shutdown (not recommended for regular use).
- Collegamento di periferiche: Use the available USB ports (2x USB 2.0, 2x USB 3.0) on the front panel and the rear I/O panel of your motherboard to connect keyboards, mice, and other devices.
6. Manutenzione
- Pulizia: Regularly clean the exterior of the case with a soft, dry cloth. For dust accumulation inside, use compressed air to gently clear vents and components. Ensure the system is powered off and unplugged before cleaning.
- Ventilazione: Ensure that the case's ventilation openings are not obstructed to maintain optimal airflow and cooling performance.
7. Risoluzione Dei Problemi
Se riscontri problemi con la configurazione del tuo PC, prendi in considerazione i seguenti passaggi generali per la risoluzione dei problemi:
- Nessun potere:
- Check if the power cable is securely connected to both the power supply and the wall outlet.
- Ensure the power supply switch (if present) is in the 'ON' position.
- Verificare che il cavo dell'interruttore di alimentazione del pannello frontale sia collegato correttamente alla scheda madre.
- Nessuna visualizzazione:
- Ensure your monitor is connected to the correct video output port (either on the motherboard or a dedicated graphics card).
- Check that all internal power cables (24-pin ATX, CPU power) are firmly seated.
- Reseat RAM modules and any graphics cards.
- Rumore eccessivo:
- Identify the source of the noise (e.g., CPU fan, case fan, PSU fan).
- Assicurarsi che nessun cavo ostruisca le pale della ventola.
- Pulisci la polvere dalle ventole e dai dissipatori di calore.
8. Specifiche
| Caratteristica | Dettaglio |
|---|---|
| Marca | Capotecnico |
| Numero di modello | BT-02B-U3 |
| Tipo di caso | Mini-Tower (Mini-ITX) |
| Compatibilità della scheda madre | Mini-ITX |
| Alimentazione elettrica | Integrated 250W SFX Power Supply |
| Materiale | Acciaio legato |
| Colore | Nero |
| Dimensioni del prodotto (LxWxH) | 9.45 x 5.31 x 11.61 pollici (24 x 13.5 x 29.5 cm) |
| Peso dell'articolo | 7.22 libbre (3.28 kg) |
| Porte USB 2.0 | 2 |
| Porte USB 3.0 | 2 |
| Metodo di raffreddamento | Aria |
| Tipo di montaggio dell'alimentatore | Montaggio inferiore |
9. Garanzia e supporto
For warranty information or technical support, please refer to the official Chieftec webo contattare il rivenditore locale. Conservare la prova d'acquisto per eventuali reclami in garanzia.
For further assistance, you may visit the Chieftec official websito: www.chieftec.eu