Introduzione
Grazie per l'acquistoasing the Muse M-12 CR Radio Alarm Clock. This compact and versatile device combines an FM radio with a dual alarm clock, offering convenience and functionality for your daily routine. Featuring a clear red LED display and intuitive controls, the M-12 CR is designed for ease of use. Please read this manual carefully to ensure proper operation and to fully utilize all features of your new alarm clock.
Contenuto della confezione
Si prega di verificare che tutti gli articoli siano presenti e in buone condizioni:
- Muse M-12 CR Radio Alarm Clock Unit
- Adattatore di alimentazione
- Manuale dell'utente (questo documento)
Prodotto finitoview e controlli
Familiarize yourself with the various parts and controls of your Muse M-12 CR Radio Alarm Clock.

Figura 1: Davanti e in alto view of the Muse M-12 CR Radio Alarm Clock, highlighting the red LED display and the arrangement of control buttons.
Pulsanti di controllo (pannello superiore):
- Pulsante SNOOZE / DIMMER: Press to temporarily silence the alarm (snooze function). Press and hold to adjust display brightness.
- Pulsante ALLARME 1: Press to activate/deactivate Alarm 1. Press and hold to set Alarm 1 time.
- Pulsante ALLARME 2: Press to activate/deactivate Alarm 2. Press and hold to set Alarm 2 time.
- Pulsante IMPOSTAZIONE ORA: Press and hold to set the current time.
- Pulsante HR (Ora): Used to adjust the hour during time or alarm setting.
- Pulsante MIN (Minuti): Used to adjust the minute during time or alarm setting.
- VOL- / PREV Button: Decreases volume. In radio mode, short press for previous preset station, long press for backward auto-scan.
- VOL+ / NEXT Button: Increases volume. In radio mode, short press for next preset station, long press for forward auto-scan.
- FM / MEM Button: Press to switch to FM radio mode. Press and hold to automatically scan and store FM stations.
- Tasto SONNO: Attiva la funzione del timer di spegnimento.
- NAP Button: Activates the nap timer function.
Impostare
1. Collegamento elettrico
- Unpack the Muse M-12 CR unit and the power adapter.
- Insert the DC plug of the power adapter into the DC IN jack located at the back of the unit.
- Plug the power adapter into a standard AC wall outlet (100-240V, 50/60Hz). The display will light up, and the clock will be ready for time setting.
2. Batteria di backup (opzionale)
To maintain time and alarm settings during a power outage, you can install backup batteries (not supplied). The unit typically uses AAA batteries. Refer to the battery compartment on the bottom of the unit for correct battery type and polarity.
Istruzioni per l'uso
Impostazione dell'ora
- Premere e tenere premuto il tasto IMPOSTAZIONE DELL'ORA finché le cifre dell'ora non iniziano a lampeggiare.
- Premere il tasto HR ripetutamente il pulsante per regolare l'ora.
- Premere il tasto MINIMO ripetutamente il pulsante per regolare i minuti.
- Premere il tasto IMPOSTAZIONE DELL'ORA nuovamente il pulsante per confermare e uscire dalla modalità di impostazione dell'ora.
Impostazione degli allarmi (allarme 1 e allarme 2)
The M-12 CR features two independent alarms.
- Premere e tenere premuto il tasto ALLARME 1 or ALLARME 2 finché le cifre dell'ora della sveglia non lampeggiano.
- Premere il tasto HR pulsante per impostare l'ora desiderata per la sveglia.
- Premere il tasto MINIMO pulsante per impostare i minuti di sveglia desiderati.
- Premere il tasto ALLARME 1 or ALLARME 2 button again to select the alarm source (Radio or Buzzer). The corresponding indicator will light up.
- Premere il tasto ALLARME 1 or ALLARME 2 button one more time to confirm and activate the alarm. The alarm indicator (1 or 2) will appear on the display.
Per disattivare un allarme, premere il tasto corrispondente ALLARME 1 or ALLARME 2 button until its indicator disappears from the display.
Funzionamento radio (FM)
- Premere il tasto FM / MEM button to switch to FM radio mode. The frequency will be displayed.
- Scansione e archiviazione automatiche: Premere e tenere premuto il tasto FM / MEM button to automatically scan for and store available FM stations (up to 20 presets).
- Sintonizzazione manuale: Utilizzare il VOL- / PREV E VOL+ / NEXT buttons to manually tune to a specific frequency. Long press for auto-scan to the next strong station.
- Selezione dei preset: Premere brevemente il tasto VOL- / PREV or VOL+ / NEXT pulsanti per scorrere le stazioni preimpostate memorizzate.
- Regolazione del volume: Utilizzare il VOL- / PREV E VOL+ / NEXT buttons (when not in tuning mode) to adjust the radio volume.
Funzione snooze
Quando suona la sveglia, premere il tasto SNOOZE / DIMMER button to temporarily silence the alarm. The alarm will sound again after a few minutes (default snooze time is usually 9 minutes, refer to specific product behavior if different).
Funzione Sleep Timer
Grazie al timer di spegnimento automatico è possibile addormentarsi ascoltando la radio, che si spegnerà automaticamente dopo un periodo di tempo impostato.
- Mentre la radio è in riproduzione, premere il tasto SONNO button repeatedly to cycle through available sleep timer durations (e.g., 120, 90, 60, 30, 15, 10, 5 minutes, or OFF).
- La radio si spegnerà automaticamente dopo l'orario selezionato.
Funzione timer pisolino
The nap timer sets an alarm to sound after a short, predefined period.
- Premere il tasto PISOLINO button repeatedly to select a nap duration (e.g., 120, 90, 60, 30, 15, 10, 5 minutes, or OFF).
- La sveglia suonerà una volta trascorso il tempo di riposo selezionato.
Dimmer del display
Per regolare la luminosità del display LED:
- Premere il tasto SNOOZE / DIMMER button (when the alarm is not sounding) to cycle through different brightness levels (e.g., High, Medium, Low, Off).
Manutenzione
- Pulizia: Utilizzare un panno morbido e asciutto per pulire l'esterno dell'unità. Non utilizzare detergenti abrasivi, cere o solventi poiché potrebbero danneggiare la finitura.
- Posizionamento: Posizionare l'unità su una superficie stabile e piana, lontano dalla luce solare diretta, da fonti di calore e da polvere o umidità eccessive.
- Ventilazione: Assicurare un'adeguata ventilazione attorno all'unità per evitare il surriscaldamento. Non ostruire le aperture di ventilazione.
- Disconnessione dell'alimentazione: If the unit is not going to be used for a long period, unplug the power adapter from the wall outlet.
Risoluzione dei problemi
| Problema | Possibile causa | Soluzione |
|---|---|---|
| Nessuna alimentazione / Display spento | Power adapter not connected or faulty. Power outlet not active. | Assicurarsi che l'adattatore di alimentazione sia collegato saldamente all'unità e a una presa a muro funzionante. Provare una presa diversa. |
| L'allarme non suona | Alarm not activated. Alarm volume too low (for radio alarm). Incorrect alarm time set. | Ensure the alarm indicator (1 or 2) is visible on the display. Increase radio volume if using radio alarm. Verify alarm time is correctly set. |
| Scarsa ricezione radio | Antenna not extended or positioned correctly. Interference from other electronic devices. Weak signal in the area. | Fully extend and adjust the FM wire antenna for best reception. Move the unit away from other electronics. Try auto-scanning for stronger stations. |
| I pulsanti non rispondono | Problema temporaneo del sistema. | Unplug the unit from power for a few minutes, then plug it back in to reset. |
Specifiche
| Modello | M-12 CR |
| Tipo di visualizzazione | LED (rosso) |
| Dimensioni dello schermo | 1.5 cm (0.6 pollici) |
| Frequenza Radio | FM (with 20 preset stations) |
| Funzioni di allarme | Dual Alarm (Radio or Buzzer), Snooze, Sleep, Timer (Nap) |
| Fonte di alimentazione | Wired (AC Power Adapter) |
| Dimensioni (L x P x A) | 12.9 x 5.3 x 6.5 cm (circa) |
| Peso | 290 g (circa) |
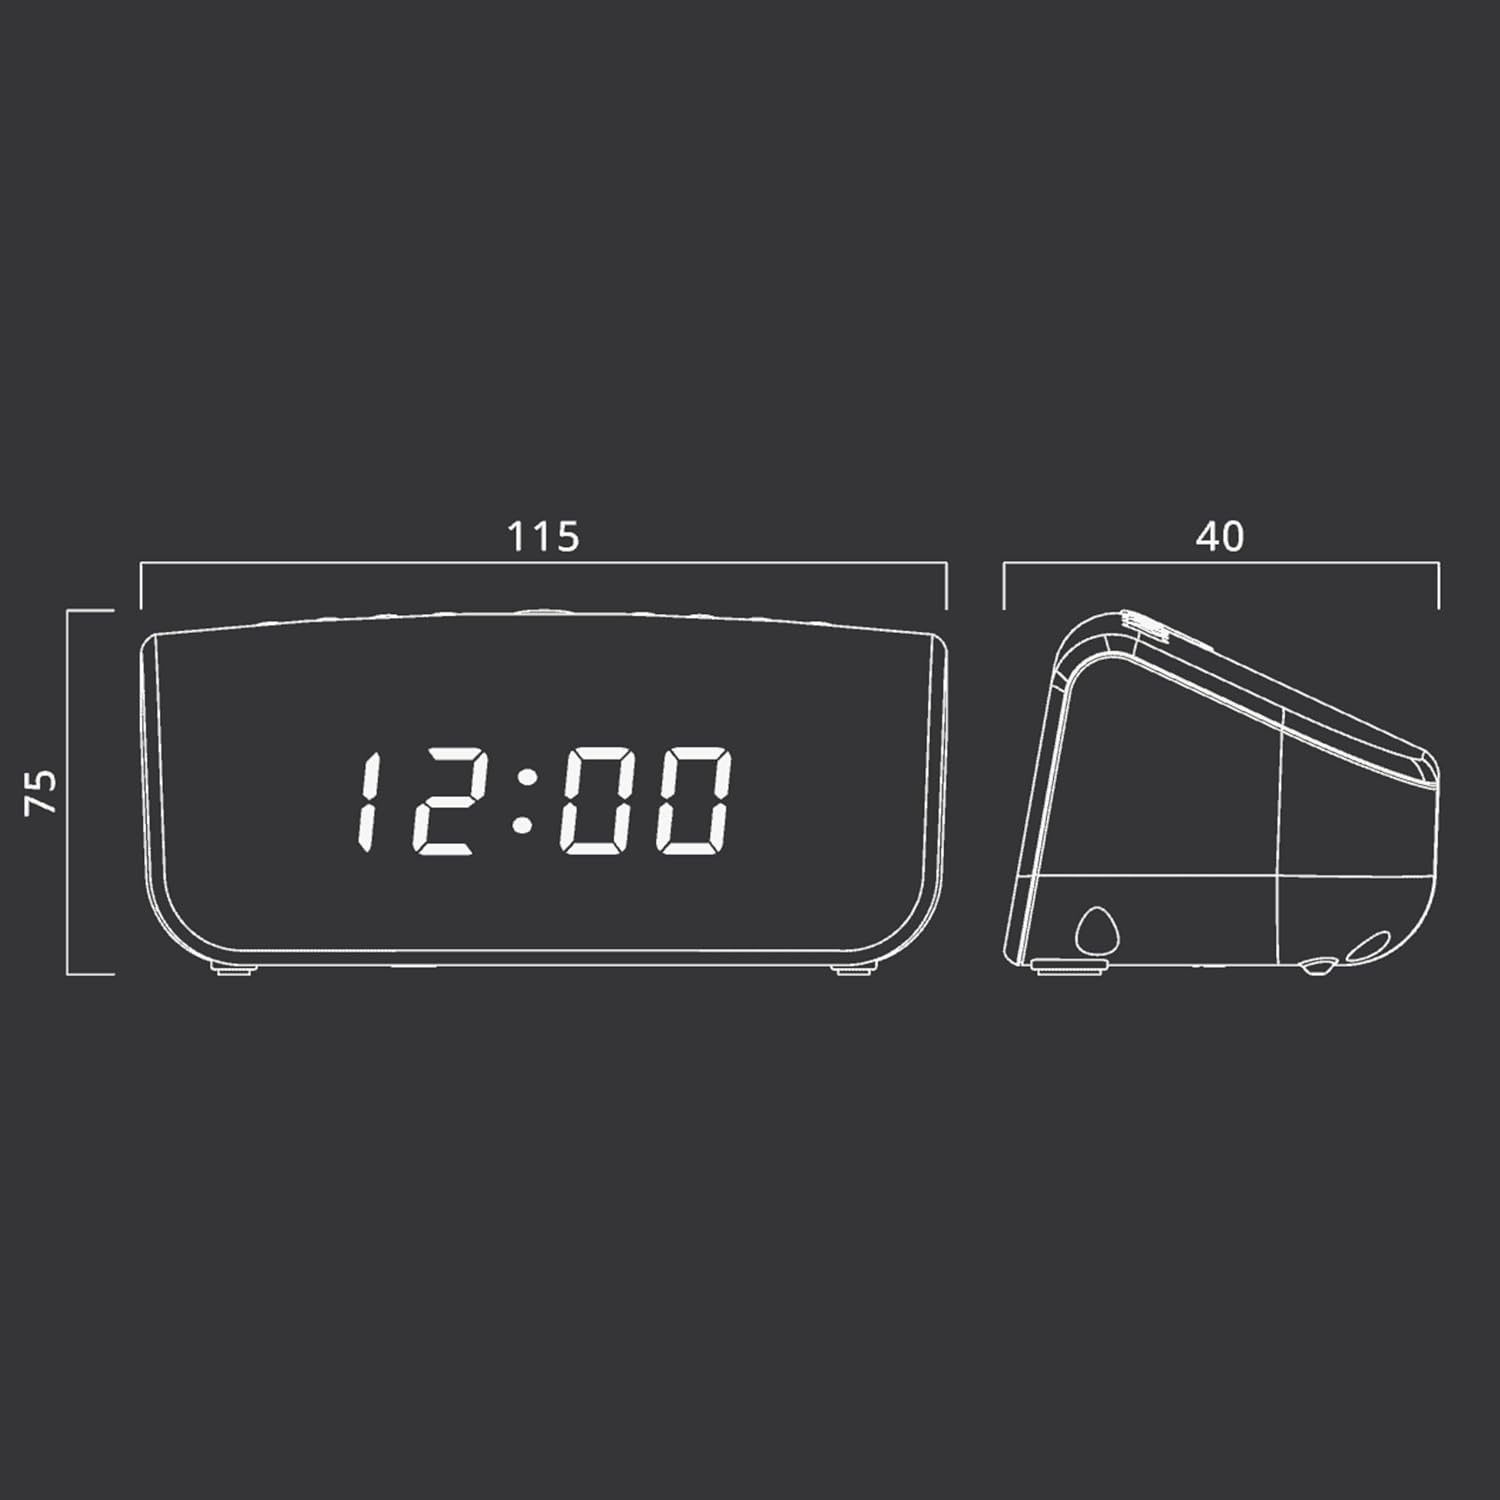
Figura 2: Approximate dimensions of the Muse M-12 CR unit.
Garanzia e supporto
For warranty information and technical support, please refer to the warranty card included with your product or visit the official Muse websito. Conservare la ricevuta d'acquisto come prova d'acquisto per eventuali reclami in garanzia.
For further assistance, please contact Muse customer service.