
Mintcraft JL-45891-3L
ProSource JL-45891-3L Digital Electronic Safe User Manual
Model: JL-45891-3L
Brand: Mintcraft
1. Introduzione
This manual provides detailed instructions for the safe and efficient operation, setup, and maintenance of your ProSource JL-45891-3L Digital Electronic Safe. Please read this manual thoroughly before using the product and retain it for future reference.
The ProSource JL-45891-3L Digital Electronic Safe is designed to provide secure storage for your valuables. It features a digital electronic keypad for access and is constructed from solid steel with a powder coating finish for durability.
2. Informazioni sulla sicurezza
AVVERTIMENTO:
- This safe is NOT fireproof. Do not store highly flammable materials inside.
- Keep emergency backup keys in a secure location away from the safe.
- Assicurarsi che la cassaforte sia montata saldamente per impedirne la rimozione non autorizzata.
- Do not attempt to force the safe open if the electronic lock malfunctions. Refer to the troubleshooting section or contact support.
- Tenere le batterie fuori dalla portata dei bambini.
3. Contenuto della confezione
Verifica che tutti gli articoli elencati di seguito siano inclusi nel tuo pacchetto:
- 1 x Digital Electronic Safe (Model: JL-45891-3L)
- 4 batterie AA
- 2 x Emergency Back-Up Keys
- 4 x Anchor Bolts
- 1 x Manuale utente (questo documento)
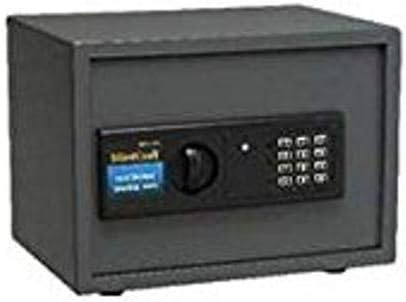
Figure 1: Mintcraft Digital Electronic Safe, showing the main unit with its electronic keypad and manual override knob.
4. Impostazione
4.1. Installazione della batteria
- Individuare il vano batterie all'interno dello sportello della cassaforte.
- Inserire 4 batterie AA, assicurandosi della corretta polarità (+/-).
- Chiudere il coperchio del vano batterie.
4.2. Impostazione del codice iniziale
- With the safe door open, press the red reset button located on the inside of the door near the hinge. A beep will sound, and the indicator light will flash.
- Inserisci il codice desiderato, composto da 3 a 8 cifre, sulla tastiera.
- Press the "E" or "#" button to confirm. The light will flash green, indicating the code is set.
- Prova il nuovo codice con la porta aperta prima di chiuderla.
4.3. Montaggio della cassaforte
The safe can be mounted to a wall or floor using the provided anchor bolts. Choose a secure, discreet location.
- Mark the desired drilling points through the pre-drilled holes on the back or bottom of the safe.
- Drill pilot holes in the wall or floor using an appropriate drill bit.
- Align the safe with the drilled holes and secure it using the anchor bolts.
- Assicurarsi che la cassaforte sia fissata saldamente e che non possa essere rimossa facilmente.
5. Istruzioni per l'uso
5.1. Opening the Safe with Digital Code
- Inserisci il tuo codice personale da 3 a 8 cifre sulla tastiera.
- Premere il tasto "E" o "#".
- If the code is correct, the green light will illuminate. Within 5 seconds, turn the knob clockwise to open the door.
- If the code is incorrect, the yellow light will flash, and a beep will sound.
5.2. Apertura della cassaforte con chiave di emergenza
In caso di guasto della batteria o di codice dimenticato, la cassaforte può essere aperta utilizzando la chiave di emergenza.
- Locate the keyhole cover, usually hidden behind the keypad or a removable panel.
- Togliere il coperchio.
- Inserire la chiave di emergenza e ruotarla in senso antiorario, ruotando contemporaneamente la manopola in senso orario per aprire la porta.
- Once opened, replace the keyhole cover.
5.3. Chiusura e blocco della cassaforte
Per bloccare la cassaforte, basta chiudere lo sportello e ruotare la manopola in senso antiorario. La cassaforte si bloccherà automaticamente.
6. Manutenzione
- Sostituzione della batteria: Replace batteries annually or when the low battery indicator light (if present) illuminates. Always use 4 new AA batteries.
- Pulizia: Pulisci l'esterno della cassaforte con un panno morbido eamp panno. Non usare detergenti abrasivi o solventi.
- Cura della tastiera: Avoid pressing the keypad buttons with excessive force. Keep the keypad dry and free from dust.
- Lubrificazione: Periodically apply a small amount of lubricant to the door hinges and locking mechanism to ensure smooth operation.
7. Risoluzione Dei Problemi
| Problema | Possibile causa | Soluzione |
|---|---|---|
| La cassaforte non si apre con il codice. | Codice inserito non corretto; Batterie scariche o scariche; Malfunzionamento della tastiera. | Re-enter code carefully. Replace batteries. Use emergency key to open, then reset code. |
| La tastiera non risponde. | Batterie scariche; collegamento della batteria allentato. | Sostituire le batterie. Assicurarsi che le batterie siano inserite correttamente. |
| La porta non si chiude o non si blocca correttamente. | Obstruction in door frame; Locking bolts misaligned. | Check for obstructions. Gently push the door inward while turning the knob. |
| La chiave di emergenza non funziona. | Key not fully inserted; Internal mechanism jammed. | Ensure key is fully inserted and turned correctly. Do not force. Contact support if issue persists. |
8. Specifiche
| Caratteristica | Dettaglio |
|---|---|
| Numero di modello | JL-45891-3L |
| Dimensioni esterne (A x L x P) | 9-7/8 in x 13-3/4 in x 9-7/8 in (25.08 cm x 34.93 cm x 25.08 cm) |
| Dimensioni del prodotto (L x P x A) | 12.25 x 12.5 x 15.88 pollici (31.12 x 31.75 x 40.34 cm) |
| Peso | 30.8 libbre (13.97 kg) |
| Tipo di blocco | Digital Electronic with Emergency Key |
| Lunghezza del codice | Da 3 a 8 cifre |
| Materiale | Solid Steel with Powder Coating Finish |
| Fonte di alimentazione | 4 batterie AA (incluse) |
| Tipo di montaggio | Montaggio a parete |
| Ignifugo | NO |
| Livello di resistenza all'acqua | Non resistente all'acqua |
9. Informazioni sulla garanzia
Please refer to the product packaging or contact the manufacturer directly for specific warranty details. Typically, products are covered against defects in materials and workmanship for a limited period from the date of purchase.
10. Assistenza clienti
For technical assistance, replacement parts, or any questions regarding your Mintcraft Digital Electronic Safe, please contact your retailer or the manufacturer directly.
Note: Specific contact information may be found on the product packaging or the manufacturer's official websito.
Ask a question about this manual
Ask about setup, troubleshooting, compatibility, parts, safety, or missing instructions. Manuals+ will review the question and use this page’s manual context to help answer it.