
1. Introduzione
This manual provides comprehensive instructions for the installation, operation, and maintenance of your LUX Pro PSD010B Mechanical Non-Programmable Thermostat. This thermostat is designed for use with 1 Heat Only systems, including fireplaces, stoves, and in-floor radiant heating. It does not require a fan switch and is battery-powered for reliable operation.

Immagine 1.1: Davanti view of the LUX Pro PSD010B Thermostat, displaying a temperature of 72 degrees Fahrenheit on its digital screen, along with up and down arrow buttons for temperature adjustment.
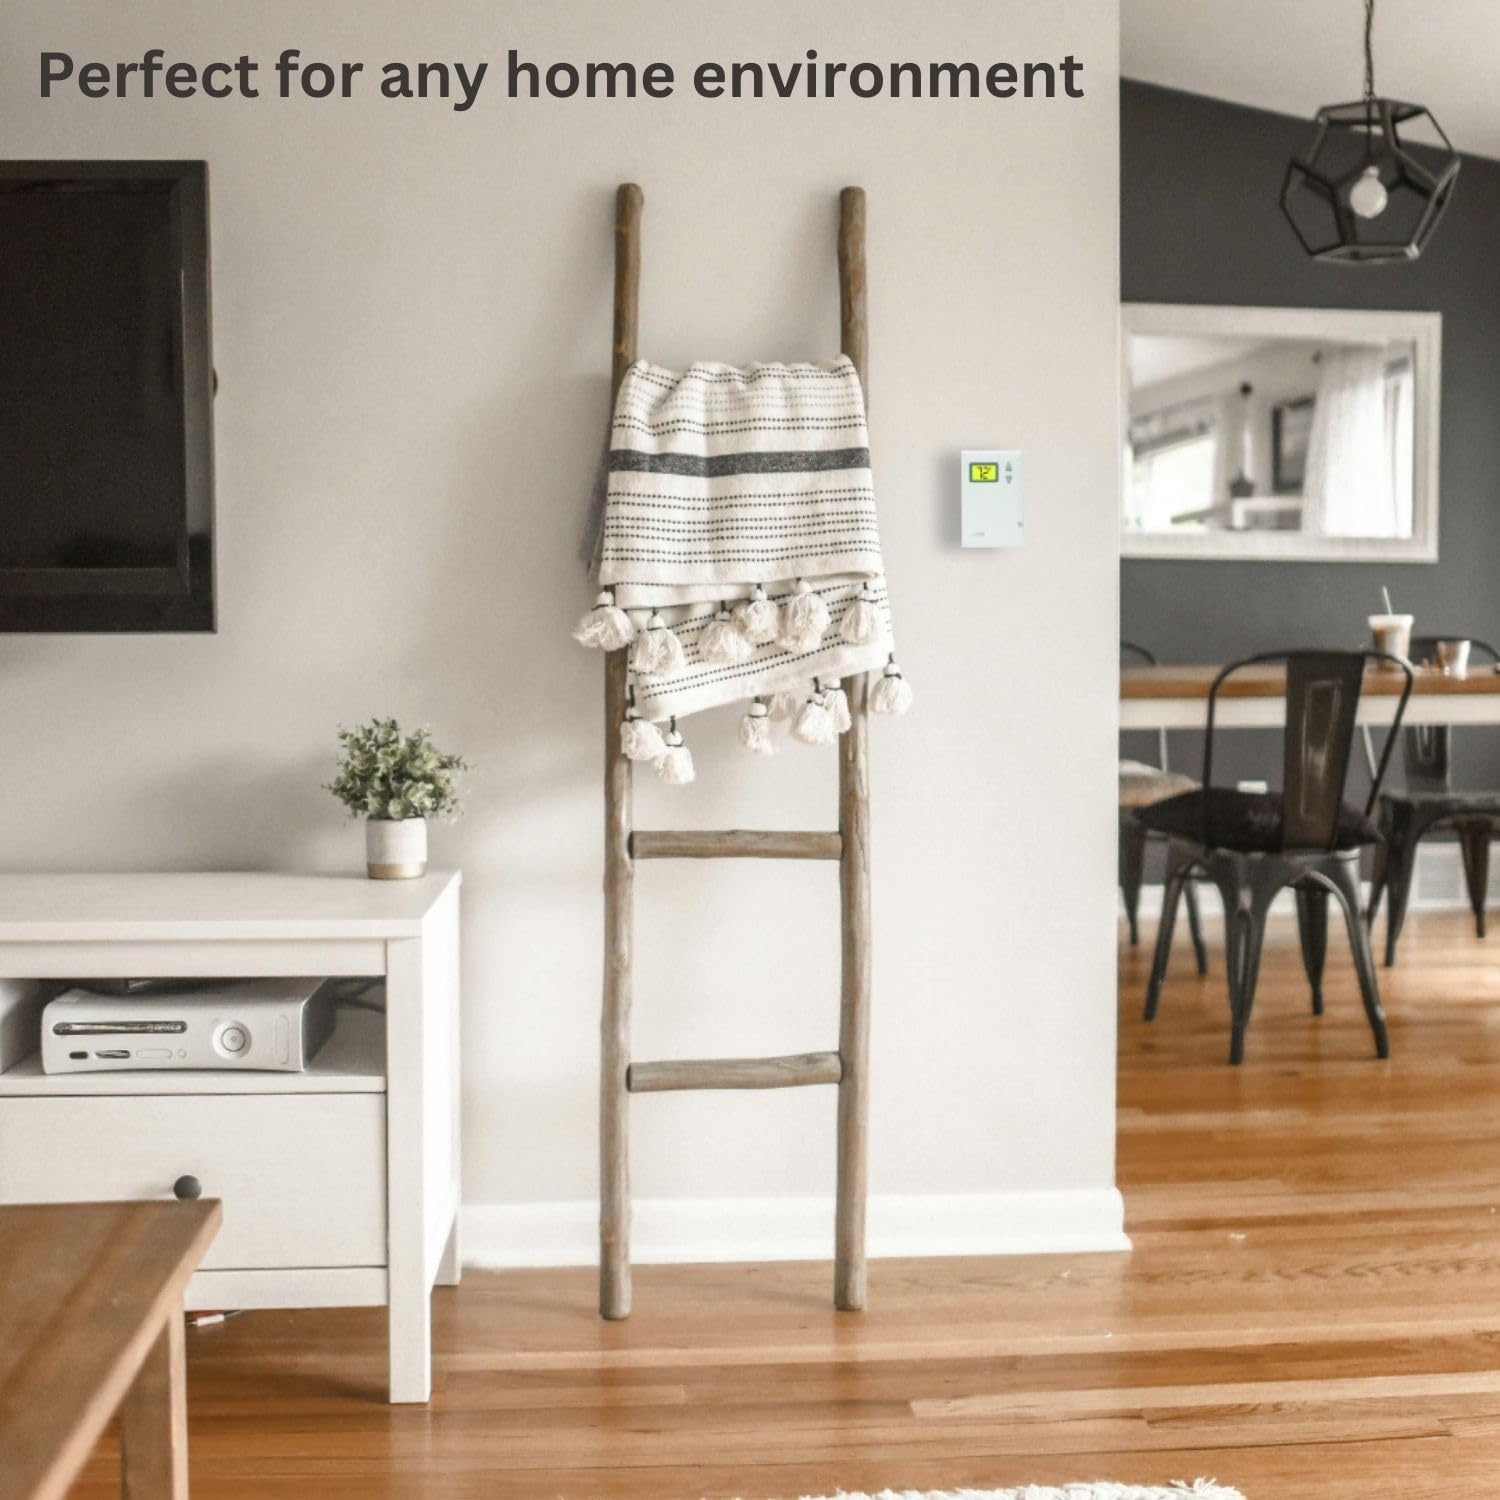
Immagine 1.2: The LUX Pro PSD010B Thermostat mounted on a wall in a contemporary living room, demonstrating its discreet integration into a home environment.
2. Informazioni sulla sicurezza
- Prima di installare o effettuare la manutenzione del termostato, disattivare sempre l'alimentazione dell'impianto di riscaldamento tramite il fusibile principale o il pannello dell'interruttore automatico.
- Questo termostato è progettato per bassi volumitage (24V) heating systems or millivolt systems. Do not use with line voltagsistemi e (120V/240V).
- Assicurarsi che tutti i collegamenti elettrici siano sicuri e conformi alle normative elettriche locali.
- Smaltire le batterie secondo le normative locali. Non incenerire le batterie.
3. Contenuto della confezione
Verifica che il pacco contenga i seguenti articoli:

Immagine 3.1: Visual representation of the items included in the product box: the PSD010B thermostat, two AA LR6 batteries, two ST screws, two wall anchors, and wire labels.
- LUX Pro PSD010B Thermostat
- 2 batterie AA LR6
- 2 Mounting Screws (ST screws)
- 2 ancoraggi a muro
- Etichette a filo
- Manuale di istruzioni (questo documento)
4. Installazione
4.1 Lista di controllo pre-installazione
- Ensure your heating system is compatible (see Section 6: System Compatibility).
- Gather necessary tools: Phillips screwdriver, wire strippers (if needed), drill (if installing wall anchors).
- Turn off power to your heating system at the circuit breaker or fuse box.
4.2 Rimozione del vecchio termostato
- Turn off the power to your heating system.
- Rimuovi il coperchio del tuo vecchio termostato.
- Note the wire connections. This thermostat is designed for 2-wire heat-only systems. Label the wires (e.g., R and W) using the provided wire labels.
- Scollegare i fili e rimuovere la vecchia base del termostato dalla parete.
4.3 Montaggio del nuovo termostato
- Separate the front cover from the thermostat base.
- Position the thermostat base on the wall where the old thermostat was located. Ensure it is level.
- Mark the mounting holes. If new holes are required, drill pilot holes and insert wall anchors if mounting into drywall.
- Fissare la base del termostato alla parete utilizzando le viti fornite.
4.4 Cablaggio
The PSD010B is compatible with 2-wire heat-only systems. Connect the wires from your heating system to the terminals on the thermostat base. Typically, these are R (power) and W (heat call) wires. Ensure connections are tight.
4.5 Installazione della batteria
- Insert the two AA batteries into the battery compartment on the back of the thermostat, observing the correct polarity (+/-).
- Fissare il coperchio anteriore alla base del termostato.
- Restore power to your heating system at the main fuse or circuit breaker panel.
5. Funzionamento
5.1 Display e controlliview
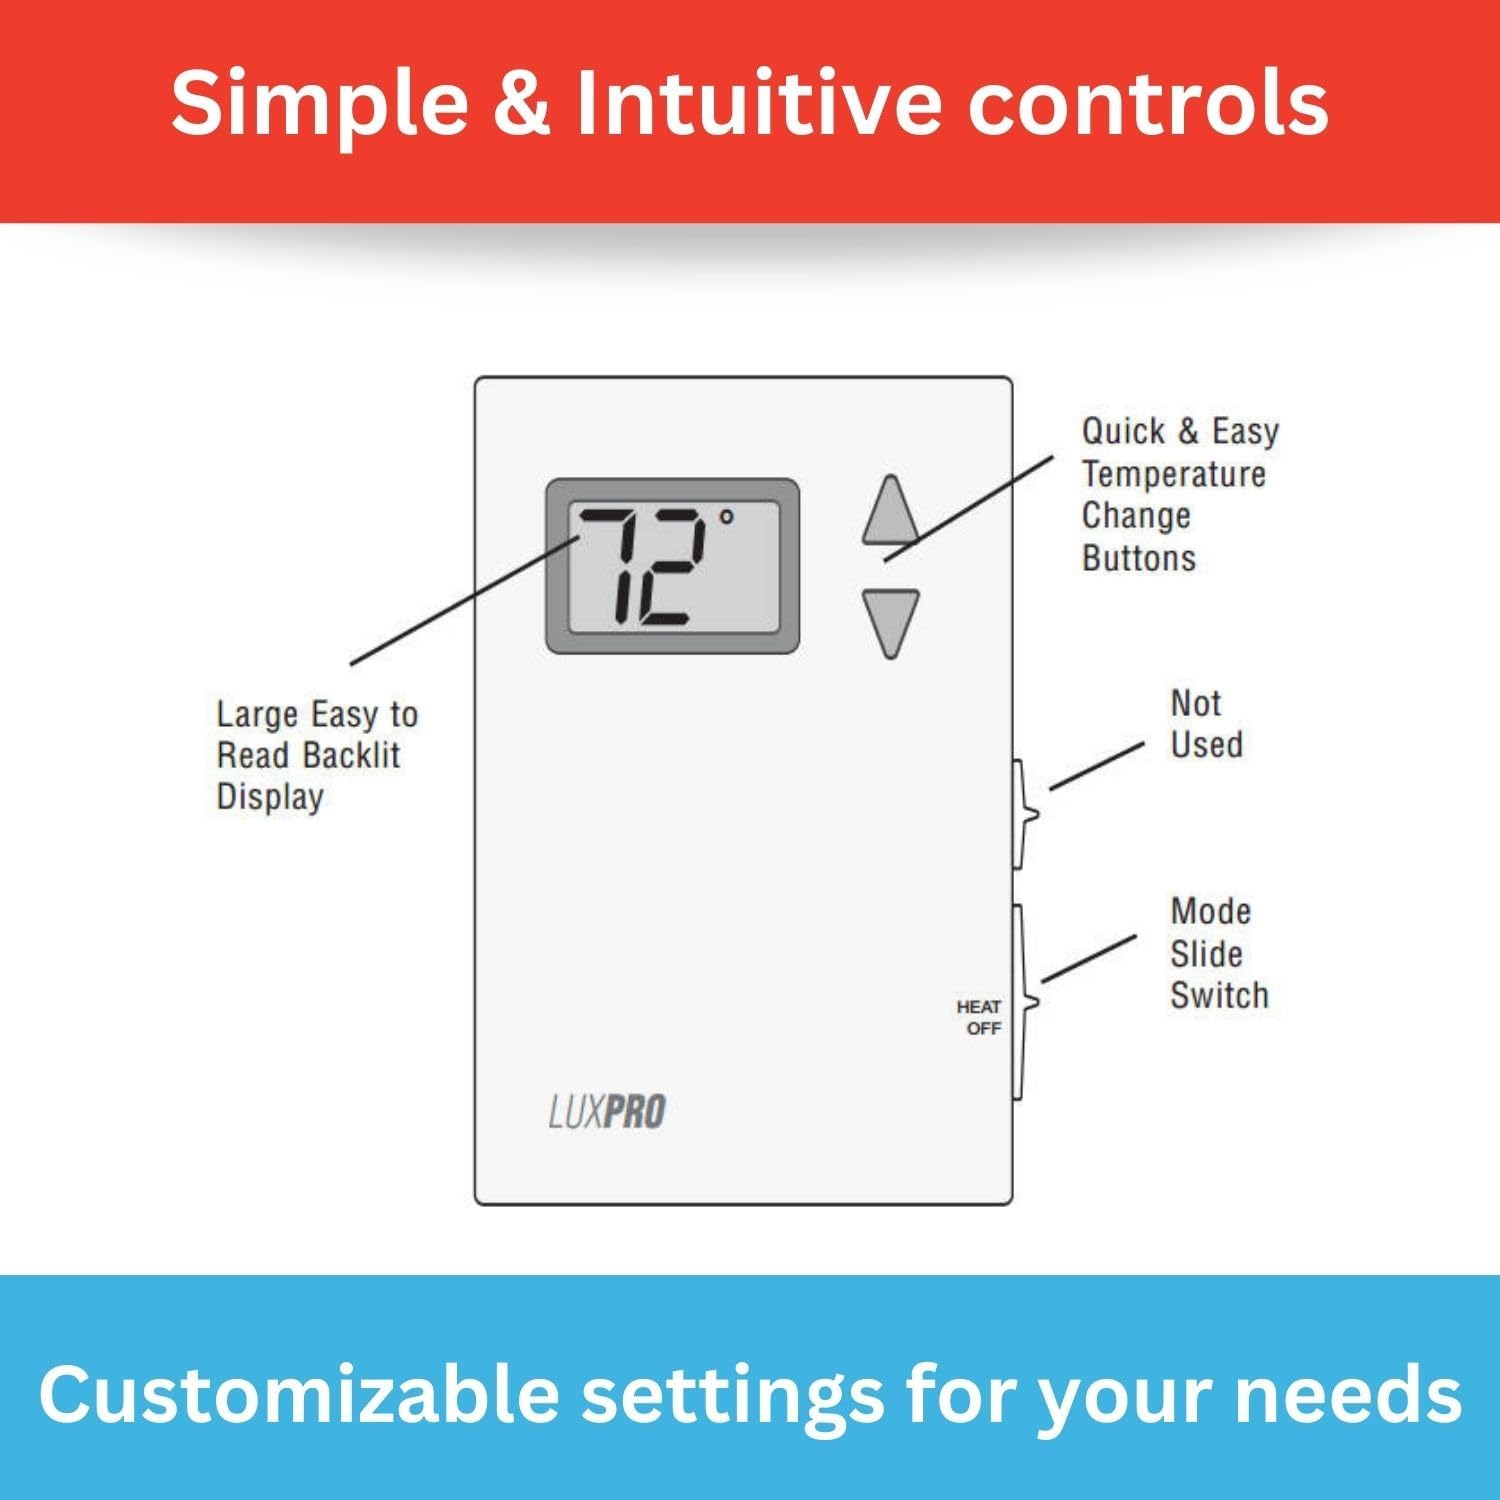
Immagine 5.1: Diagram illustrating the controls of the LUX Pro PSD010B Thermostat, highlighting the large backlit display, quick and easy temperature change buttons (up/down arrows), and the Heat/Off mode slide switch on the side.
- Display digitale: Shows the current room temperature and the set temperature. It is backlit for easy reading.
- Pulsanti su/giù: Utilizzato per regolare l'impostazione della temperatura desiderata.
- Interruttore a scorrimento della modalità: Located on the side of the thermostat. Select 'HEAT' for heating operation or 'OFF' to turn the system off.
5.2 Impostazione della temperatura
Per regolare la temperatura desiderata, utilizzare il Up or Giù arrow buttons. The display will show the set temperature as you adjust it, then revert to showing the current room temperature after a few seconds. The thermostat will automatically activate your heating system when the room temperature falls below your set temperature.
5.3 Selezione della modalità
Use the slide switch on the side of the thermostat to select the operating mode:
- CALORE: Il termostato controllerà il tuo impianto di riscaldamento per mantenere la temperatura impostata.
- OFF: The heating system will remain off.
5.4 Selezione Fahrenheit/Celsius
The thermostat allows selection between Fahrenheit and Celsius temperature display. Refer to the detailed specifications or the full manual for instructions on how to switch this setting, typically involving a button combination or a switch on the circuit board.
5.5 Adjustable Temperature Limits
The thermostat features adjustable temperature limits, allowing you to set a minimum and maximum temperature range. This prevents the temperature from being set too high or too low. Consult the full manual for instructions on how to configure these limits.
6. Compatibilità del sistema
The LUX Pro PSD010B thermostat is designed for specific heating systems. Please review the compatibility information below before installation.

Immagine 6.1: A chart detailing the system compatibility of the LUX Pro PSD010B Thermostat. It is compatible with 2-wire Hydronic (Hot Water), 750 Millivolt, and Gas Fireplaces (24V). It is not compatible with Heat Pump Multistage, Radiant Ceiling Heat, Electric Baseboards, Heat Pump w/ Auxiliary Heat, Portable space heaters, 3-wire Hydronic (Hot Water), Gas/Oil/Electric Furnace - Multistage, Cool Multistage, Cooling only, Plug-in air conditioners, Heat Pump w/o Auxiliary Heat, Gas/Oil/Electric Furnace - Heating only, and Gas/Oil/Electric Furnace - Single Stage.
Compatible Systems (Heat Only - 24V or Millivolt)
- 2-wire Hydronic (Hot Water) systems
- 750 Millivolt systems (e.g., gas fireplaces, floor furnaces)
- Caminetti a gas (24V)
Non compatibile con
- Pompe di calore multipletage sistemi
- Riscaldamento radiante a soffitto
- Battiscopa elettrici
- Pompa di calore con riscaldamento ausiliario
- Riscaldatori portatili
- 3-wire Hydronic (Hot Water) systems
- Forno a gas/olio/elettrico - Multistage
- Multi-Fantasticitage sistemi
- Sistemi di solo raffreddamento
- Condizionatori d'aria plug-in
- Pompa di calore senza calore ausiliario
- Gas/Oil/Electric Furnace - Heating only (if it requires a fan control)
- Forno a gas/olio/elettrico - Singolo Stage (if it requires a fan control)
7. Manutenzione
7.1 Sostituzione della batteria
The thermostat is powered by two AA batteries. When the battery power is low, a low battery indicator will appear on the display. Replace batteries annually or when the low battery indicator appears to ensure continuous operation.
- Gently pull the bottom of the thermostat cover forward to release it from the base.
- Rimuovere le vecchie batterie AA.
- Inserire due nuove batterie alcaline AA, assicurandosi della corretta polarità.
- Snap the cover back onto the thermostat base.
7.2 Pulizia
Pulisci l'esterno del termostato con un panno morbido eamp panno. Non utilizzare detergenti abrasivi o solventi. Evitare di spruzzare liquidi direttamente sul termostato.
8. Risoluzione Dei Problemi
| Problema | Possibile causa | Soluzione |
|---|---|---|
| Nessun display o schermo vuoto | Batterie scariche o installate in modo errato | Sostituire le batterie con nuove batterie alcaline AA, assicurandosi della corretta polarità. |
| Il sistema di riscaldamento non si accende |
|
|
| Lettura della temperatura imprecisa | Thermostat located near heat source/draft, or internal sensor issue. | Assicurarsi che il termostato non sia esposto alla luce solare diretta, a correnti d'aria o a fonti di calore. Se il problema persiste, contattare l'assistenza. |
9. Specifiche

Immagine 9.1: A detailed list of features for the LUX Pro PSD010B Thermostat, including digital, non-programmable operation, battery power, temperature range of 40°F to 90°F, clean design, large backlit display, easy installation, F/C selectable display, 5-minute minimum run/off time, and adjustable temperature stop.
- Modello: PSD010B
- Tipo: Mechanical, Non-Programmable
- Compatibilità del sistema: 1 Heat Only (2-wire Hydronic, 750 Millivolt, 24V Gas Fireplaces)
- Fonte di energia: 2 batterie AA (incluse)
- Intervallo di temperatura: da 40°F a 90°F (da 4°C a 32°C)
- Tipo di visualizzazione: Digitale, LCD retroilluminato
- Tipo di controllo: Button Control (Up/Down arrows), Slide Switch (Heat/Off)
- Dimensioni: 1.13"P x 5"L x 3.5"A
- Peso dell'articolo: 0.4 libbre (6.4 once)
- Voltage: 24 Volts (compatible with millivolt systems)
- Materiale: Plastica
- Tipo di montaggio: Montaggio a parete
- Codice UPC: 021079070107
10. Garanzia e supporto
The LUX Pro PSD010B Thermostat comes with a Garanzia limitata di 5 anni, ensuring reliable performance and peace of mind. For warranty claims, technical assistance, or further inquiries, please refer to the contact information provided with your product packaging or visit the official LUX websito.

Immagine 10.1: The LUX Pro PSD010B Thermostat displayed with icons highlighting its key features: a backlit display, adjustable temperature limits, battery-only power, and a 5-year limited warranty.