
Introduzione
The Westek TMSW15MI is a hardwire indoor in-wall mechanical countdown timer designed to automatically turn off lights and motors after a selected time, up to 15 minutes. This device replaces a standard single-pole, single-throw wall switch, providing convenient timed control for various electrical loads.
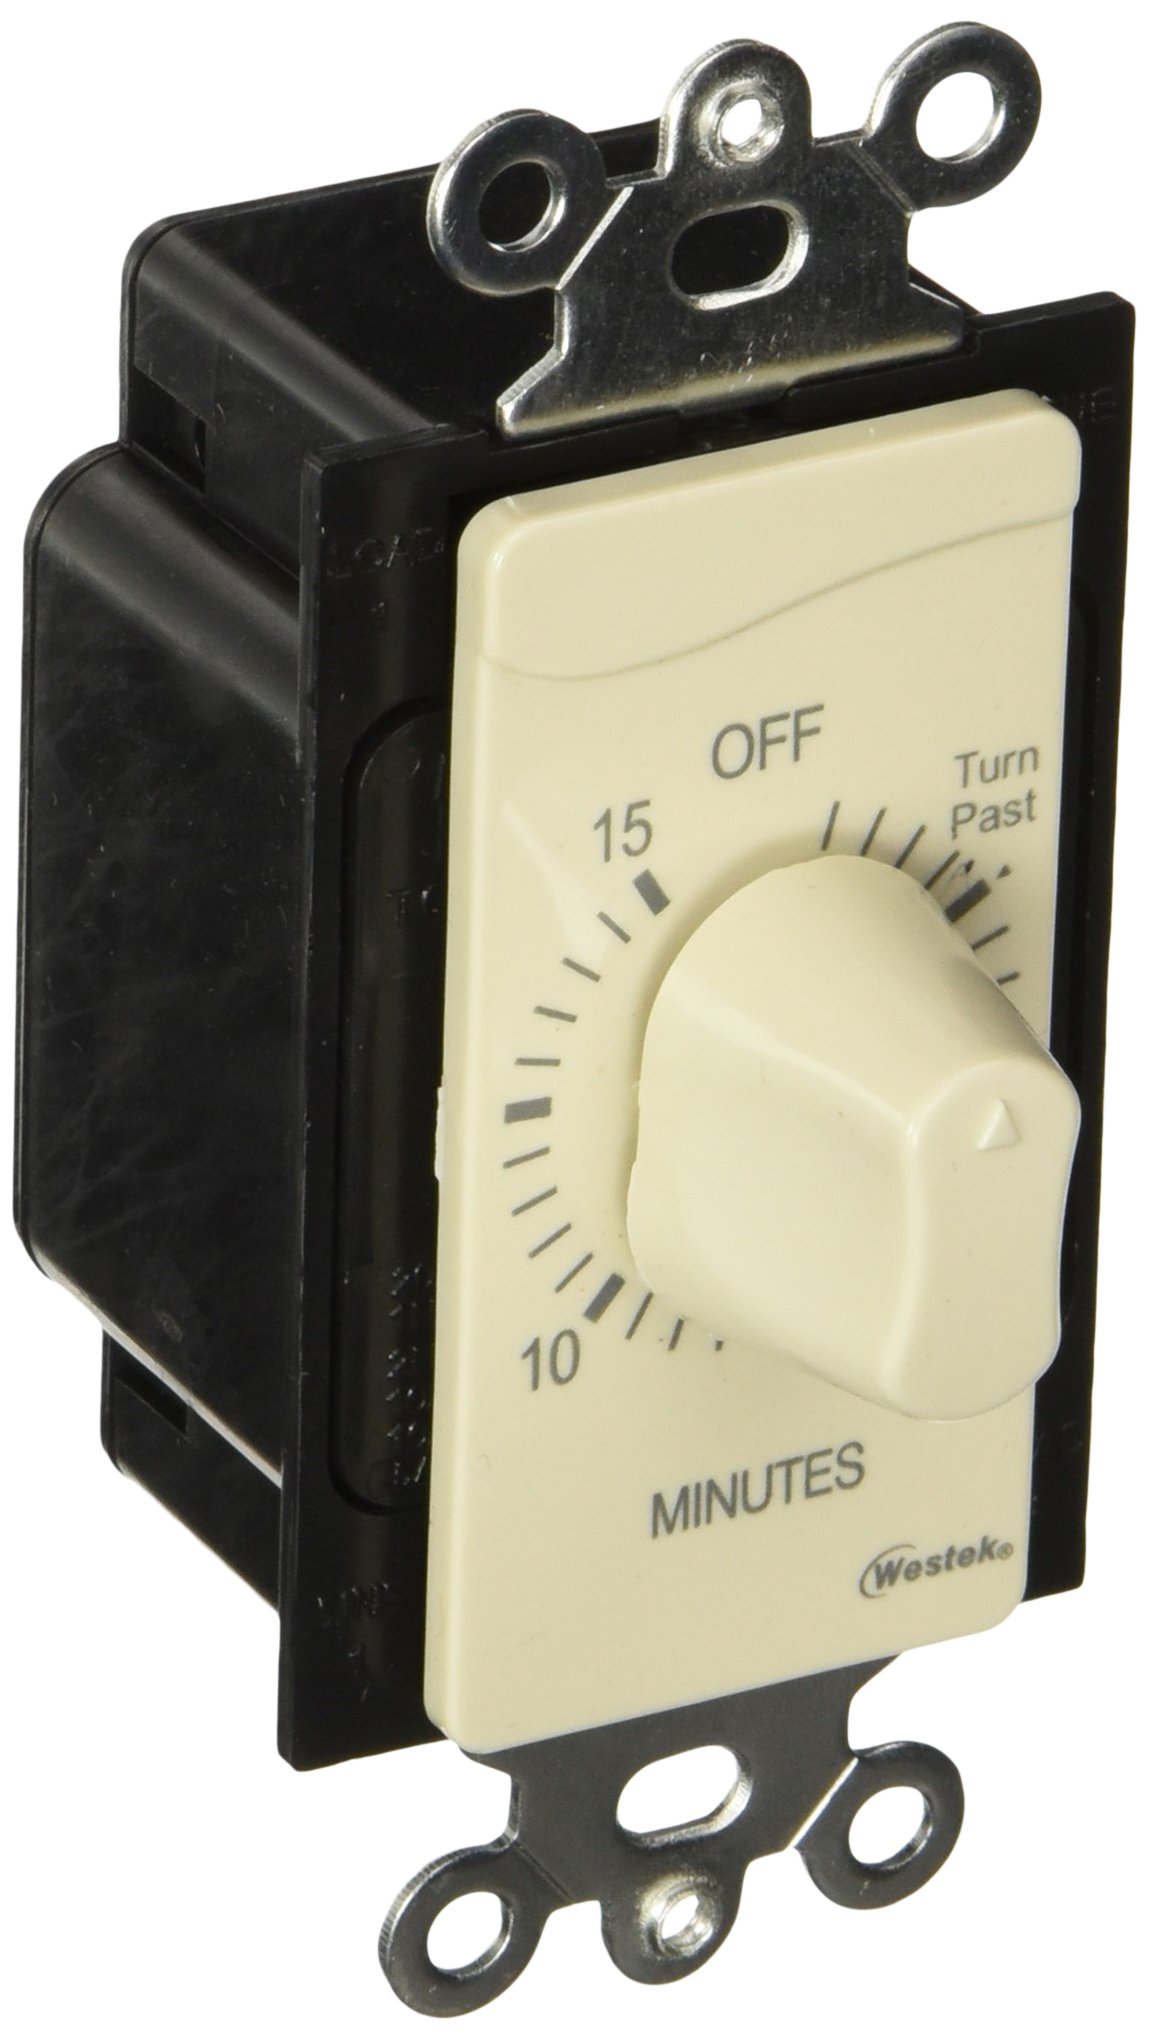
Immagine: Frontale view of the Westek TMSW15MI In-Wall Mechanical Countdown Timer, showing the ivory finish and the twist knob for setting the countdown time.
Informazioni sulla sicurezza
WARNING: RISK OF ELECTRIC SHOCK. Improper installation can result in serious injury or death. Always consult a qualified electrician if you are unsure about any part of the installation process.
- SPEGNERE L'ALIMENTAZIONE at the circuit breaker or fuse box before installing or servicing the timer.
- Verify that power is off before proceeding with installation.
- This timer is for solo per uso interno.
- Non superare i valori elettrici massimi del dispositivo.
- Assicurarsi che tutti i collegamenti dei cavi siano sicuri e adeguatamente isolati.
- This device must be installed in accordance with all national and local electrical codes.
Contenuto della confezione
- 1 x Westek TMSW15MI In-Wall Mechanical Countdown Timer
- Viti di montaggio
- Wire Nuts (typically included, but may vary)
- Foglio di istruzioni
Specifiche
| Modello | TMSW15MI |
| Modalità di funzionamento | Automatico |
| Tipo di interruttore | Mechanical Countdown (Push Button Actuator) |
| Conto alla rovescia | Fino a 15 minuti |
| Tipo di circuito | Single-pole / Single-throw (1-way) |
| Tipo di montaggio | Wall Mount (replaces single gang switch) |
| Tipo di connettore | Morsetti a vite |
| Materiale | Metallo (componenti interni), Plastica (alloggiamento) |
| Colore | Avorio |
| Dimensioni (L x P x A) | 6.2 x 2.9 x 2.1 pollici |
| Valutazioni elettriche | 1 HP 125 VAC, 2HP 250 VAC, 20 Amp 125 V CA, 10 Amp 277 V CA, 5 Amp 125 VAC Tungsten |
| Valutazione internazionale di protezione | Grado di protezione IP00 |
Installazione
Replacing an Existing Wall Switch
- Spegnere l'alimentazione: Locate the circuit breaker or fuse that controls the switch you are replacing and turn it OFF. Verify the power is off by attempting to operate the switch or using a voltagetester.
- Remove wall plate: Unscrew and remove the existing wall plate.
- Rimuovere il vecchio interruttore: Unscrew the old switch from the electrical box and carefully pull it out.
- Scollegare i fili: Note the wiring configuration of the old switch. Typically, there will be two load/line wires connected to the switch and a ground wire. Disconnect these wires.
- Connect new timer: The Westek TMSW15MI timer has screw terminals. Connect the two load/line wires from the electrical box to the two terminals on the timer. If a ground wire is present in the box, connect it to the green ground screw on the timer (if available) or to the box's ground. Ensure all connections are tight and secure.
- Mount timer: Carefully push the wired timer back into the electrical box. Secure it with the provided mounting screws.
- Install wall plate: Fissare la piastra a muro nuova o esistente sopra il timer.
- Ripristinare l'alimentazione: Riattivare l'alimentazione tramite l'interruttore automatico o la scatola dei fusibili.
Importante: This timer is designed for single-pole applications only. Do not attempt to install it in a 3-way or 4-way switch configuration unless you are certain of the wiring and have consulted a qualified electrician.
Istruzioni per l'uso
The Westek TMSW15MI mechanical countdown timer is simple to operate:
- Per attivare il timer: Rotate the knob clockwise to the desired countdown time (up to 15 minutes).
- The connected device (light, motor, etc.) will turn ON immediately.
- Il timer inizierà il conto alla rovescia.
- Once the set time has elapsed, the timer will automatically turn OFF the connected device by breaking the electrical circuit.
- To turn the device ON again, simply rotate the knob to the desired time.
Manutenzione
- Pulizia: To clean the timer, wipe the surface with a soft, damp panno. Non utilizzare detergenti abrasivi o solventi. Assicurarsi che l'alimentazione sia spenta prima di pulire.
- No user-serviceable parts: The internal mechanism of the timer contains no user-serviceable parts. Do not attempt to open or repair the unit.
Risoluzione dei problemi
- Timer does not turn ON:
- Controllare se l'interruttore automatico è acceso.
- Assicurarsi che tutti i collegamenti dei cavi siano sicuri.
- Verify the load is within the timer's electrical ratings.
- Timer does not turn OFF:
- Ensure the knob is set to a specific time and not stuck.
- The internal mechanism may be faulty. If so, the unit may need replacement.
- Timer makes a ticking sound:
- This is normal for mechanical timers as the internal gears operate.
Garanzia
Questo prodotto Westek è coperto da una Garanzia limitata di 1 anni from the date of purchase. This warranty covers defects in materials and workmanship under normal use. It does not cover damage resulting from misuse, abuse, improper installation, or unauthorized repairs. For warranty service, please retain your proof of purchase and contact Westek customer support.
Assistenza clienti
For further assistance, technical support, or warranty inquiries, please visit the official Westek website or contact their customer service department. Refer to the packaging or the Westek websito per le informazioni di contatto più aggiornate.
Westek Ufficiale Websito: Visita il negozio Westek su Amazon