
1. Introduzione
Thank you for choosing the STEINEL Master Check 3 Voltage Tester. This device is engineered for professional use, offering a robust, versatile, and practical solution for electrical testing. It is specifically designed for working on electrical installations and for safely verifying the presence of live circuits. The Master Check 3 accurately tests both AC (Alternating Current) and DC (Direct Current) voltage, with clear indication provided by integrated LEDs.
2. Istruzioni di sicurezza
To ensure safe operation and prevent personal injury or damage to the device, please read and adhere to the following safety guidelines:
- Always assume that electrical circuits are live until proven otherwise.
- Non utilizzare il dispositivo se appare danneggiato o non funziona correttamente.
- Ensure your hands are dry and you are standing on an insulated surface when testing.
- Non tentare mai di misurare il volumetages exceeding the specified maximum ratings of the device.
- Questo dispositivo è destinato a volumitage testing only. Do not use it for other purposes.
- Tenere il dispositivo lontano dalla portata dei bambini.
3. Prodotto finitoview
The STEINEL Master Check 3 is a compact and durable voltage tester. Its primary function is to detect and indicate AC and DC voltages across a wide range. The device is battery-powered for portability and ease of use in various environments.
Caratteristiche principali:
- Voltage Test: Capable of testing both AC and DC voltages.
- Indicazione LED: Voltage levels are clearly indicated by a series of LEDs.
- Voltage Intervalli: Supports common voltage levels including 6V, 12V, 24V, 50V, 120V, 220V, 380V (and 240V/415V for specific applications).
- Design robusto: Built for durability in professional settings.
- Fonte di energia: Operates on batteries.
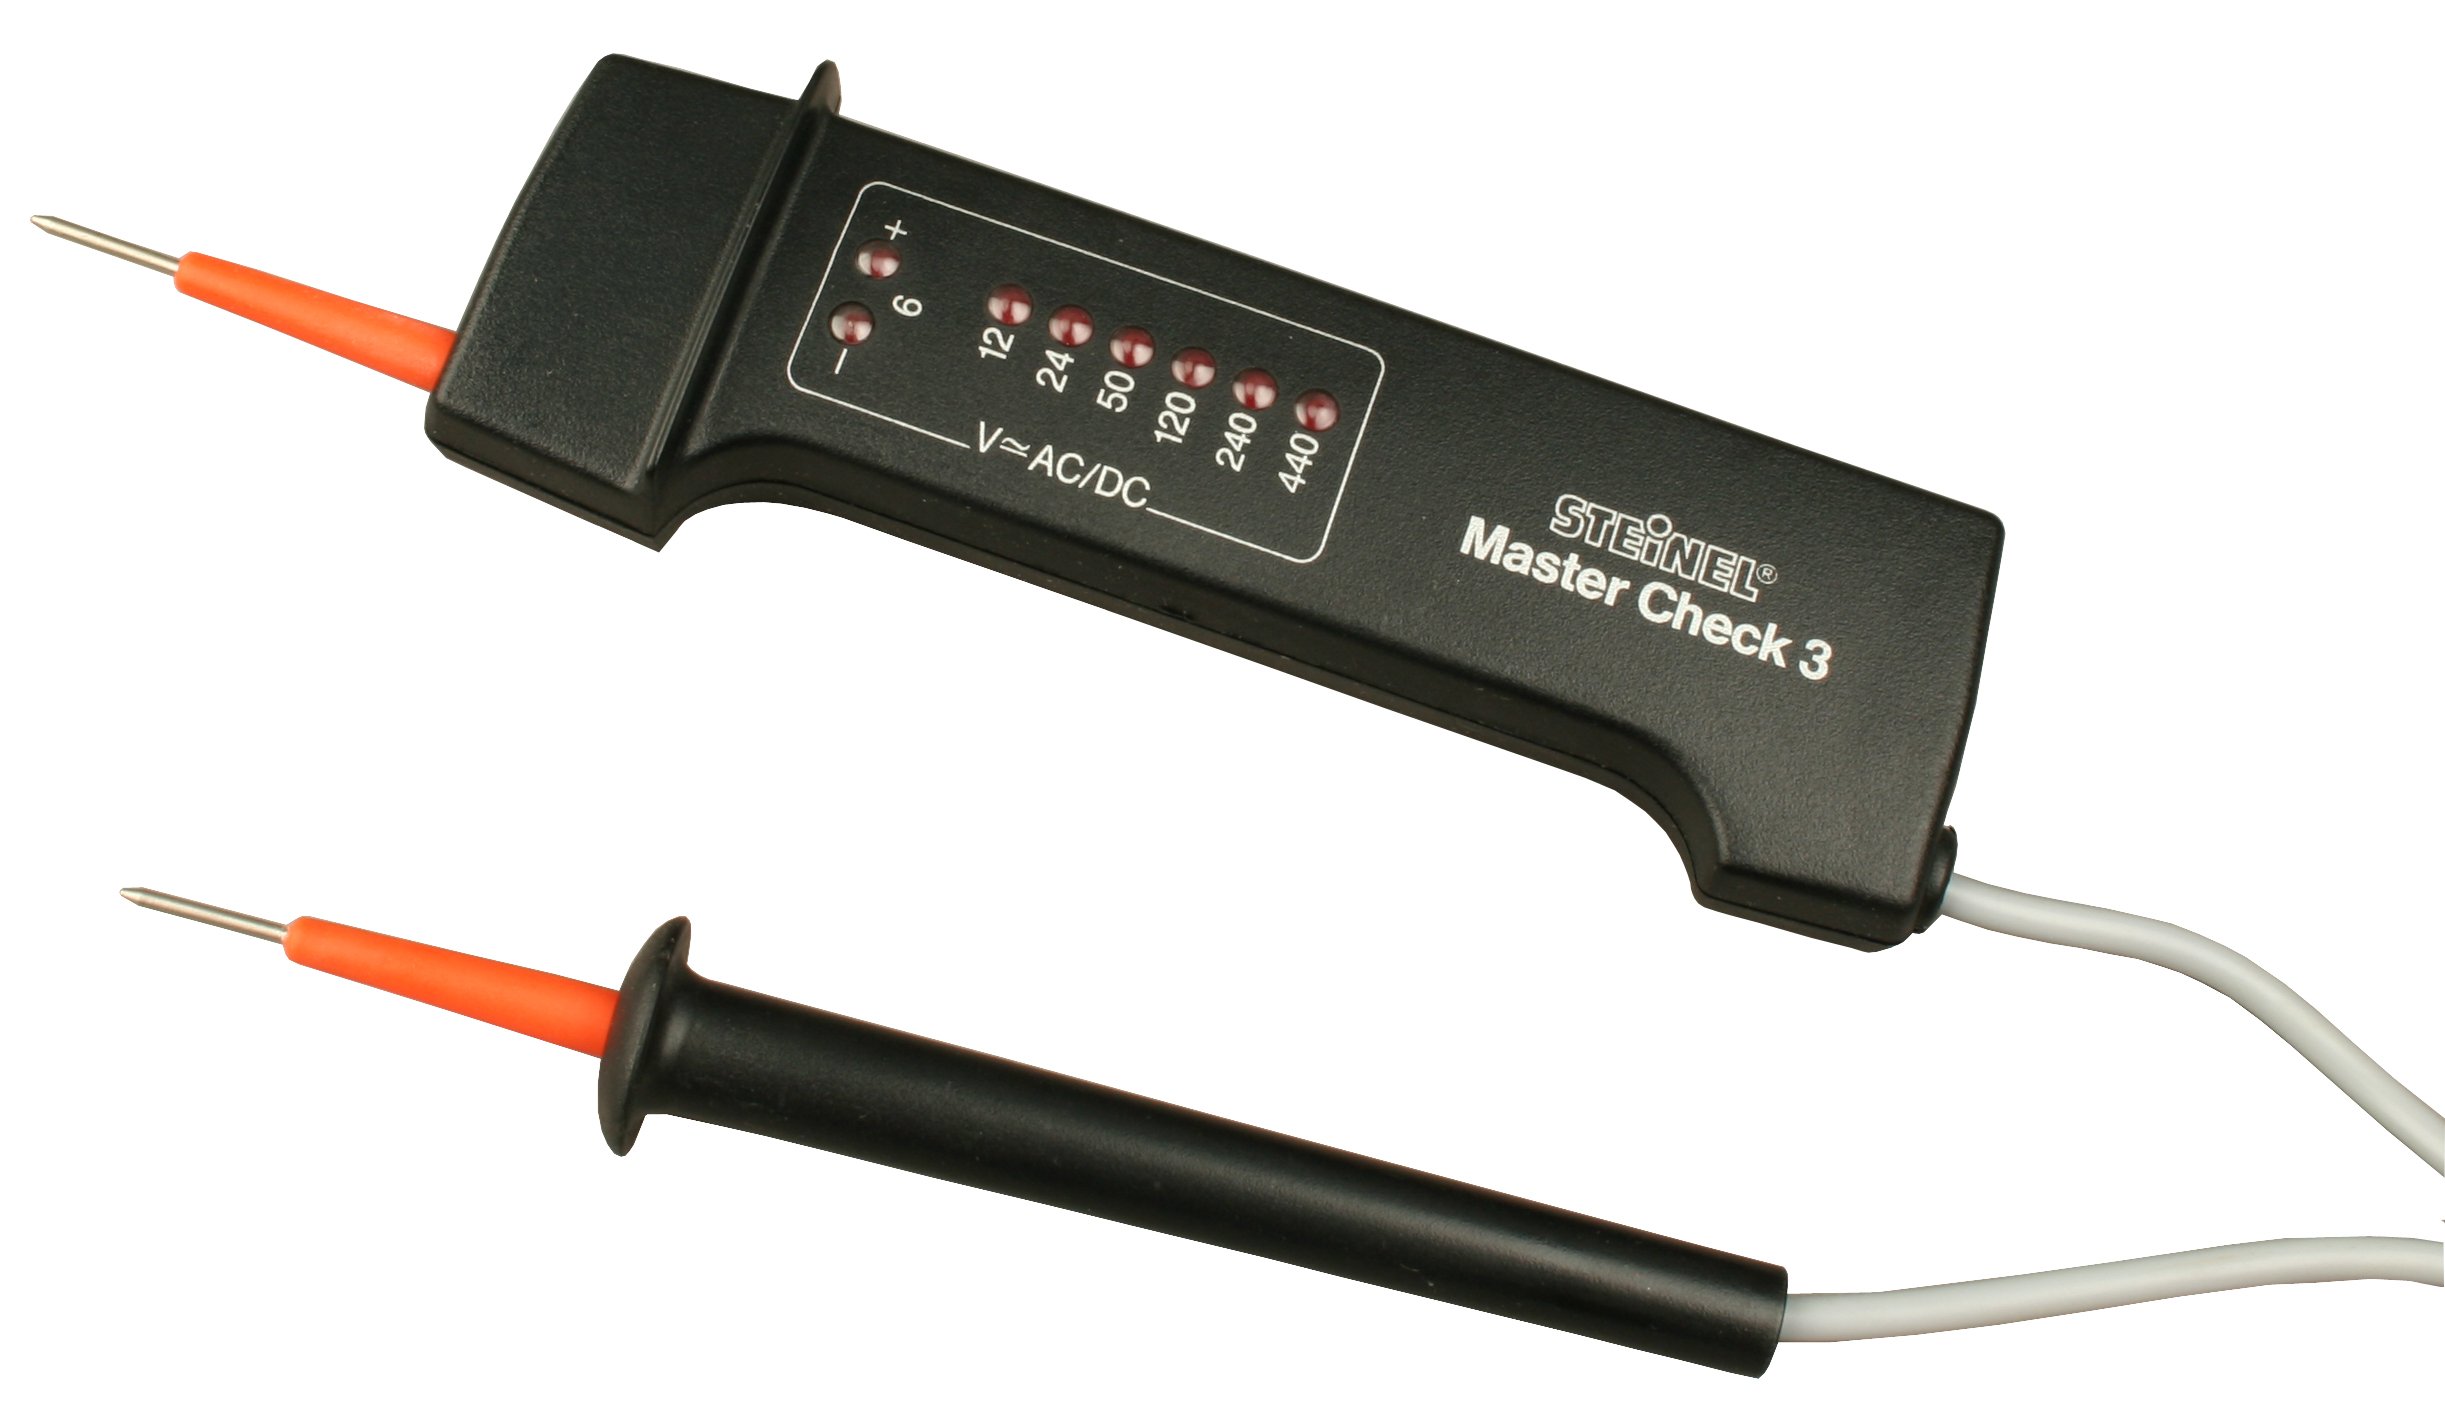
This image displays the STEINEL Master Check 3 Voltage Tester, highlighting its durable construction and the two test probes used for electrical measurements.
4. Impostazione
4.1 Installazione della batteria
The STEINEL Master Check 3 is powered by batteries. Before initial use, or when the indicators become dim, batteries must be installed or replaced.
- Individuare il coperchio del vano batteria sul retro del dispositivo.
- Use a suitable tool (e.g., a small screwdriver) to open the battery compartment.
- Insert the required batteries, ensuring correct polarity (+ and - terminals). Refer to the markings inside the compartment.
- Chiudere saldamente il coperchio del vano batterie.
4.2 Controllo iniziale
Before using the tester on an unknown circuit, it is recommended to test it on a known live circuit (e.g., a wall outlet) to confirm proper functionality.
5. Istruzioni per l'uso
The Master Check 3 is designed for straightforward voltage rilevamento.
5.1 Performing a Voltage Prova
- Ensure the test probes are clean and free from damage.
- Carefully apply the two test probes to the points of the circuit you wish to test. For AC voltage, this would typically be phase and neutral. For DC voltage, this would be positive and negative terminals.
- Observe the LED indicators on the device.
5.2 Interpretazione degli indicatori LED
The Master Check 3 features a series of LEDs that illuminate to indicate the detected voltage level. The LEDs are typically labeled with voltage values (e.g., 6V, 12V, 24V, 50V, 120V, 220V, 380V). The highest illuminated LED indicates the approximate voltage present. For example, if the 220V LED illuminates but the 380V LED does not, the voltage è compreso tra 220 V e 380 V.
The device automatically detects whether the voltage is AC or DC and indicates accordingly, often through specific LED patterns or dedicated indicators if present on the model.
6. Manutenzione
6.1 Pulizia
Per pulire il dispositivo, strofinarlo con un panno morbido, damp panno. Non utilizzare detergenti abrasivi o solventi. Assicurarsi che il dispositivo sia completamente asciutto prima di riporlo o di utilizzarlo nuovamente.
6.2 Sostituzione della batteria
Replace batteries as described in Section 4.1 when the LED indicators become dim or the device fails to respond. Always dispose of used batteries responsibly according to local regulations.
6.3 Conservazione
Store the Master Check 3 in a dry, cool place, away from direct sunlight and extreme temperatures. If storing for extended periods, it is advisable to remove the batteries to prevent leakage.
7. Risoluzione Dei Problemi
If you encounter issues with your STEINEL Master Check 3, refer to the following common problems and solutions:
- No LED indication when testing a known live circuit:
- Controllare l'installazione delle batterie e sostituirle se necessario.
- Ensure probes are making good contact with the circuit points.
- Verify the circuit is indeed live with another known working device.
- Dim or flickering LEDs:
- Le batterie sono scariche. Sostituiscile.
- Letture incoerenti:
- Ensure probes are clean and free from corrosion.
- Confirm stable contact with the test points.
If the problem persists after attempting these solutions, contact STEINEL customer support for further assistance.
8. Specifiche
| Caratteristica | Specificazione |
|---|---|
| Marca | STEINEL |
| Modello | Master Check 3 |
| Fonte di alimentazione | Alimentato a batteria |
| Voltage Campo di prova | 6V, 12V, 24V, 50V, 120V, 220V, 380V (240V/415V) |
| Voltagtipo e | Corrente alternata e corrente continua |
| ASIN | B003IPCZ84 |
| Produttore | Pietra |
| Stile | Standard |
| Conteggio unità | 1.0 unità |
9. Garanzia e supporto
Specific warranty information for the STEINEL Master Check 3 Voltage Tester is not provided within this manual. For details regarding warranty coverage, terms, and conditions, please refer to the documentation included with your purchase or visit the official STEINEL website. For technical support or service inquiries, please contact STEINEL customer service through their official channels.

