Introduzione
This manual provides detailed instructions for the setup, operation, maintenance, and troubleshooting of your Avaya 9640G IP Phone. Please read this manual thoroughly before using the device to ensure proper functionality and to prevent damage.
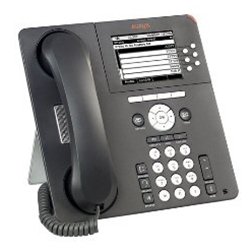
Figura 1: Davanti view of the Avaya 9640G IP Phone, showing the display, keypad, and function buttons.
1. Impostazione
1.1 Disimballaggio
Rimuovere con cautela tutti i componenti dall'imballaggio. Verificare che siano presenti i seguenti elementi:
- Avaya 9640G IP Phone unit
- Cornetta
- Cavo del ricevitore
- Cavo Ethernet
- Desk stand (if applicable)
- Adattatore di alimentazione (se non si utilizza Power over Ethernet - PoE)
1.2 Collegamento del telefono
Per connettere il tuo telefono IP, segui questi passaggi:
- Collegare il portatile: Plug one end of the coiled handset cord into the handset and the other end into the handset port on the phone base (usually marked with a handset icon).
- Collegare l'auricolare (facoltativo): If using a headset, plug it into the headset port (usually marked with a headset icon).
- Connetti alla rete:
- Plug one end of the Ethernet cable into the LAN port on the phone (often labeled with a network icon or "LAN").
- Plug the other end of the Ethernet cable into a network jack or a network switch/router.
- If your network provides Power over Ethernet (PoE), the phone will power on automatically.
- Collegamento dell'alimentazione (se non si utilizza PoE): If PoE is not available, connect the power adapter to the phone's power port and then plug the adapter into a wall outlet.
- Avvio iniziale: The phone will power on and begin its boot-up sequence. This may take a few minutes. The display will show progress and eventually indicate readiness for use.
1.3 Configurazione iniziale
Upon first boot-up or after a factory reset, the phone may require network configuration or login credentials. Consult your network administrator for specific settings such as IP address, subnet mask, gateway, and SIP server details.
2. Istruzioni per l'uso
2.1 Funzioni di chiamata di base
- Effettuare una chiamata:
- Lift the handset, press the Speaker button, or press a Line button.
- Comporre il numero desiderato utilizzando la tastiera.
- Press the "Call" or "Dial" softkey, or wait for the call to connect automatically.
- Risposta a una chiamata:
- Lift the handset, press the Speaker button, or press the flashing Line button.
- Terminare una chiamata:
- Replace the handset, press the Speaker button again, or press the "End Call" softkey.
2.2 Funzioni di chiamata avanzate
- Presa: During an active call, press the "Hold" button. The call will be placed on hold, and the line button may flash. To resume, press the flashing line button again.
- Trasferimento: During an active call, press the "Transfer" button. Dial the number to which you want to transfer the call. You can either announce the call (wait for the other party to answer) or perform a blind transfer (press "Transfer" again before they answer).
- Conferenza: During an active call, press the "Conference" button. Dial the number of the third party. Once they answer, press "Conference" again to join all parties.
2.3 Segreteria telefonica
To access your voicemail, press the "Message" or "Voicemail" button (often indicated by an envelope icon). Follow the audio prompts to listen to, save, or delete messages. You may need to enter a PIN.
2.4 Directory/Contacts
The phone may have a local directory or access to a corporate directory. Press the "Directory" or "Contacts" button to access these lists. Use the navigation buttons to scroll and select entries, then press "Dial" to call.
2.5 Feature Buttons and Display Navigation
The Avaya 9640G features a color display and several programmable buttons. Use the navigation cluster (up, down, left, right arrows, and Select button) to move through menus and options on the display. Softkeys (buttons directly below the display) change their function based on the current context.
3. Manutenzione
3.1 Pulizia
Per pulire il telefono, utilizzare un panno morbido eamp, lint-free cloth. Do not use abrasive cleaners, solvents, or aerosol sprays directly on the phone. Disconnect the phone from power before cleaning.
3.2 Aggiornamenti software e firmware
Software and firmware updates are typically managed by your system administrator. Do not attempt to manually update the phone's software unless instructed to do so by qualified personnel. Regular updates ensure optimal performance and security.
4. Risoluzione Dei Problemi
| Problema | Possibile causa | Soluzione |
|---|---|---|
| Nessun tono di linea | Phone not powered, network cable loose, network issue. | Check power connection (PoE or adapter). Ensure Ethernet cable is securely connected. Contact your network administrator. |
| Non è possibile effettuare/ricevere chiamate | Network connectivity issues, incorrect configuration, account not registered. | Verify network connection. Check phone's IP address and registration status. Contact your system administrator. |
| Il display è vuoto o bloccato | Problema di alimentazione, errore software. | Disconnect and reconnect power. If the issue persists, contact technical support. |
| Scarsa qualità audio | Network congestion, faulty cable, handset/headset issue. | Check network activity. Try a different handset or headset. Report to network administrator if problem persists. |
For issues not listed here, or if the suggested solutions do not resolve the problem, please contact your IT or network support department.
5. Specifiche
- Marca: Avaya
- Modello: 9640G
- ASIN: B003P5AA8Y
- Tipo di sistema di risposta: Digitale
- Identificazione del chiamante: NO
- Connettività: Ethernet (PoE capable)
- Display: Schermo a colori
- portatile: Cablato
- Supporto per cuffie: SÌ
Nota: le specifiche sono soggette a modifiche senza preavviso.
6. Garanzia e supporto
6.1 Informazioni sulla garanzia
The Avaya 9640G IP Phone typically comes with a limited manufacturer's warranty. Please refer to the warranty card included with your product or visit the official Avaya webPer termini e condizioni dettagliati relativi alla copertura della garanzia, alla durata e alle procedure di reclamo, consultare il sito. Conservare la prova d'acquisto ai fini della garanzia.
6.2 Supporto tecnico
For technical assistance, troubleshooting beyond this manual, or service requests, please contact your authorized Avaya reseller or your organization's IT support department. You may also find additional resources and support documentation on the official Avaya support websito: support.avaya.com.