Introduzione
This manual provides detailed instructions for the installation, operation, and maintenance of your Dual DSA1014 In-Dash Car Stereo Receiver. Please read this manual thoroughly before using the product to ensure proper operation and to prevent damage.
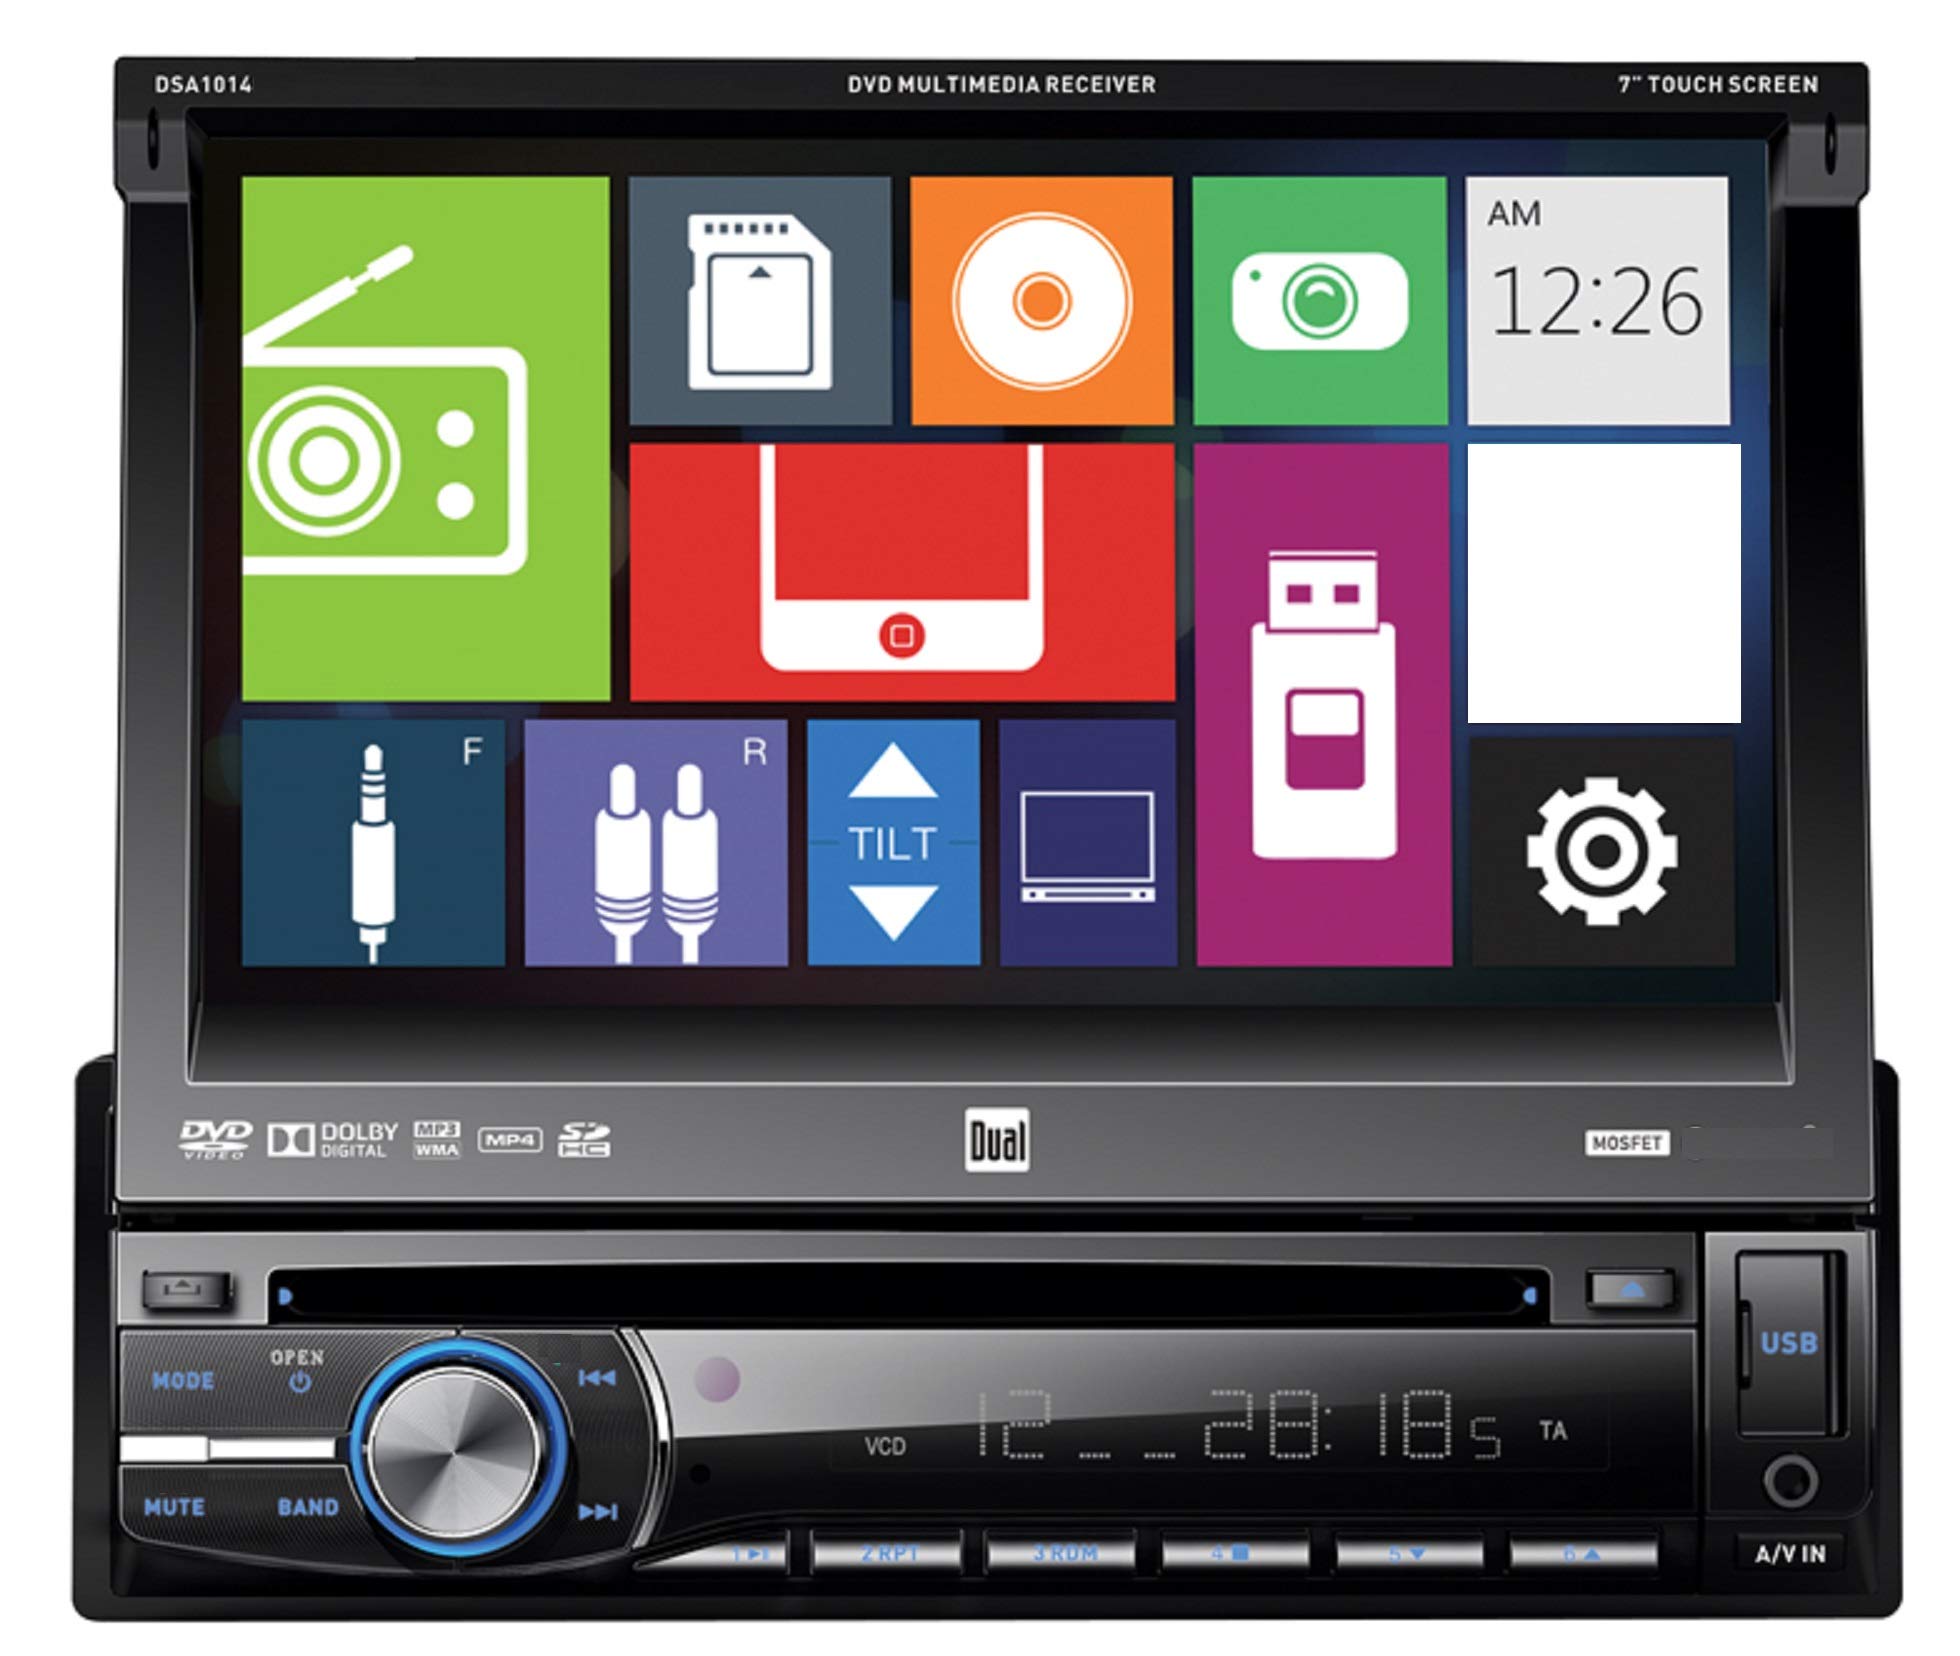
Davanti view of the Dual DSA1014 In-Dash Car Stereo Receiver, showing the 7-inch touchscreen display, control buttons, volume knob, USB port, and A/V input.
Informazioni sulla sicurezza
- Always consult a qualified professional for installation to avoid damage to the unit or vehicle.
- Non utilizzare l'unità in modo da distrarti dalla guida.
- Assicurarsi che tutti i cavi siano collegati correttamente per evitare cortocircuiti o pericoli elettrici.
- Keep the detachable face plate clean and handle it with care.
Contenuto della confezione
Verificare che tutti gli articoli siano presenti nel pacco:
- Dual DSA1014 In-Dash Car Stereo Receiver
- Telecomando
- Cablaggio elettrico
- Hardware di installazione
- Manuale dell'utente (questo documento)
Caratteristiche del prodotto
- 7-inch Digital LED Backlit LCD Touchscreen Display (800 x 480 resolution)
- Detachable Face Plate
- CD/CD-R/RW, DVD/DVD-R/RW, MP3, and WMA Playback
- AM/FM Tuner with 24FM/12AM Presets
- Direct USB Control for iPod/iPhone (iPod and iPhone Ready)
- Front USB Input (supports up to 64GB flash drive)
- Front SD Card Slot (located behind the screen, supports up to 2GB SD card)
- Front 3.5mm A/V Auxiliary Input
- 5 Equalizer Presets: Pop, Rock, Classic, Jazz, and Flat
- Conforme a CEA-2006 Amplifier: Peak 60W x 4 channels, RMS 18W x 4 channels
- CD Text Information Display and MP3 ID3 Tag Display (Title/Artist/Album)
Configurazione e installazione
Installation of this car stereo receiver requires technical knowledge and experience. It is highly recommended to have the unit installed by a professional car audio technician. Incorrect installation can lead to damage to the unit, vehicle, or personal injury.
Collegamenti elettrici
Refer to the wiring diagram provided with your unit for specific connections. Ensure all wires are securely connected and insulated to prevent short circuits. Common connections include:
- Potenza (Giallo): Costante 12V+
- Accessorio (rosso): Switched 12V+
- Terra (Nero): Vehicle chassis ground
- Uscite altoparlanti: Collegare agli altoparlanti del veicolo (assicurarsi della corretta polarità).
- Antenna: Collegare all'antenna radio del veicolo.
Montaggio
Mount the unit securely in the vehicle's dashboard using the supplied mounting hardware. Ensure adequate clearance for the detachable face plate and disc insertion.
Istruzioni per l'uso
Controlli di base
The DSA1014 features a 7-inch touchscreen for primary control, supplemented by physical buttons on the front panel.
- Pulsante di accensione / modalità: Press to turn the unit ON/OFF. Press briefly to cycle through available sources (Radio, Disc, USB, SD, AUX, iPod).
- Manopola del volume: Ruotare per regolare il livello del volume.
- Tasto muto: Press to mute or unmute audio output.
- Pulsante della fascia: In Radio mode, press to switch between FM1, FM2, FM3, AM1, and AM2 bands.
- Track/Seek Buttons (◀◀ / ▶▶): Skip tracks on media, or seek radio stations.
- Pulsante Apri: Press to open the faceplate and access the disc slot or SD card slot.
- Porta USB: Located on the front panel for USB flash drives and iPod/iPhone connection.
- A/V IN (3.5mm): Front auxiliary input for external audio/video devices.
Disc Playback (CD/DVD)
- Premere il tasto APRIRE button to tilt the faceplate.
- Insert a CD or DVD into the disc slot with the label side up. The unit will automatically load the disc and begin playback.
- Use the touchscreen controls or physical buttons to navigate tracks/chapters, pause, or stop playback.
Operazione radio
- Premere il tasto MODALITÀ button until "Radio" is selected.
- Premere il tasto BANDA pulsante per selezionare FM1, FM2, FM3, AM1 o AM2.
- Use the seek buttons (◀◀ / ▶▶) to automatically search for strong stations.
- Per effettuare la sintonizzazione manuale, utilizzare i comandi touchscreen.
- To store a preset, tune to the desired station, then press and hold one of the preset numbers on the touchscreen until you hear a beep.
USB/iPod/iPhone Connectivity
- Connect your USB flash drive or iPod/iPhone to the front USB port using a compatible cable.
- The unit will automatically detect the device and switch to USB or iPod mode.
- Use the touchscreen to browse and select audio files or control your iPod/iPhone.
- La porta USB consente anche la ricarica dei dispositivi collegati.
Funzionamento della scheda SD
- Premere il tasto APRIRE button to tilt the faceplate.
- Insert an SD card (up to 2GB) into the SD card slot.
- The unit will automatically detect the card and switch to SD mode.
- Use the touchscreen to browse and select audio files.
Ingresso ausiliario
- Connect an external audio/video device to the front 3.5mm A/V IN jack.
- Premere il tasto MODALITÀ pulsante fino a selezionare "AUX".
- Controlla la riproduzione dal dispositivo connesso.
Impostazioni equalizzatore
Access the audio settings via the touchscreen to select from 5 preset equalizer curves:
- Pop
- Roccia
- Classico
- Jazz
- Piatto
Manutenzione
- Pulizia dell'unità: Use a soft, dry cloth to clean the unit. For stubborn stains, dampen il panno con acqua. Non utilizzare mai detergenti o solventi abrasivi.
- Cleaning the Touchscreen: Gently wipe the touchscreen with a soft, lint-free cloth. Avoid excessive pressure.
- Piastra frontale staccabile: When detached, store the face plate in its protective case to prevent scratches and damage.
- Cura del disco: Maneggiare i dischi tenendoli per i bordi. Mantenerli puliti e privi di graffi.
Risoluzione dei problemi
| Problema | Possibile causa | Soluzione |
|---|---|---|
| Nessun potere | Cablaggio errato; Fusibile bruciato; Batteria del veicolo scarica. | Controllare i collegamenti di alimentazione e di terra; sostituire il fusibile; controllare la batteria del veicolo. |
| Nessun suono | Volume troppo basso; Disattivazione audio attivata; Cavi degli altoparlanti scollegati; Sorgente audio errata. | Aumentare il volume; Disattivare l'audio; Controllare i collegamenti degli altoparlanti; Selezionare la sorgente audio corretta. |
| Errore disco | Disc dirty or scratched; Incorrect disc format; Disc inserted incorrectly. | Clean or replace disc; Ensure disc is compatible (CD/DVD); Reinsert disc correctly. |
| USB/SD Not Recognized | Incompatible format; Device not properly connected; SD card capacity exceeded. | Garantire files are MP3/WMA; Reconnect device; Use SD card up to 2GB; Check USB flash drive format. |
| Il telecomando non funziona | Dead battery; Obstruction; Not pointing at receiver. | Replace battery; Remove obstruction; Point remote directly at the unit. |
Specifiche
| Caratteristica | Dettaglio |
|---|---|
| Numero di modello | DSA1014 |
| Display | 7" Digital LED Backlit LCD Touchscreen (800 x 480) |
| Potenza di uscita (picco) | 60 Watts x 4 channels |
| Potenza in uscita (RMS) | 18 Watts x 4 channels (CEA-2006 compliant) |
| Riproduzione multimediale | CD/CD-R/RW, DVD/DVD-R/RW, MP3, WMA |
| Sintonizzatore | AM/FM with 24FM/12AM presets |
| Ingresso USB | Front, supports up to 64GB flash drive, iPod/iPhone direct control and charging |
| Slot per scheda SD | Front (behind faceplate), supports up to 2GB SD card |
| Ingresso ausiliario | Front 3.5mm A/V |
| Equalizzatore | 5 Presets (Pop, Rock, Classic, Jazz, Flat) |
| Dimensioni del telaio | Singolo DIN |
| Peso dell'articolo | 2.2 libbre (circa 1 kg) |
| Dimensioni del prodotto | 7 x 7 x 2 pollici |
Garanzia e supporto
Dual Electronics provides a limited warranty for this product. The warranty period is typically 1 year from the date of purchase. For specific warranty terms, conditions, and to register your product, please refer to the warranty card included in your package or visit the official Dual Electronics websito.
For technical support, troubleshooting assistance, or service inquiries, please contact Dual Electronics customer support. Contact information can usually be found on the manufacturer's websito o nella confezione del prodotto.
Risorse online: www.dualav.com