1. Introduzione
This manual provides essential information for the safe and efficient operation, installation, and maintenance of your Steinbach SPS 100-1 self-priming filter pump. Please read all instructions carefully before installation and use. Keep this manual for future reference.
2. Istruzioni di sicurezza
Informazioni importanti sulla sicurezza:
- Scollegare sempre la pompa dall'alimentazione elettrica prima di effettuare qualsiasi operazione di manutenzione o pulizia.
- Ensure the electrical installation complies with local regulations and is protected by a Residual Current Device (RCD) with a tripping current not exceeding 30 mA.
- Non utilizzare la pompa se il cavo di alimentazione o la spina sono danneggiati. Contattare personale qualificato per le riparazioni.
- The pump must be installed on a solid, level surface, protected from direct sunlight and rain.
- Ensure adequate ventilation around the pump motor to prevent overheating.
- Questo apparecchio non è destinato all'uso da parte di persone (bambini compresi) con ridotte capacità fisiche, sensoriali o mentali, o prive di esperienza e conoscenza, a meno che non siano supervisionate o abbiano ricevuto istruzioni riguardanti l'uso dell'apparecchio da una persona responsabile della loro sicurezza.
- I bambini devono essere sorvegliati per assicurarsi che non giochino con l'apparecchio.
3. Prodotto finitoview
The Steinbach SPS 100-1 is a self-priming filter pump designed for efficient water circulation in swimming pool filter systems, such as the Speed Clean Comfort 75. It operates without a built-in timer, offering continuous operation when powered.
Componenti
- Pump body with motor
- Pre-filter basket with transparent lid
- Connessioni di ingresso e uscita
- Cavo di alimentazione con spina

Figura 1: Oltreview of the Steinbach SPS 100-1 Self-Priming Filter Pump.
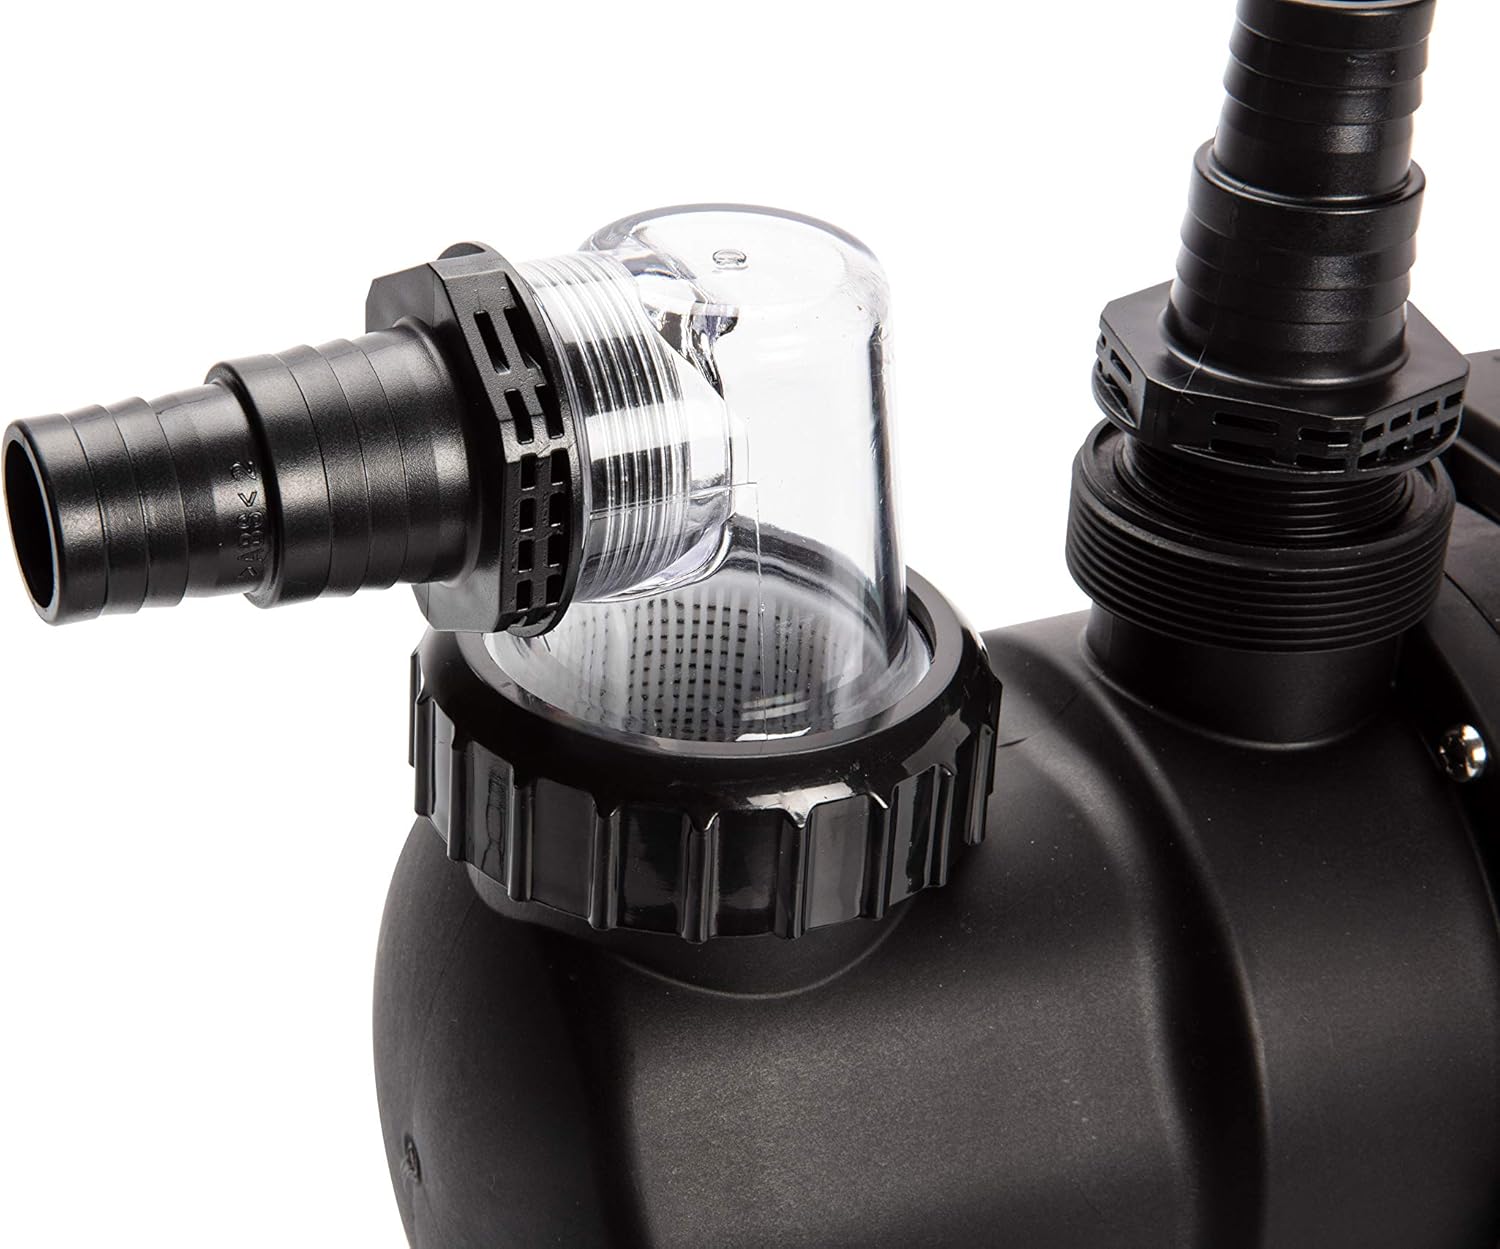
Figura 2: primo piano view of the pre-filter housing and the inlet connection with a hose attached. The transparent lid allows for easy inspection of the filter basket.

Figura 3: dettagliata view of the pre-filter and the threaded inlet connection, ready for hose attachment.

Figure 4: Close-up of the pump's outlet connection with a hose securely fastened, directing filtered water.

Figura 5: dettagliata view of the pump's threaded outlet connection, showing the port where the return hose connects.

Figure 6: Product label displaying technical specifications such as model number, voltage, power, and flow rate.
4. Configurazione e installazione
Proper installation is crucial for the pump's performance and longevity. Refer to your specific filter system manual for detailed plumbing instructions.
4.1 Posizionamento
- Position the pump as close to the pool as possible, below water level if feasible, to aid in self-priming.
- Ensure the pump is on a stable, level, and dry surface.
- Proteggere la pompa dall'esposizione diretta alle intemperie (pioggia, neve, luce solare diretta).
- Allow sufficient space around the motor for ventilation and maintenance access.
4.2 Collegamenti idraulici
- Connect the suction line from the pool skimmer/main drain to the pump's inlet (front connection).
- Connect the discharge line from the pump's outlet (top connection) to the filter system's inlet.
- Use appropriate fittings, clamps, and thread sealant (Teflon tape) to ensure watertight connections.
- Avoid kinks or sharp bends in hoses to maintain optimal flow.
4.3 Collegamento elettrico
- Assicurarsi che l'alimentazione corrisponda al volume della pompatage (230V).
- Plug the pump into a grounded electrical outlet protected by an RCD.
- Non utilizzare prolunghe se non assolutamente necessario e assicurarsi che siano adatte all'uso esterno e ai requisiti di alimentazione della pompa.
5. Istruzioni per l'uso
5.1 Adescamento della pompa
As a self-priming pump, the SPS 100-1 can draw water, but initial priming is recommended for faster startup:
- Ensure all valves are open, allowing water to flow from the pool to the pump.
- Remove the transparent lid of the pre-filter.
- Fill the pre-filter housing completely with water.
- Replace the lid securely, ensuring the O-ring is properly seated to prevent air leaks.
- Turn on the pump. It should begin to draw water and expel air. If it does not prime within a few minutes, turn it off, re-check connections, and repeat the priming process.
5.2 Funzionamento normale
- Once primed, the pump will continuously circulate water through your filter system.
- Monitor the pressure gauge on your filter (if applicable) to determine when backwashing or filter cleaning is needed.
- This model does not include a timer, so you will need to manually switch it on and off or connect it to an external timer (not included).
6. Manutenzione
6.1 Pre-Filter Basket Cleaning
Regularly inspect and clean the pre-filter basket to prevent debris buildup and maintain pump efficiency.
- Turn off the pump and disconnect it from the power supply.
- Chiudere tutte le valvole necessarie per impedire il flusso d'acqua dalla piscina.
- Unscrew the transparent lid of the pre-filter.
- Rimuovere il cestello e svuotarlo da eventuali detriti raccolti.
- Sciacquare accuratamente il cestello con acqua.
- Controllare che l'O-ring sul coperchio non sia danneggiato e assicurarsi che sia pulito.
- Replace the basket and securely fasten the lid.
6.2 Rimessaggio invernale
Before freezing temperatures arrive, properly winterize your pump to prevent damage:
- Scollegare la pompa dall'alimentazione.
- Drain all water from the pump by removing the drain plug (usually located at the bottom of the pump housing).
- Disconnect all hoses and pipes.
- Clean the pre-filter basket and housing.
- Conservare la pompa in un luogo asciutto e al riparo dal gelo.
7. Risoluzione Dei Problemi
| Problema | Possibile causa | Soluzione |
|---|---|---|
| La pompa non si avvia | No power; tripped breaker/RCD; motor jammed | Check power connection, reset breaker/RCD; contact service if motor is jammed. |
| Pump runs but does not prime/no water flow | Air leak in suction line; pre-filter basket clogged; insufficient water in pre-filter; low pool water level | Check all connections for air leaks; clean pre-filter basket; fill pre-filter with water; ensure adequate pool water level. |
| Flusso d'acqua ridotto | Clogged pre-filter; clogged main filter; partially closed valves; debris in impeller | Clean pre-filter; backwash/clean main filter; open all valves fully; inspect impeller for debris (disconnect power first). |
| Forte rumore/vibrazione | Air in pump; cavitation; loose mounting; worn bearings | Check for air leaks and prime pump; ensure adequate water supply; tighten mounting bolts; contact service for worn bearings. |
8. Specifiche
| Caratteristica | Specificazione |
|---|---|
| Numero di modello | 040922 |
| Tipo | Self-Priming Filter Pump |
| Voltage | 230 Volt |
| Energia | 550 L |
| Portata massima | 158 Liters Per Minute (9.400 l/h) |
| Altezza massima della testa | 10 metri |
| Materiale | Stainless Steel (motor components), Durable Plastic (pump housing) |
| Peso | 5.96 kg |
| Colore | Nero |
| Caratteristiche | Self-priming, No integrated timer, Suitable for Speed Clean Comfort 75 sand filter systems |
9. Garanzia e supporto
For warranty information and technical support, please refer to the documentation provided with your purchase or contact Steinbach customer service directly. Keep your proof of purchase for warranty claims.
Informazioni sui contatti:
- Manufacturer: Steinbach
- Websito: www.steinbach.at (Please check for local support details)


