
1. Introduzione
This manual provides detailed instructions for the safe and effective use of your Fujifilm Finepix S4300 digital camera. Please read this manual thoroughly before using the camera and keep it in a safe place for future reference.
The Fujifilm Finepix S4300 is a 14-megapixel digital camera featuring a 26x optical zoom lens (24-624mm equivalent), dual image stabilization, and HD 720p video recording capabilities. It is designed for users seeking a versatile camera with a powerful zoom and user-friendly features.
2. Fotocamera finitaview
2.1 Anteriore e superiore View

Figura 1: Parte anteriore e superiore view of the Fujifilm Finepix S4300 camera, showing the lens, flash, and control dial.
2.2 Posteriore View
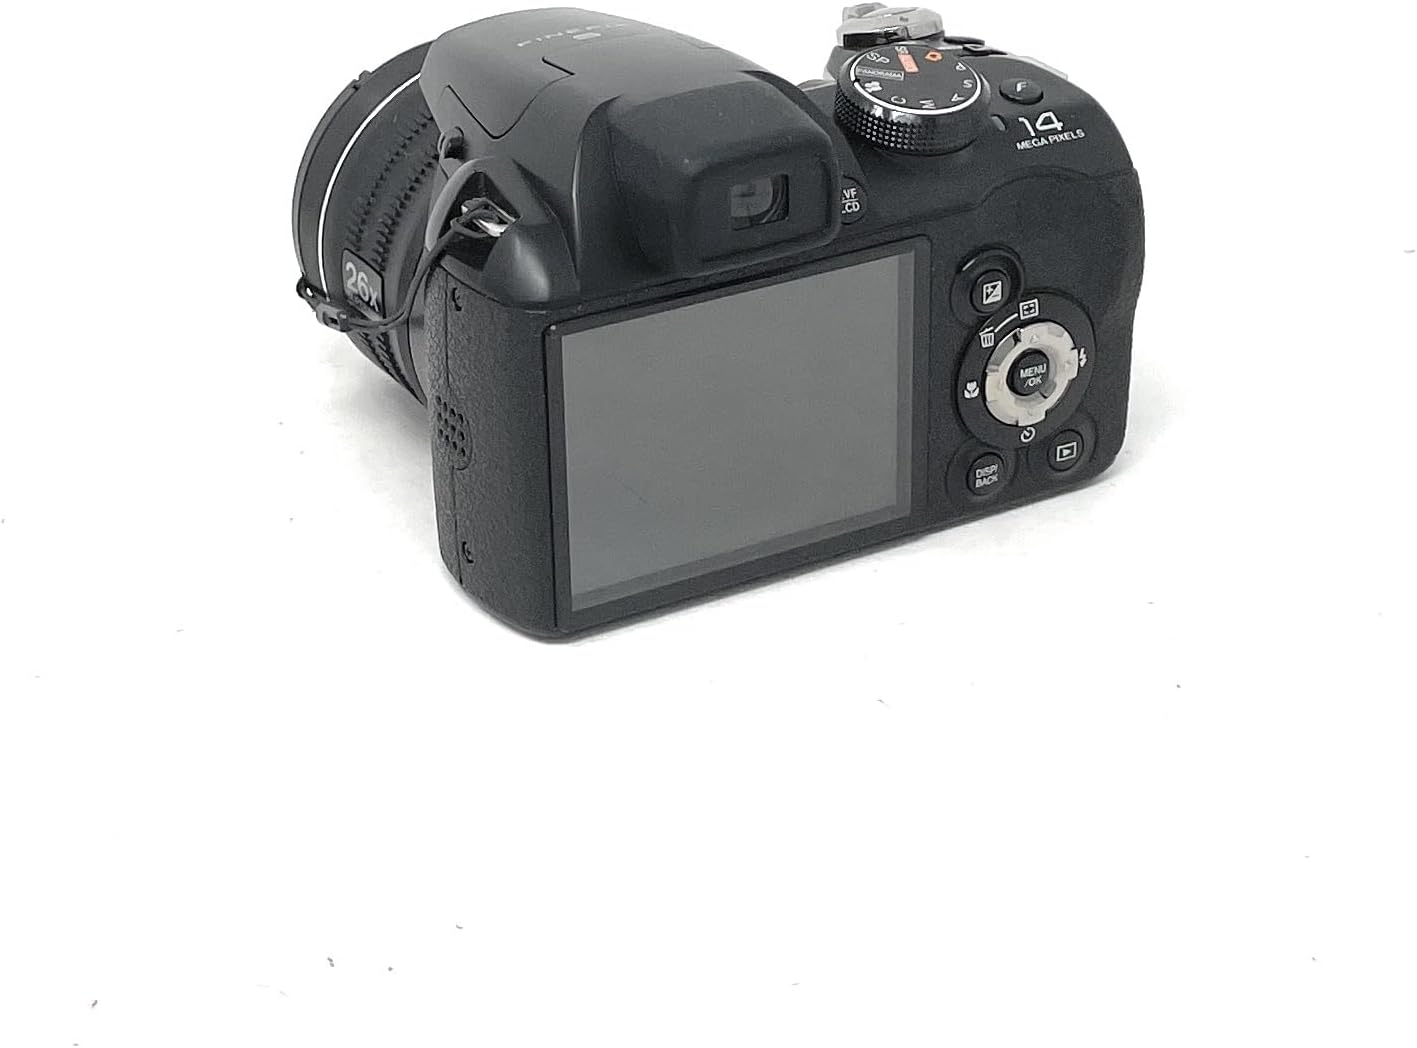
Figura 2: Posteriore view of the Fujifilm Finepix S4300 camera, displaying the 3-inch LCD screen and various control buttons.
2.3 In basso View
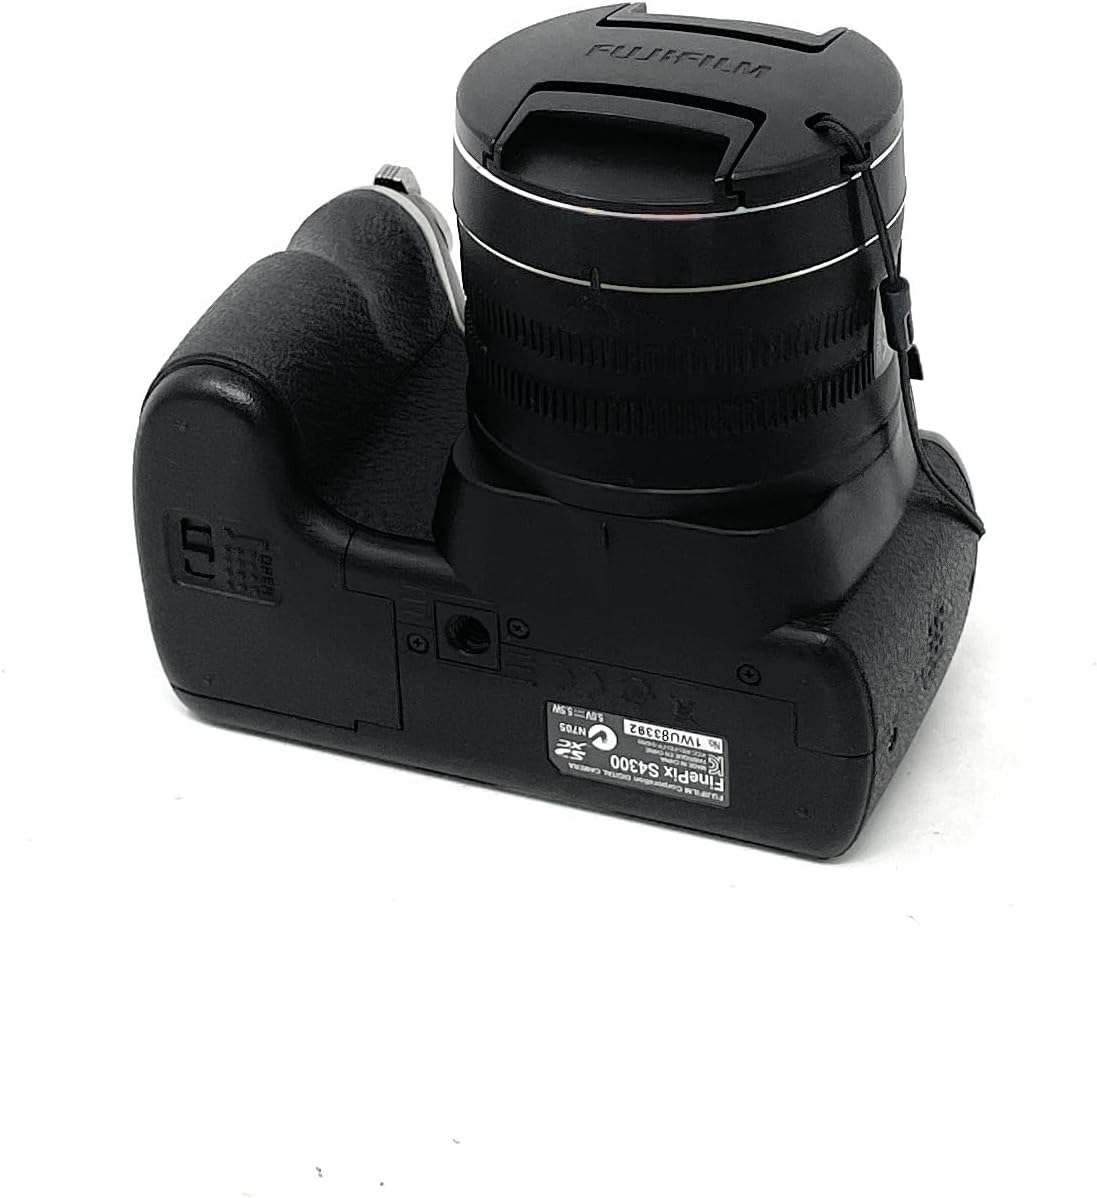
Figura 3: In basso view of the Fujifilm Finepix S4300 camera, showing the battery and memory card compartment.
3. Impostazione
3.1 Installazione delle batterie
The Finepix S4300 operates on four AA batteries. Ensure you use new, high-quality alkaline or Ni-MH rechargeable batteries for optimal performance.
- Open the battery compartment cover located on the bottom of the camera (refer to Figure 3).
- Inserire quattro batterie AA, assicurandosi che la polarità (+/-) sia corretta, come indicato all'interno del vano.
- Chiudere saldamente il coperchio del vano batteria finché non scatta in posizione.
3.2 Inserimento di una scheda di memoria
The camera supports SD memory cards. A memory card is required to store photos and videos.
- Open the battery/memory card compartment cover (refer to Figure 3).
- Insert the SD card into the card slot with the label facing the front of the camera until it clicks.
- Chiudere saldamente il coperchio del vano.
- To remove the card, push it gently inward until it clicks, then release it to eject.
3.3 Initial Power On and Date/Time Setting
After installing batteries and a memory card, power on the camera for the first time.
- Premere il tasto ACCESO/SPENTO pulsante.
- The camera will prompt you to set the date and time. Use the directional pad to navigate and the MENÙ/OK pulsante per confermare.
- Imposta il fuso orario, la data e l'ora corretti.
4. Utilizzo della fotocamera
4.1 Taking Photos in Auto Mode
For simple point-and-shoot photography, use the camera's automatic mode.
- Ruotare la ghiera delle modalità su AUTO.
- Inquadra il tuo scatto utilizzando il monitor LCD o la fotocamera elettronica viewmirino (EVF).
- Premere il pulsante di scatto a metà per mettere a fuoco. Una volta raggiunta la messa a fuoco, la cornice di messa a fuoco diventerà verde.
- Premere completamente il pulsante di scatto per scattare la foto.
4.2 Using the Optical Zoom
The camera features a 26x optical zoom lens.
- Per ingrandire, spingere la leva dello zoom verso T (Teleobiettivo).
- Per ridurre lo zoom, spingere la leva dello zoom verso W (Grandangolo).
4.3 Registrazione di video
The Finepix S4300 can record HD 720p videos at 30 frames per second.
- Ruotare la ghiera delle modalità su Film icona.
- Press the movie recording button (usually a red dot icon) to start recording.
- Premere di nuovo il pulsante per interrompere la registrazione.
4.4 modalità flash
The built-in flash can be used in various modes:
- Flash automatico: La fotocamera determina automaticamente se è necessario il flash.
- Forced Flash: Flash fires with every shot.
- Sincro lenta: For night portraits, combining flash with slow shutter speeds.
- Flash disattivato: Il flash è disabilitato.
Access flash settings via the MENU button in shooting mode.
4.5 Modalità di scatto avanzate
Beyond AUTO, the mode dial offers:
- Programma (P): La fotocamera imposta l'apertura e la velocità dell'otturatore, ma è possibile regolare altre impostazioni.
- Priorità otturatore (S): Tu imposti la velocità dell'otturatore, la macchina fotografica imposta l'apertura.
- Priorità di apertura (A): Tu imposti l'apertura, la macchina fotografica imposta la velocità dell'otturatore.
- Manuale (M): Puoi controllare sia l'apertura che la velocità dell'otturatore.
- Scene Recognition Auto (SR AUTO): Camera intelligently detects the scene type and optimizes settings.
- Scene Position (SP): Select from various scene modes like Portrait, Landscape, Sport, Night, etc.
4.6 Image Playback and Connectivity
A view le tue foto e i tuoi video:
- Premere il tasto GIOCARE pulsante.
- Use the directional pad to navigate through images.
- To connect to an HD TV, use an HDMI cable (not included) and the camera's HDMI port.
- Images can be easily uploaded to platforms like Facebook and YouTube using the included software (refer to the software manual for details).
5. Manutenzione
5.1 Pulizia della fotocamera
- Corpo macchina fotografica: Wipe gently with a soft, dry cloth. Do not use alcohol, solvents, or harsh chemicals.
- Lente: Use a lens brush to remove dust, then gently wipe with a lens cleaning cloth. For stubborn smudges, use a small amount of lens cleaning fluid on the cloth, not directly on the lens.
- Monitor LCD: Pulire delicatamente con un panno morbido e asciutto. Evitare di premere con forza sullo schermo.
5.2 Cura della batteria
- Remove batteries when the camera will not be used for an extended period.
- Conservare le batterie in un luogo fresco e asciutto.
- Non mischiare batterie vecchie e nuove o diversi tipi di batterie.
5.3 Conservazione
When storing the camera for long periods, remove the batteries and memory card. Store the camera in a cool, dry, well-ventilated area, away from direct sunlight and extreme temperatures.
6. Risoluzione Dei Problemi
| Problema | Soluzione |
|---|---|
| La fotocamera non si accende. |
|
| Non è possibile scattare foto. |
|
| Le immagini sono sfocate. |
|
| Il flash non si attiva. |
|
7. Specifiche
| Caratteristica | Dettaglio |
|---|---|
| Nome del modello | FinePix S4300 |
| Pixel effettivi | 14 Megapixel |
| Sensore di immagine | CCD da 1/2.3 pollici |
| Zoom ottico | 26x |
| Lunghezza focale | 24-624 mm (equivalente a 35 mm) |
| Digital Zoom | 7x |
| Stabilizzazione dell'immagine | Doppia stabilizzazione dell'immagine |
| Schermo LCD | LCD da 3.0 pollici, 460,000 punti |
| Elettronico Viewcercatore (EVF) | Yes, 200,000 dots |
| Registrazione video | HD 720p at 30 fps (MP4 format) |
| Supporti di memorizzazione | Scheda di memoria SD/SDHC/SDXC |
| Fonte di alimentazione | 4 x AA Alkaline or Ni-MH batteries |
| Connettività | HDMI, USB 2.0, Wi-Fi |
| Dimensioni (L x A x P) | Dimensioni: 11.8 x 9.99 x 8.09 cm |
| Peso | 448 Grams (excluding batteries and memory card) |
| Caratteristiche speciali | Auto Focus, Face Detection, SR Auto, Panorama Mode |
8. Garanzia e supporto
For information regarding warranty coverage, service, or technical support for your Fujifilm Finepix S4300 camera, please refer to the warranty card included with your product or visit the official Fujifilm website for your region. Specific warranty terms and conditions may vary by country or region of purchase.
Si prega di conservare la prova d'acquisto per eventuali reclami in garanzia.


