1. Introduzione
This manual provides detailed instructions for the proper setup, operation, and maintenance of your AmScope ME1400T Inverted Trinocular Metallurgical Microscope. This instrument is designed for observing opaque or metallic specimens, or larger specimens that cannot be viewed on a standard microscope stage, utilizing reflected light.
The ME1400T features 40X-400X magnification, WF10x eyepieces with a reticle, Kohler condenser, 30W halogen illumination with rheostat, and a double-layer mechanical stage. Please read this manual thoroughly before using the microscope to ensure safe and optimal performance.
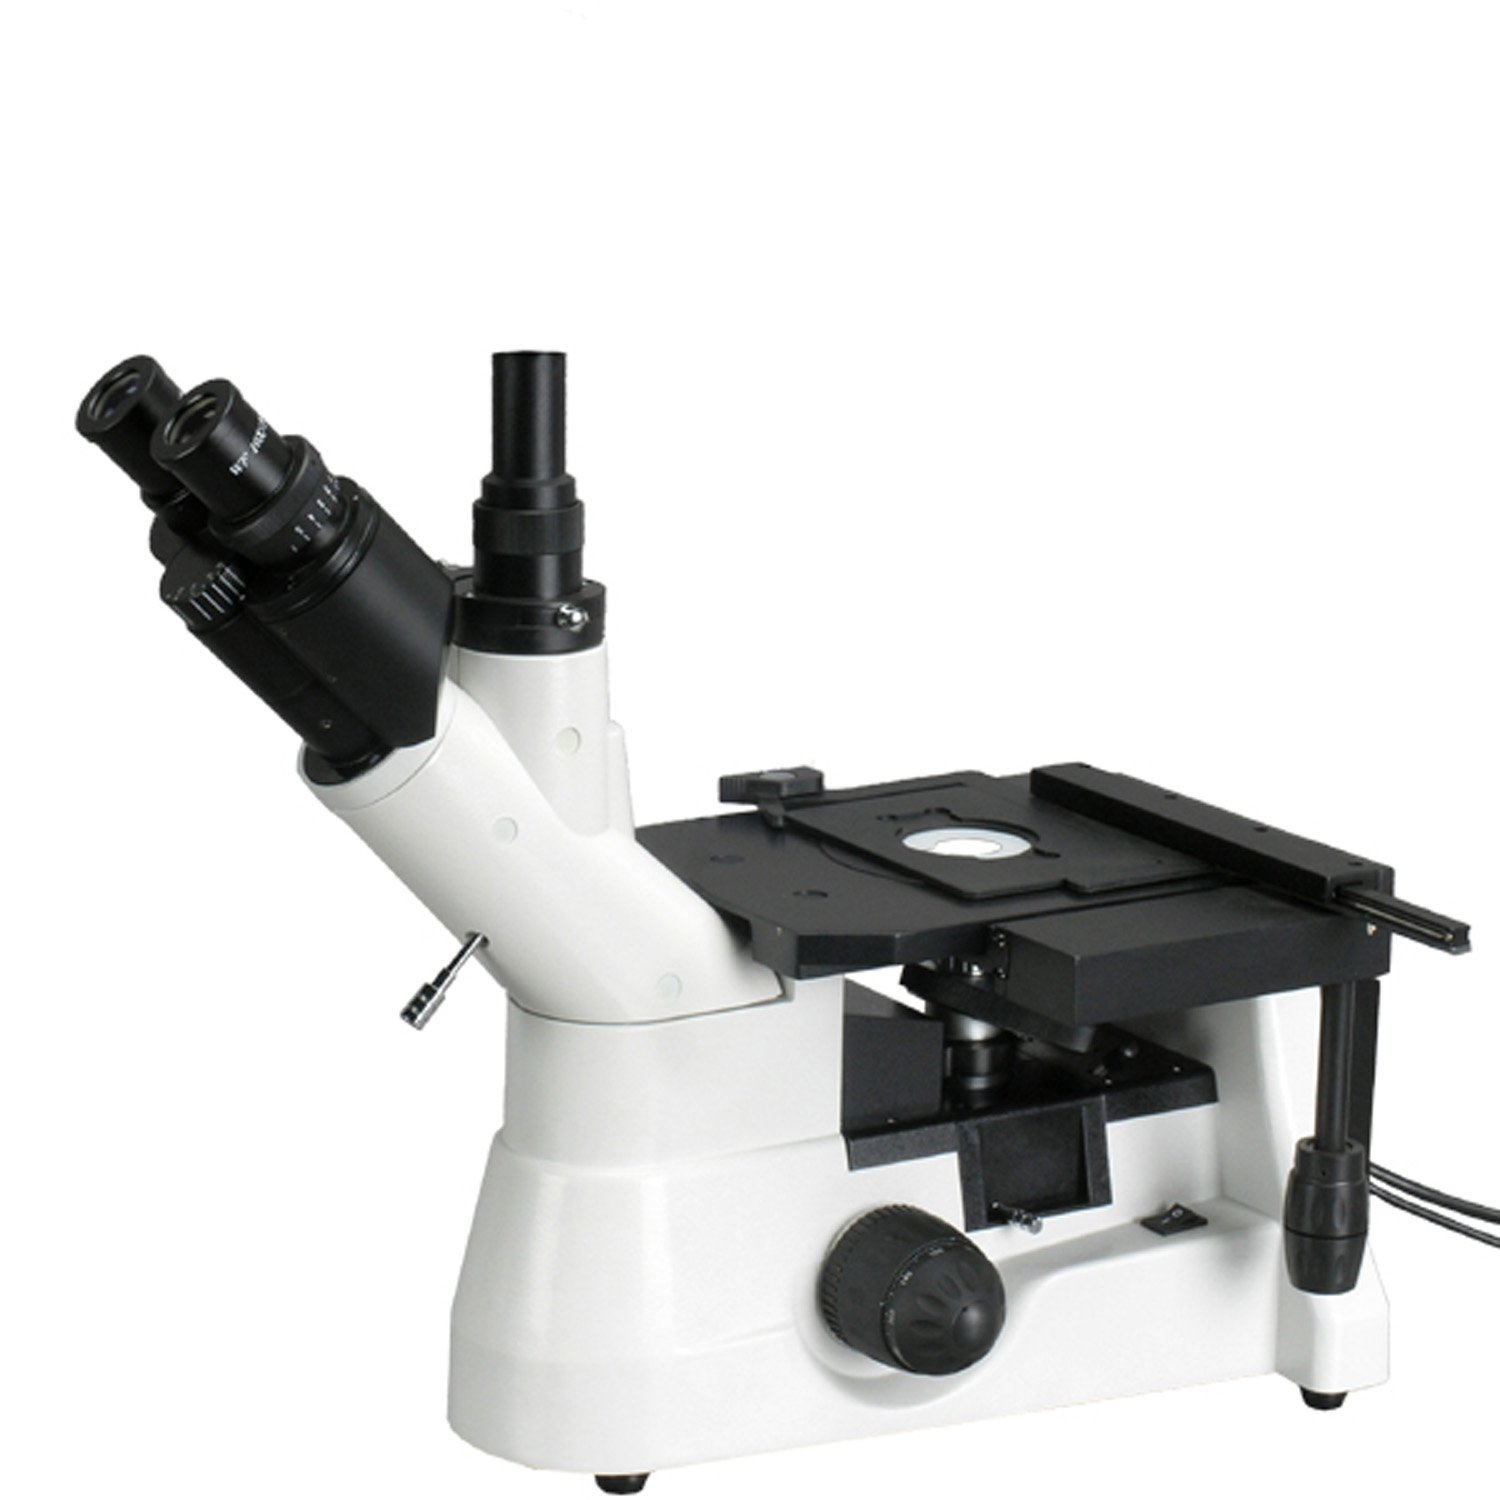
Figure 1: AmScope ME1400T Inverted Trinocular Metallurgical Microscope
2. Informazioni sulla sicurezza
- Maneggiare sempre il microscopio con cura. Evitare movimenti o urti bruschi.
- Assicurarsi che il microscopio sia posizionato su una superficie stabile e piana per evitare che si ribalti.
- Connect the power cord only to a grounded electrical outlet with the correct voltage (85-230 V).
- Do not expose the microscope to direct sunlight, high temperatures, dust, or high humidity.
- Scollegare il cavo di alimentazione prima di pulire o effettuare qualsiasi operazione di manutenzione.
- Never touch optical surfaces with bare hands. Use a soft, lint-free cloth or lens paper for cleaning.
- Keep small parts and accessories away from children.
- If the halogen bulb needs replacement, ensure the microscope is unplugged and the bulb has cooled down to prevent burns.
3. Componenti finitiview
Familiarize yourself with the main components of your ME1400T microscope:
- Trinocular Head: Allows for simultaneous viewing through eyepieces and connection of a camera to the vertical port. Features a Siedentopf design for interpupillary distance adjustment and 45-degree inclination for comfortable viewing.
- Oculari: Includes a pair of 10x20mm high-eyepoint super-widefield eyepieces and one 10x measuring eyepiece with a built-in reticle and micrometer (0.1mm graduations).
- Nasello: Forward-facing quintuple nosepiece holding the objective lenses.
- Lenti dell'obiettivo: Four DIN metallurgical objectives (4x, 10x, 20x, 40x) providing color correction and improved focus.
- Meccanico Stage: Doppio strato meccanico stage with a removable stage plate and stage stop to protect specimens and objectives.
- Manopole di messa a fuoco: Graduated coarse and fine focus knobs with tension control.
- Sistema di illuminazione: Episcopic reflected and Brightfield illumination with a 30W halogen light source and rheostat for intensity control. Includes a polarizing condenser.

Figure 2: WF10x Eyepieces with Diopter Adjustment

Figure 3: Quintuple Nosepiece with Metallurgical Objectives
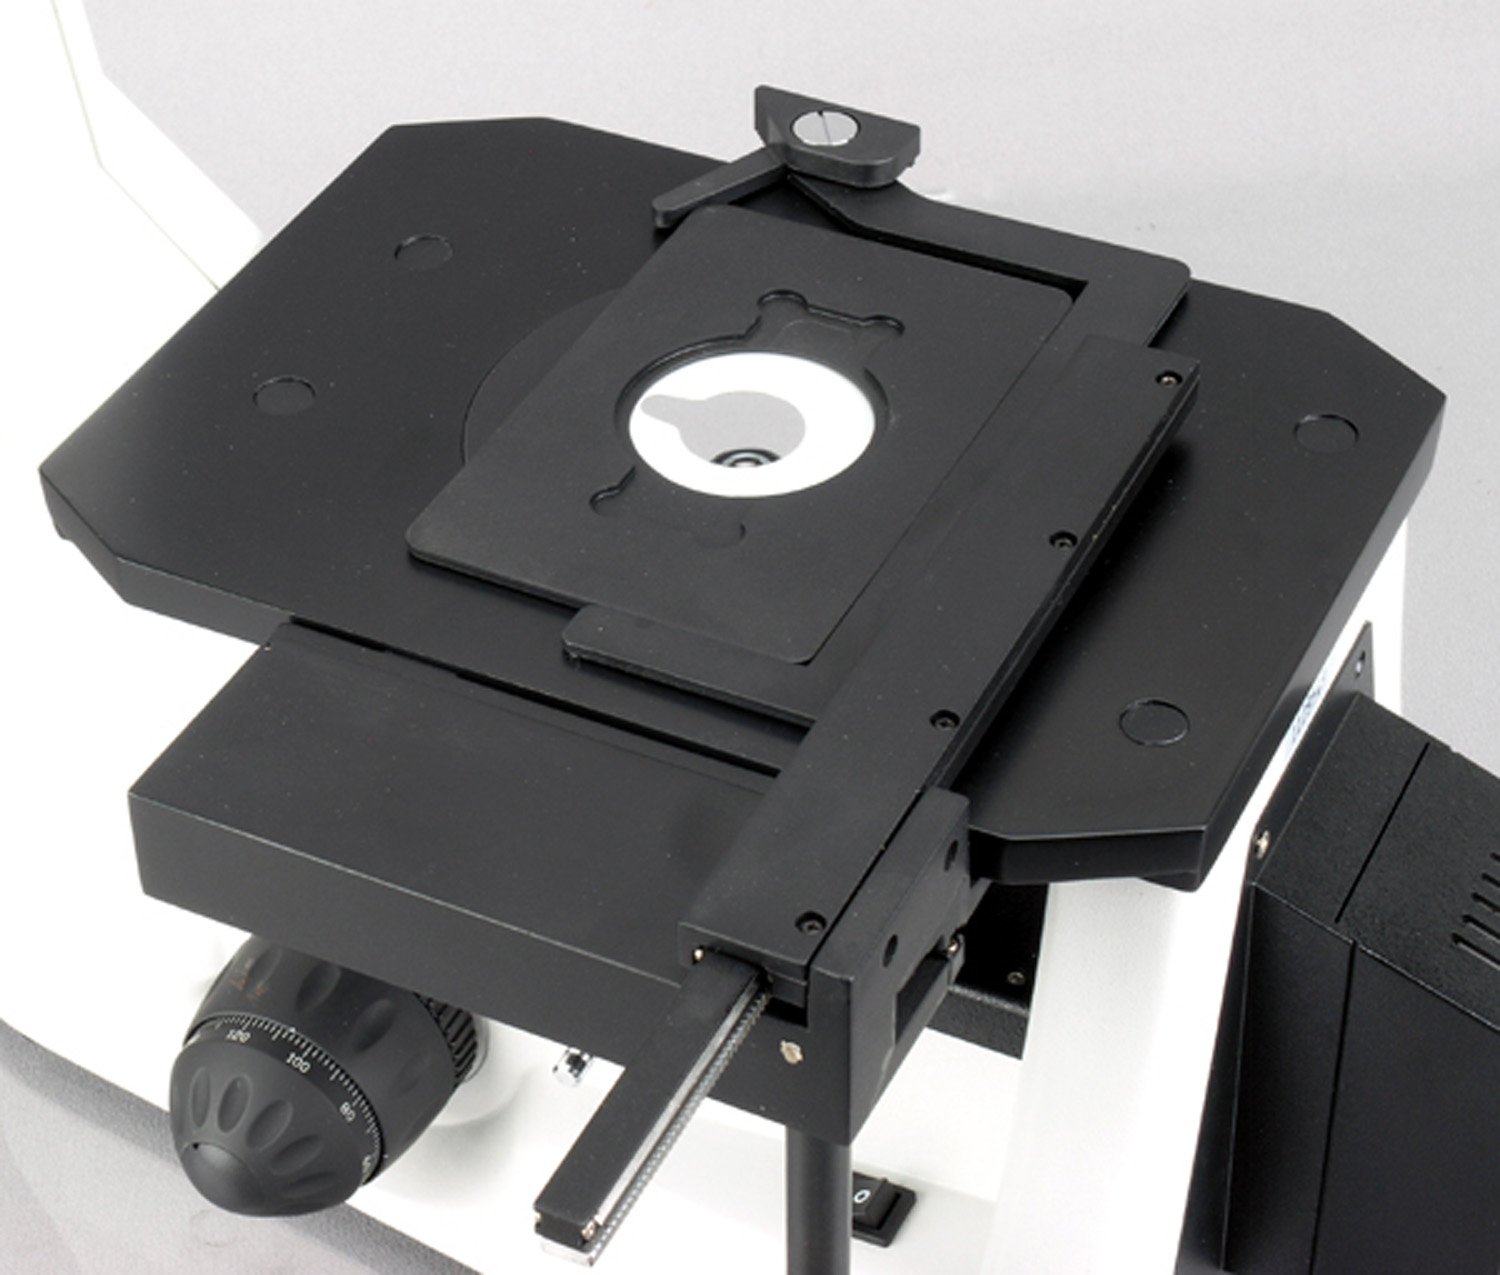
Figure 4: Double-Layer Mechanical Stage
4. Impostazione
- Disimballaggio: Rimuovere con cautela tutti i componenti dall'imballaggio. Conservare l'imballaggio originale per eventuali trasporti o rimessaggio futuri.
- Posizionamento: Place the microscope on a sturdy, level, and vibration-free surface. Ensure adequate space around the instrument for operation and ventilation.
- Attach Trinocular Head: Gently insert the trinocular head into the top port of the microscope body. Secure it by tightening the set screw.
- Inserire gli oculari: Insert the pair of WF10x20mm eyepieces into the binocular tubes. If using the measuring eyepiece, replace one of the WF10x20mm eyepieces with it.
- Connetti alimentazione: Plug the power cord into the microscope's power input, then into a grounded electrical outlet.
- Regolazioni iniziali:
- Distanza interpupillare: While looking through the eyepieces, adjust the distance between the two eyepiece tubes until a single, clear circular field of view viene osservato.
- Regolazione diottrica: Focus on a specimen using the 10x objective and the right eyepiece only. Then, without touching the coarse or fine focus knobs, adjust the diopter ring on the left eyepiece until the image is sharp through the left eyepiece.
5. Istruzioni per l'uso
- Accensione: Flip the main power switch to the 'ON' position. The halogen illumination should light up.
- Regola l'illuminazione: Use the rheostat knob to adjust the brightness of the halogen light source to a comfortable level.
- Posizionare il campione: Place your specimen on the mechanical stage. Usa la stage clip per fissarlo se necessario.
- Seleziona Obiettivo: Rotate the nosepiece to select the lowest power objective (e.g., 4x) first. Ensure the objective clicks firmly into place.
- Messa a fuoco:
- Using the coarse focus knob, slowly raise the stage until the specimen comes into approximate focus.
- Use the fine focus knob to achieve a sharp, clear image.
- Modifica dell'ingrandimento: Rotate the nosepiece to a higher power objective. The microscope is parfocal, meaning only minor adjustments with the fine focus knob should be needed.
- Using the Measuring Eyepiece: If installed, the measuring eyepiece allows for basic measurements. Calibrate the reticle using a stage micrometer (not included) for accurate measurements at different magnifications.
- Porto trinoculare: For camera attachment, slide the light path selector (if present) to direct light to the vertical trinocular port. A camera (sold separately) can be mounted here for image capture. The port has a 100% light-splitting rate.
- Polarizing Illumination: The integrated polarizing condenser can be engaged for observing specimens under polarized light, enhancing contrast for certain materials.
- Spegni: After use, turn the rheostat to the lowest setting, then flip the main power switch to 'OFF'. Unplug the microscope if it will not be used for an extended period.
6. Manutenzione
- Pulizia delle lenti: Use a soft brush to remove dust, then gently wipe with lens paper moistened with lens cleaning solution. Do not use abrasive cloths or solvents.
- Pulizia generale: Pulisci il corpo del microscopio con un panno morbido eamp panno. Evitare che l'umidità penetri nei componenti elettrici.
- Sostituzione della lampadina alogena:
- Unplug the microscope and allow the bulb to cool completely.
- Locate the bulb housing (refer to your specific model's diagram if available).
- Carefully remove the old bulb and insert a new 30W halogen bulb, avoiding touching the glass with bare hands.
- Secure the housing and plug in the microscope.
- Magazzinaggio: When not in use, cover the microscope with a dust cover to protect it from dust and debris. Store in a cool, dry place.
7. Risoluzione Dei Problemi
| Problema | Possibile causa | Soluzione |
|---|---|---|
| Nessuna illuminazione | Power cord unplugged, power switch off, bulb burnt out. | Check power connection, turn on switch, replace bulb. |
| L'immagine è sfocata o fuori fuoco | Incorrect focus adjustment, objective not fully engaged, dirty lens. | Adjust coarse/fine focus, rotate nosepiece until objective clicks, clean lenses. |
| Illuminazione non uniforme | Condenser not centered, light source obstruction. | Adjust Kohler condenser, check for obstructions in light path. |
| Cannot adjust interpupillary distance | Head not properly seated or secured. | Ensure trinocular head is fully inserted and set screw is tightened. |
8. Specifiche
| Caratteristica | Specificazione |
|---|---|
| Modello | ME1400T |
| Tipo di microscopio | Inverted Trinocular Metallurgical |
| Gamma di ingrandimento | 40X - 400X |
| Oculari | WF10x20mm (pair), 10x Measuring Eyepiece (with 0.1mm reticle) |
| Lenti dell'obiettivo | 4x, 10x, 20x, 40x DIN Metallurgical Achromatic |
| Revolver nasale | Quintuple, Forward-facing |
| Viewcapo | Siedentopf Trinocular, 45-degree inclination |
| Distanza interpupillare | 55 - 75 mm |
| Illuminazione | Episcopic Reflected Brightfield and Polarizing, 30W Halogen with Rheostat |
| Condensatore | Kohler, Polarizing |
| Stage | Doppio strato meccanico Stage con Stage Stop |
| Messa a fuoco | Coarse and Fine Adjustment with Tension Control |
| Alimentazione elettrica | 85-230 V |
| Peso dell'articolo | 27.22 kg (60 libbre) |
9. Garanzia e supporto
For warranty information, technical support, or service inquiries regarding your AmScope ME1400T microscope, please contact AmScope customer service directly. Refer to the official AmScope websito o la documentazione di acquisto per i dettagli di contatto e i termini di garanzia più aggiornati.
Si consiglia di registrare il prodotto al momento dell'acquisto per agevolare eventuali future esigenze di supporto.