
1. Introduzione
Grazie per l'acquistoasing the KLH R5100 Surround Sound Receiver. This receiver is designed to provide high-quality audio and video performance for your home entertainment system. It features multiple audio and video inputs, surround sound processing, and a powerful amplifier to deliver an immersive listening experience. Please read this manual thoroughly before operating the unit to ensure proper setup and optimal performance.
2. Informazioni importanti sulla sicurezza
Per ridurre il rischio di scosse elettriche, incendi o danni all'unità, osservare le seguenti precauzioni di sicurezza:
- Fonte di energia: Collegare l'unità solo a un alimentatore CA da 120 V, 60 Hz.
- Ventilazione: Assicurare un'adeguata ventilazione. Non ostruire le aperture di ventilazione. Lasciare spazio sufficiente attorno all'unità per un corretto flusso d'aria.
- Acqua e umidità: Non esporre l'unità a pioggia, umidità o umidità eccessiva. Non posizionare oggetti contenenti liquidi, come vasi, sull'unità.
- Calore: Tenere l'unità lontana da fonti di calore quali radiatori, bocchette di riscaldamento, stufe o altri apparecchi (inclusi amplificatori) che producono calore.
- Pulizia: Scollegare l'unità dalla presa a muro prima di pulirla. Utilizzare un panno asciutto per la pulizia.
- Manutenzione: Non tentare di riparare l'unità da soli. Per qualsiasi intervento di assistenza, rivolgersi a personale qualificato.
- cavi: Proteggere il cavo di alimentazione da eventuali calpestamenti o schiacciamenti, in particolare in corrispondenza delle spine, delle prese di corrente e del punto in cui esce dall'unità.
3. Contenuto della confezione
Si prega di verificare che il pacco contenga i seguenti articoli:
- KLH R5100 Surround Sound Receiver
- Unità di controllo remoto
- Manuale dell'utente
- Cavi audio/video (tipo RCA)
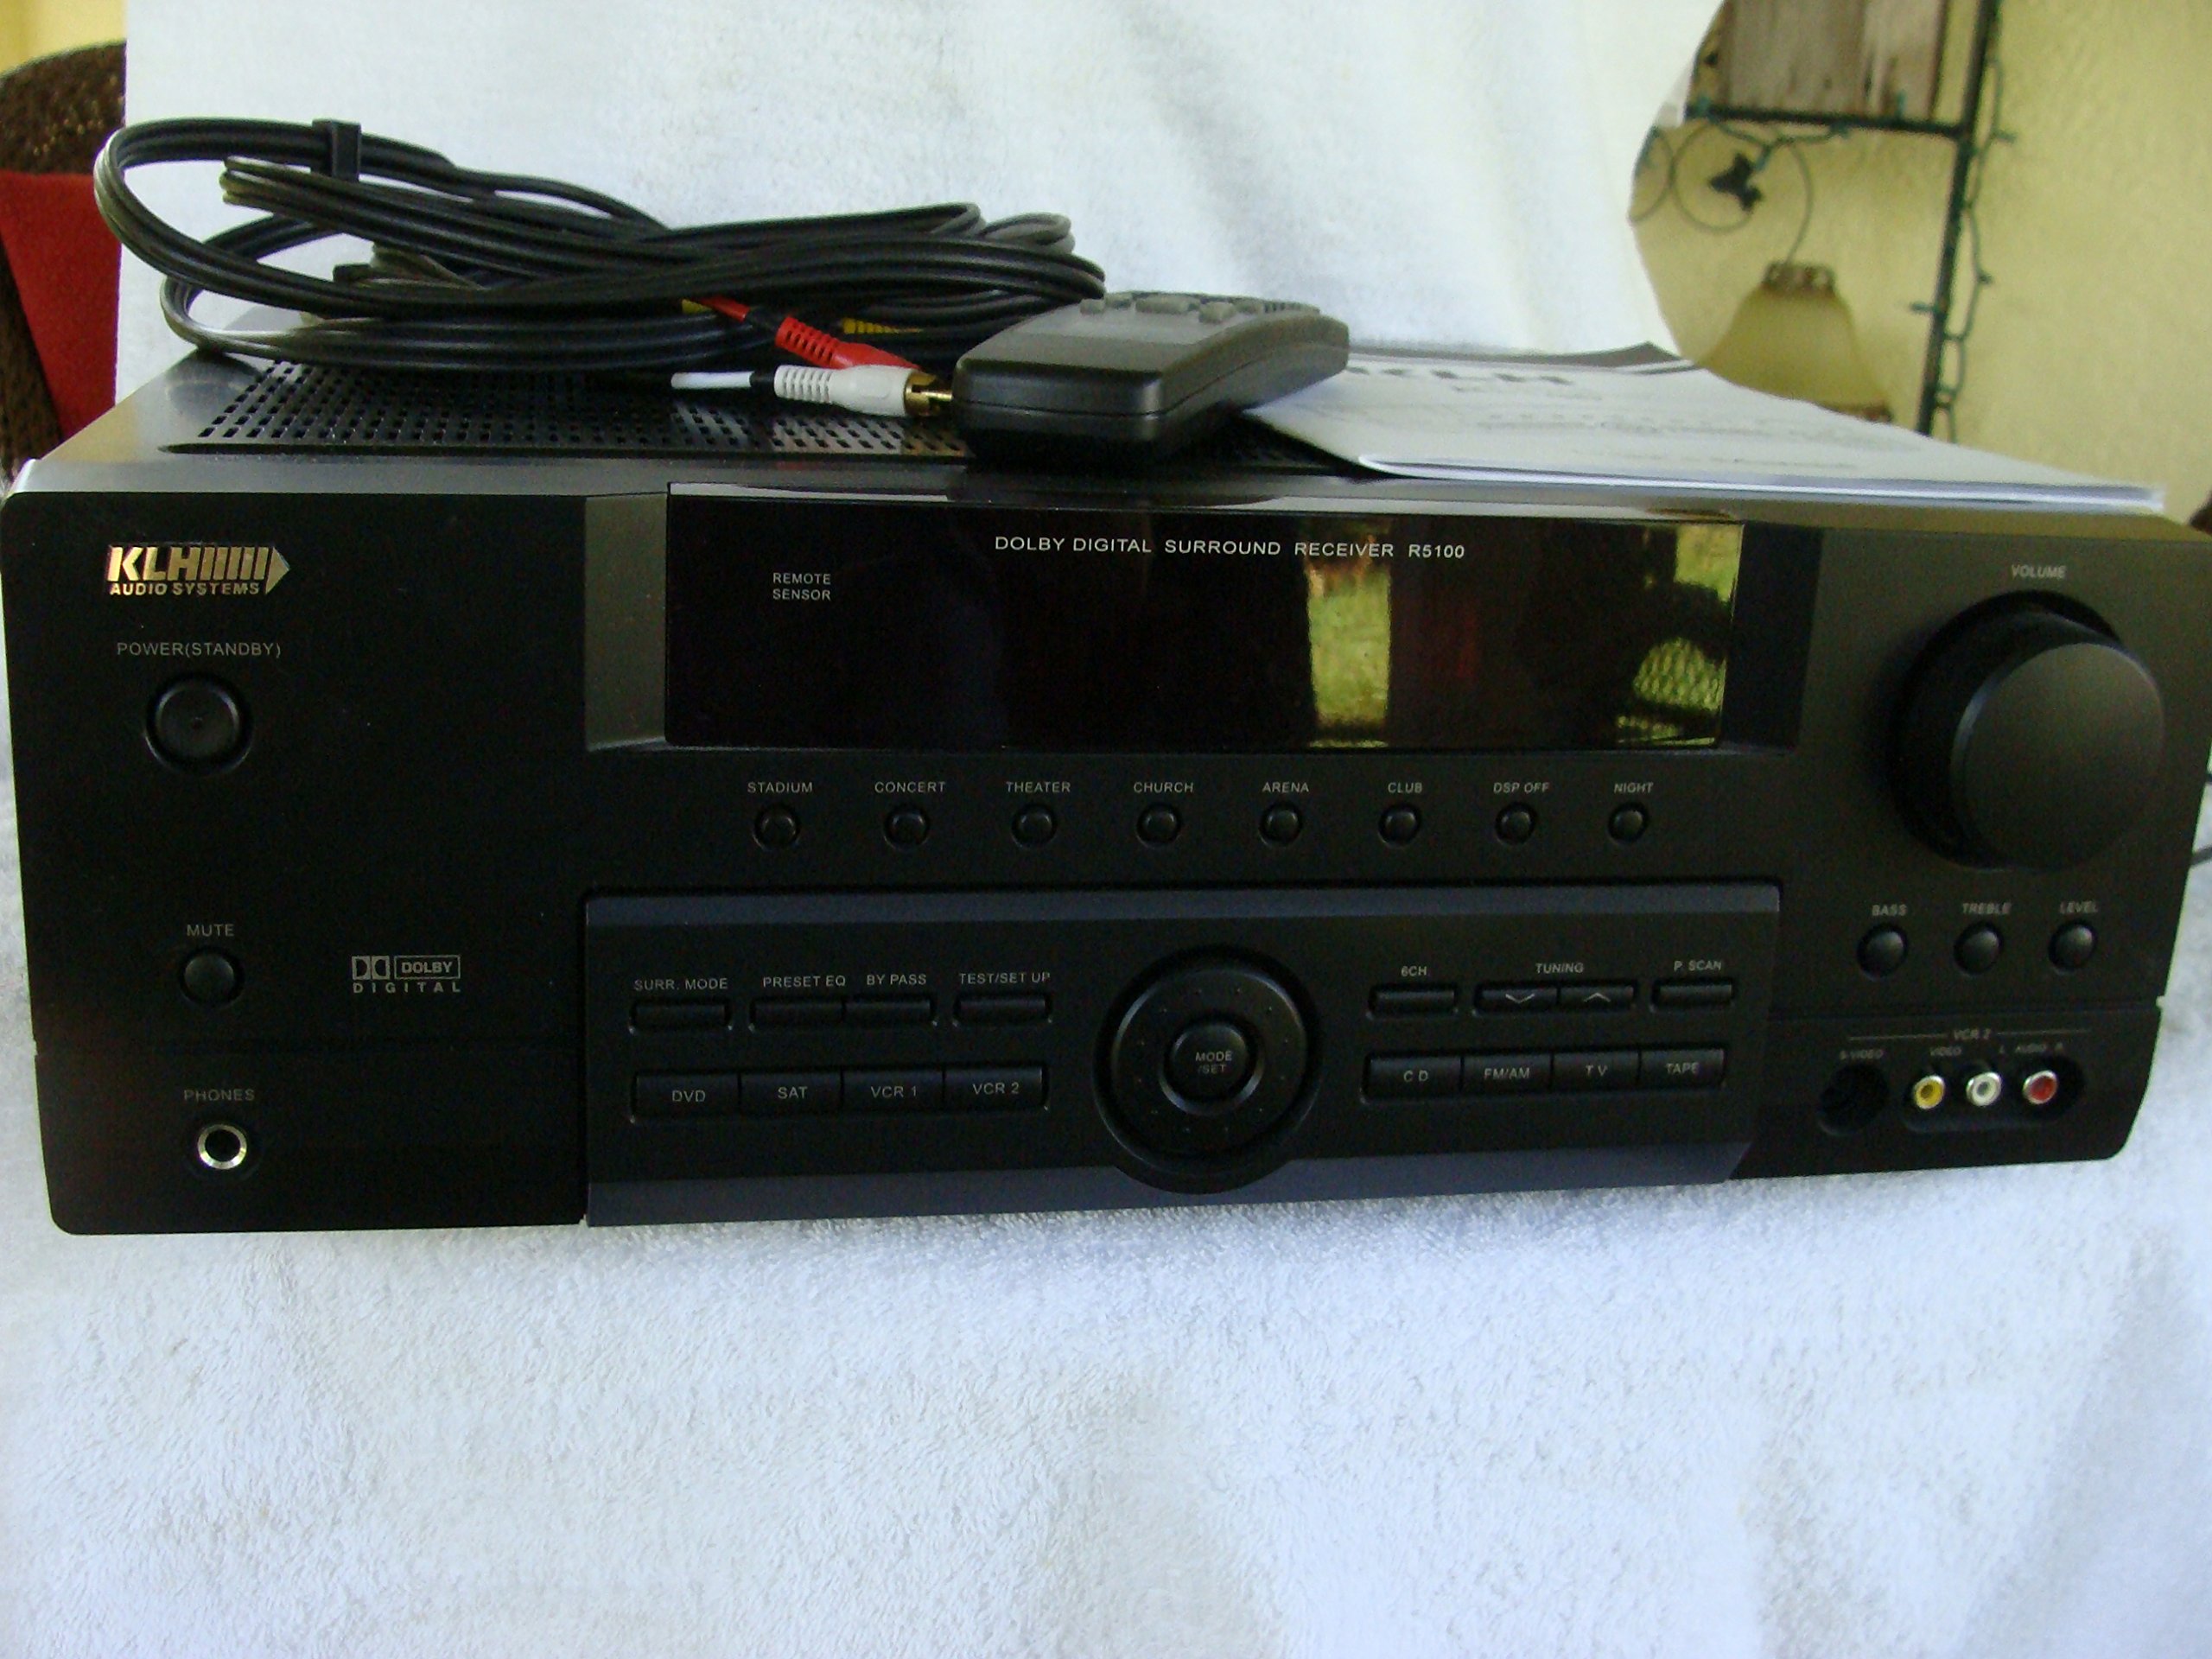
Image: The KLH R5100 receiver, its remote control, user manual, and included audio/video cables.
4. Prodotto finitoview
4.1 Controlli del pannello frontale
The front panel provides access to essential controls and indicators for daily operation.

Immagine: Un dettaglio view of the receiver's front panel, highlighting the display, volume control, and input selection buttons.
- Pulsante di accensione: Accende o spegne il ricevitore.
- Selettori di ingresso: Buttons for DVD, SAT, VCR 1, VCR 2, CD, FM/AM, TV, TAPE to choose your audio/video source.
- Manopola del volume: Regola il volume di uscita complessivo.
- Surround Mode Buttons: Select various sound fields like Stadium, Concert, Theater, Church, Arena, Club, DSP Off, Night.
- Bass/Treble/Level: Controls for adjusting audio tone and individual channel levels.
- Jack per cuffie: Per l'ascolto privato.
4.2 Collegamenti del pannello posteriore
The rear panel houses all input and output terminals for connecting your audio and video components, as well as speakers.

Image: The full rear panel of the receiver, displaying all connection ports for audio, video, and speakers.
- Terminali altoparlanti: Connections for Main (Front Left/Right), Center, and Rear (Surround Left/Right) speakers.
- Ingressi audio (RCA): For connecting CD players, tape decks, VCRs, TVs, and other stereo audio sources.
- Video Inputs/Outputs (RCA/S-Video): For connecting video sources like DVD players, VCRs, and TVs.
- Ingressi audio digitali (ottici/coassiali): For connecting digital audio sources like DVD players or set-top boxes.
- 6CH Direct Input: For connecting external multi-channel decoders or players with 5.1 analog outputs.
- Uscita subwoofer: Uscita RCA per il collegamento di un subwoofer attivo.
- Terminali dell'antenna: For FM and AM antennas.
4.3 unità di controllo remoto
The remote control provides convenient access to all receiver functions from your listening position.

Immagine: un primo piano view of the remote control unit, detailing its buttons for various functions.
- Accensione/spegnimento: Accende o spegne il ricevitore.
- Selettori di ingresso: Dedicated buttons for each input source (DVD, CD, TV, etc.).
- Volume su/giù: Regola il volume principale.
- Disattiva audio: Disattiva temporaneamente l'uscita audio.
- Modalità Surround: Cycles through available surround sound modes.
- Level/Test: For adjusting individual speaker levels and running a test tone.
- Controlli del sintonizzatore: For FM/AM station tuning and memory functions.
5. Impostazione
5.1 Collegamento degli altoparlanti
Ensure the receiver is unplugged from the power outlet before making any connections.
- Altoparlanti anteriori: Connect your main left and right speakers to the 'MAIN SPEAKERS (8Ω)' terminals. Ensure correct polarity (+ to + and - to -).
- Altoparlante centrale: Connect your center channel speaker to the 'CENTER SPEAKER (8Ω)' terminals.
- Altoparlanti posteriori: Connect your surround left and right speakers to the 'REAR SPEAKERS (8Ω)' terminals.
- Subwoofer: Connect an active subwoofer to the 'SUBWOOFER OUT' RCA jack using a single RCA cable.

Immagine: dettagliata view of the speaker connection terminals on the rear panel.
5.2 Collegamento di sorgenti audio/video
Use appropriate cables (RCA, Optical, Coaxial) to connect your source components to the receiver.
- Lettore DVD: Connect the audio output of your DVD player to the 'DVD' audio input jacks (RCA) on the receiver. For digital audio, use either the 'DIGITAL IN OPTICAL' or 'DIGITAL IN COAXIAL' input. Connect the video output to the 'DVD' video input.
- Lettore CD: Connect the audio output of your CD player to the 'CD' audio input jacks (RCA).
- TV/Cable Box: Connect the audio output of your TV or cable box to the 'TV' audio input jacks (RCA). Connect video output to the 'TV' video input.
- Altri dispositivi: Use 'SAT', 'VCR 1', 'VCR 2', or 'TAPE' inputs for other audio/video components as needed.

Image: A close-up of the digital audio inputs (Coaxial, Optical) and the 6-channel direct input section on the rear panel.
5.3 Collegamento dell'antenna
Connect the supplied FM and AM antennas to their respective terminals on the rear panel for radio reception.
6. Istruzioni per l'uso
6.1 Funzionamento di base
- Accensione: Premere il pulsante di accensione sul pannello frontale o sul telecomando.
- Seleziona ingresso: Press the desired input selector button (e.g., 'DVD', 'CD') on the front panel or remote control to choose your source.
- Regola volume: Turn the Volume knob on the front panel or use the Volume Up/Down buttons on the remote control.
6.2 Surround Sound Modes
The R5100 offers various sound modes to enhance your listening experience:
- Stadio: Simulates the acoustics of a large stadium.
- Concerto: Creates a concert hall ambiance.
- Teatro: Optimized for movie playback, enhancing dialogue and effects.
- Chiesa: Replicates the spaciousness of a church.
- Arena: Provides a wide, open sound field.
- Club: Simulates a lively club environment.
- DSP Off: Disables digital sound processing for a direct stereo signal.
- Notte: Reduces dynamic range for late-night listening without disturbing others.
Press the 'SURR. MODE' button on the remote or front panel to cycle through these modes.
Controllo a 6.3 toni
Use the BASS and TREBLE controls on the front panel or remote to adjust the low and high frequency response. The LEVEL controls allow for fine-tuning of individual speaker output levels.
6.4 Funzionamento del sintonizzatore
To listen to radio:
- Press the 'FM/AM' input selector.
- Use the 'TUNING' buttons on the front panel or remote to find stations.
- Press 'MEMORY' to store favorite stations, and 'P.SCAN' to scan through presets.
7. Manutenzione
To ensure the longevity and optimal performance of your KLH R5100 receiver, follow these maintenance guidelines:
- Pulizia: Wipe the exterior surfaces with a soft, dry cloth. Do not use abrasive cleaners, waxes, or solvents as they may damage the finish.
- Ventilazione: Regularly check that the ventilation openings are not obstructed by dust or debris. Use a soft brush or vacuum cleaner to gently remove any build-up.
- Cavo di alimentazione: Inspect the power cord periodically for any signs of damage. If damaged, discontinue use and contact qualified service personnel.
- Magazzinaggio: Se si conserva l'unità per un periodo prolungato, scollegarla dalla presa di corrente e coprirla per proteggerla dalla polvere.
8. Risoluzione Dei Problemi
If you encounter problems with your receiver, refer to the following common issues and solutions before seeking professional service.
| Problema | Possibile causa | Soluzione |
|---|---|---|
| Nessun potere | Power cord unplugged; Power outlet not active | Assicurarsi che il cavo di alimentazione sia collegato saldamente; controllare la presa di corrente con un altro dispositivo |
| Nessun suono | Incorrect input selected; Speakers not connected properly; Volume too low; Mute function active | Select correct input source; Check speaker connections and polarity; Increase volume; Deactivate Mute |
| Il telecomando non funziona | Batterie scariche; Ostruzione tra telecomando e ricevitore; Sensore remoto bloccato | Replace batteries; Remove any obstructions; Ensure remote sensor on receiver is clear |
| Scarsa ricezione radio | Antenna non collegata o posizionata male | Connect antennas securely; Adjust antenna position for better reception |
| Suono distorto | Input signal too high; Speaker impedance mismatch; Damaged cables | Reduce source volume; Ensure speakers match 8Ω impedance; Check and replace damaged cables |
9. Specifiche
The following are the technical specifications for the KLH R5100 Surround Sound Receiver:
- Numero modello: R5100
- Dimensioni del prodotto: 16.88 x 6.88 x 15.75 pollici
- Peso dell'articolo: 24.2 libbre
- Fonte di energia: CA 120 V, 60Hz
- Consumo energetico: 320W
- Modalità di uscita audio: Circondare
- Configurazione del canale audio surround: 5.1
- Tecnologia di connettività: RCA, 3.5mm Jack, Optical, Coaxial
- Dispositivi compatibili: Altoparlanti
- Tipo di controller: Remoto
- Caratteristica speciale: Advanced Room Calibration (as per product listing, though specific details may vary)
- Colore: Nero
10. Garanzia e supporto
For warranty information and customer support, please refer to the documentation included with your purchase or contact KLH customer service directly. Keep your proof of purchase for any warranty claims.