
SALORA CR612
Manuale utente della radiosveglia digitale AM/FM SALORA CR612
Modello: CR612
1. Prodotto finitoview
The SALORA CR612 is a compact digital alarm clock radio designed for bedside use. It features a large LED display, dual alarm functionality, AM/FM radio tuning, and convenient snooze and sleep timer functions. This manual provides detailed instructions for its operation.

Immagine: Angolata view of the SALORA CR612 Digital Alarm Clock Radio, showing the green LED display and top control buttons.
Controlli e display
Familiarize yourself with the main controls and display elements:
- Ampio display LED: Mostra l'ora, lo stato della sveglia e la frequenza radio.
- Pulsante di accensione: Accende/spegne l'unità.
- Pulsante Ripeti: Disattiva temporaneamente l'allarme.
- Pulsante di impostazione dell'ora: Usato per impostare l'ora corrente.
- Alarm 1/Alarm 2 Buttons: Used to set and activate individual alarms.
- Tuning/Volume Knobs: Adjust radio frequency and sound volume.
- Pulsante della fascia: Passa dalla banda radio AM a quella FM.
- Memory/Preset Buttons: Save and recall radio stations.
2. Impostazione
2.1 Collegamento di alimentazione
The SALORA CR612 operates primarily on AC power with a battery backup feature to retain time and alarm settings during power outages.
- Collegare l'alimentazione CA: Collegare il cavo di alimentazione CA a una presa a muro standard.
- Installare la batteria di backup: Open the battery compartment located at the bottom or rear of the unit. Insert 2 x AAA batteries (not included) according to the polarity markings. These batteries are for backup only and will not power the display or radio functions continuously.

Immagine: Posteriore view of the SALORA CR612, highlighting the power cable connection and the battery compartment for backup.
2.2 Configurazione dell'antenna
For optimal FM radio reception, extend the built-in wire antenna fully. For AM reception, the unit has a built-in ferrite bar antenna; try rotating the unit for better signal.
3. Istruzioni per l'uso
3.1 Impostazione dell'ora
- Premere e tenere premuto il tasto IMPOSTAZIONE DELL'ORA pulsante. Le cifre delle ore inizieranno a lampeggiare.
- Utilizzare il TUNING/VOLUME knob (or +/- buttons if present) to adjust the hour. Pay attention to AM/PM indicators if applicable.
- Premere il tasto IMPOSTAZIONE DELL'ORA nuovamente il pulsante. Le cifre dei minuti lampeggeranno.
- Utilizzare il TUNING/VOLUME knob to adjust the minutes.
- Premere il tasto IMPOSTAZIONE DELL'ORA nuovamente il pulsante per confermare e uscire dalla modalità di impostazione dell'ora.
3.2 Impostazione degli allarmi (doppio allarme)
The CR612 features two independent alarms (Alarm 1 and Alarm 2).
- Per impostare la sveglia 1: Premere e tenere premuto il tasto ALLARME 1 pulsante. Le cifre dell'ora della sveglia lampeggeranno.
- Utilizzare il TUNING/VOLUME knob to set the desired alarm hour.
- Premere il tasto ALLARME 1 nuovamente il pulsante. Le cifre dei minuti della sveglia lampeggeranno.
- Utilizzare il TUNING/VOLUME knob to set the desired alarm minutes.
- Premere il tasto ALLARME 1 button again to select the alarm source (Buzzer or Radio). The corresponding indicator will light up.
- Premere il tasto ALLARME 1 button once more to confirm and activate Alarm 1. An alarm indicator (e.g., a bell icon or 'A1') will appear on the display.
- Ripetere il procedimento utilizzando il ALLARME 2 pulsante per impostare la sveglia 2.
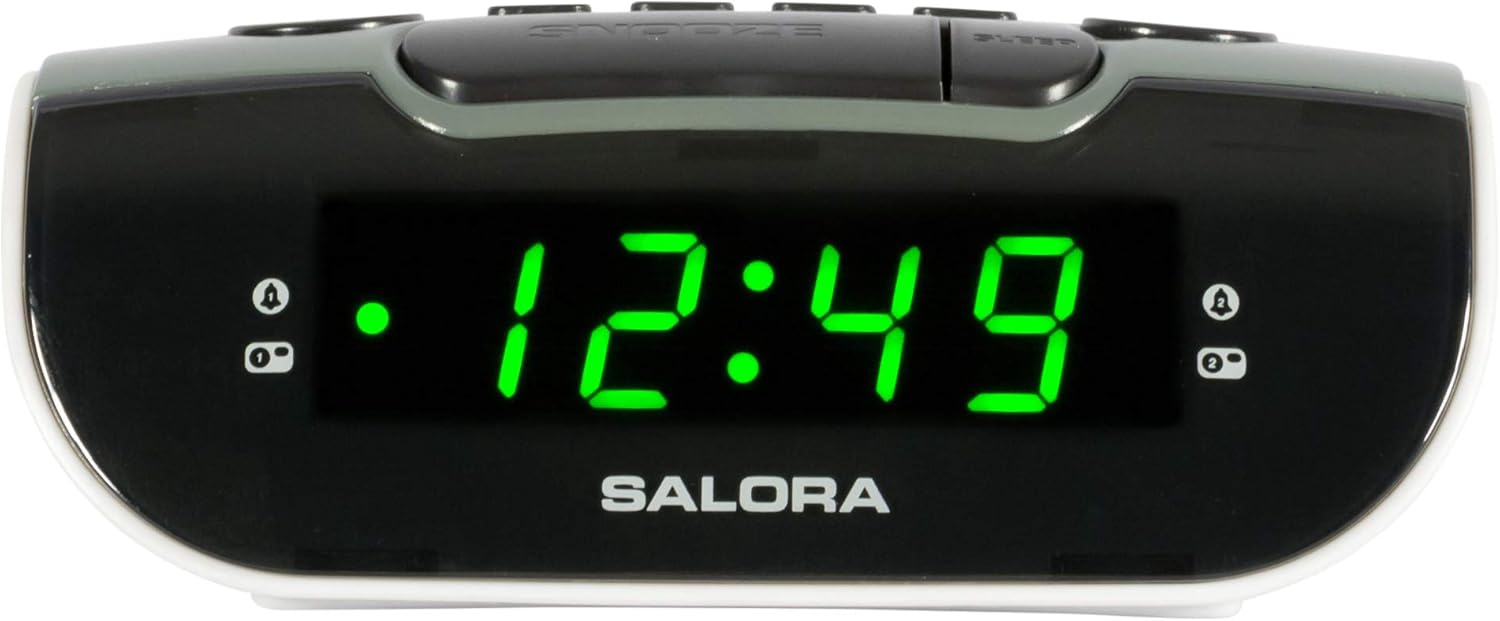
Image: Close-up of the SALORA CR612 display, showing the time '12:49' and active alarm indicators.
3.3 Funzione posticipa
Quando suona un allarme, premere il tasto POSTICIPARE button to temporarily silence it. The alarm will sound again after approximately 9 minutes. To cancel the snooze and turn off the alarm completely, press the ENERGIA pulsante.
3.4 Funzionamento della radio
- Accendi la radio: Premere il tasto ENERGIA pulsante per accendere l'unità.
- Seleziona banda: Premere il tasto BANDA button to switch between AM and FM frequencies.
- Sintonizzazione della stazione: Utilizzare il ACCORDATURA manopola per sintonizzarsi manualmente sulla stazione radio desiderata.
- Regola volume: Utilizzare il VOLUME manopola per regolare il livello del suono.
- Salva preimpostazioni: To save a station, tune to it, then press and hold the MEMORIA button until the display flashes. Use the PRESET buttons (or tuning knob) to select a preset number, then press MEMORIA di nuovo per confermare.
- Richiama i preset: Premere brevemente il tasto PRESET pulsanti per scorrere le stazioni salvate.
3.5 Timer di spegnimento
Il timer di spegnimento automatico consente alla radio di funzionare per un periodo di tempo impostato prima di spegnersi automaticamente.
- Mentre la radio è in riproduzione, premere il tasto SONNO ripetutamente il pulsante per scorrere i tempi di sospensione disponibili (ad esempio, 10, 30, 60, 90 minuti o OFF).
- La radio si spegnerà automaticamente dopo l'orario selezionato.
4. Manutenzione
4.1 Pulizia
To clean the unit, wipe it with a soft, dry cloth. Do not use abrasive cleaners, waxes, or solvents as these can damage the finish. Ensure the unit is unplugged before cleaning.
4.2 Sostituzione della batteria
Replace the backup batteries (2 x AAA) annually or if the time and alarm settings are lost after a power interruption. Ensure correct polarity when inserting new batteries.
5. Risoluzione Dei Problemi
- Nessuna alimentazione/Display spento:
- Assicurarsi che il cavo di alimentazione CA sia collegato saldamente a una presa funzionante.
- Controllare se il pulsante di accensione è stato premuto.
- L'allarme non suona:
- Verify that the alarm is set and activated (check for the alarm indicator on the display).
- Ensure the alarm volume is not set to minimum if using radio alarm.
- Confirm the alarm time is correctly set (AM/PM).
- Scarsa ricezione radio:
- Estendere completamente l'antenna a filo FM.
- For AM, rotate the unit to find the best signal.
- Allontanare l'unità da altri dispositivi elettronici che potrebbero causare interferenze.
- Time/Settings Lost After Power Outage:
- Check and replace the backup batteries if necessary.
- Assicurarsi che le batterie siano inserite con la polarità corretta.
6. Specifiche
| Caratteristica | Dettaglio |
|---|---|
| Marca | SALORA |
| Numero di modello | CR612 |
| Dimensioni del prodotto | Dimensioni: 11.5 x 13 x 4.8 cm |
| Peso | 320 grammi |
| Fonte di alimentazione | AC Power (with 2x AAA battery backup) |
| Tipo di visualizzazione | LED digitale |
| Bande radiofoniche | AM/FM PLL Tuner |
| Caratteristiche speciali | Dual Alarm, Snooze, Sleep Timer |
| Tipologia di camera | Camera da letto |
| Colore | Grey (with black and white accents) |
7. Garanzia e supporto
7.1 Informazioni sulla garanzia
This product is covered by a standard manufacturer's warranty. For specific details regarding warranty duration and terms, please refer to the warranty card included with your purchase or contact your retailer. If you wish to return a product within 30 days of receipt because you have changed your mind, please consult the retailer's return policy. If you have received a defective or damaged product, please consult the retailer's help page on returns and refunds.
7.2 Assistenza clienti
For further assistance, technical support, or inquiries not covered in this manual, please contact SALORA customer service through their official website or the retailer where the product was purchased. Please have your model number (CR612) and purchase information ready when contacting support.
Ask a question about this manual
Ask about setup, troubleshooting, compatibility, parts, safety, or missing instructions. Manuals+ will review the question and use this page’s manual context to help answer it.