
1. Introduzione
This manual provides detailed instructions for the installation, operation, and maintenance of the Liftmaster STAR1000 Commercial Access Control Receiver. The STAR1000 is designed to manage access for commercial gate and door systems, offering robust control and user management capabilities.
Si prega di leggere attentamente il presente manuale prima di tentare qualsiasi installazione o operazione per garantire il corretto funzionamento e la sicurezza.
2. Informazioni sulla sicurezza
ATTENZIONE: Rischio di scosse elettriche o lesioni.
- L'installazione e il cablaggio devono essere eseguiti da personale qualificato, nel rispetto di tutti i codici elettrici locali.
- Disconnect power to the access control system before performing any wiring or maintenance.
- Do not operate the receiver with damaged components.
- Keep hands and clothing clear of moving gate or door mechanisms during operation.
3. Contenuto della confezione
Verificare che tutti gli articoli siano presenti nel pacco:
- Liftmaster STAR1000 Commercial Access Control Receiver Unit
- Hardware di montaggio (viti, tasselli)
- Manuale di istruzioni (questo documento)
- Antenna (if applicable, check specific model variant)
4. Configurazione e installazione
4.1 Montaggio del ricevitore
Select a suitable location for mounting the STAR1000 receiver. The location should be protected from direct weather exposure and allow for optimal antenna reception. Ensure adequate space for wiring connections.
- Mark the mounting holes on the desired surface using the receiver as a template.
- Se necessario, praticare dei fori pilota.
- Secure the receiver to the surface using the provided mounting hardware.
4.2 Collegamenti di cablaggio
The STAR1000 receiver requires power and connection to the gate/door operator control board. Refer to the wiring diagram provided with your specific gate/door operator for correct connections.
- Collegamento elettrico: Connect the receiver to a stable power source as specified in the product's electrical requirements. Ensure correct polarity.
- Connessioni di uscita: Connect the receiver's output terminals to the appropriate input terminals on your gate/door operator control board (e.g., common, open, close, stop).
- Connessione dell'antenna: Securely attach the antenna to the designated port on the receiver.
Consult a professional electrician if you are unsure about any wiring procedures.
4.3 Accensione iniziale
Once all connections are secure, apply power to the receiver. The display should illuminate, indicating the unit is operational. The initial setup menu may appear.
5. Istruzioni per l'uso
The Liftmaster STAR1000 features an LCD display and a keypad for configuration and user management.
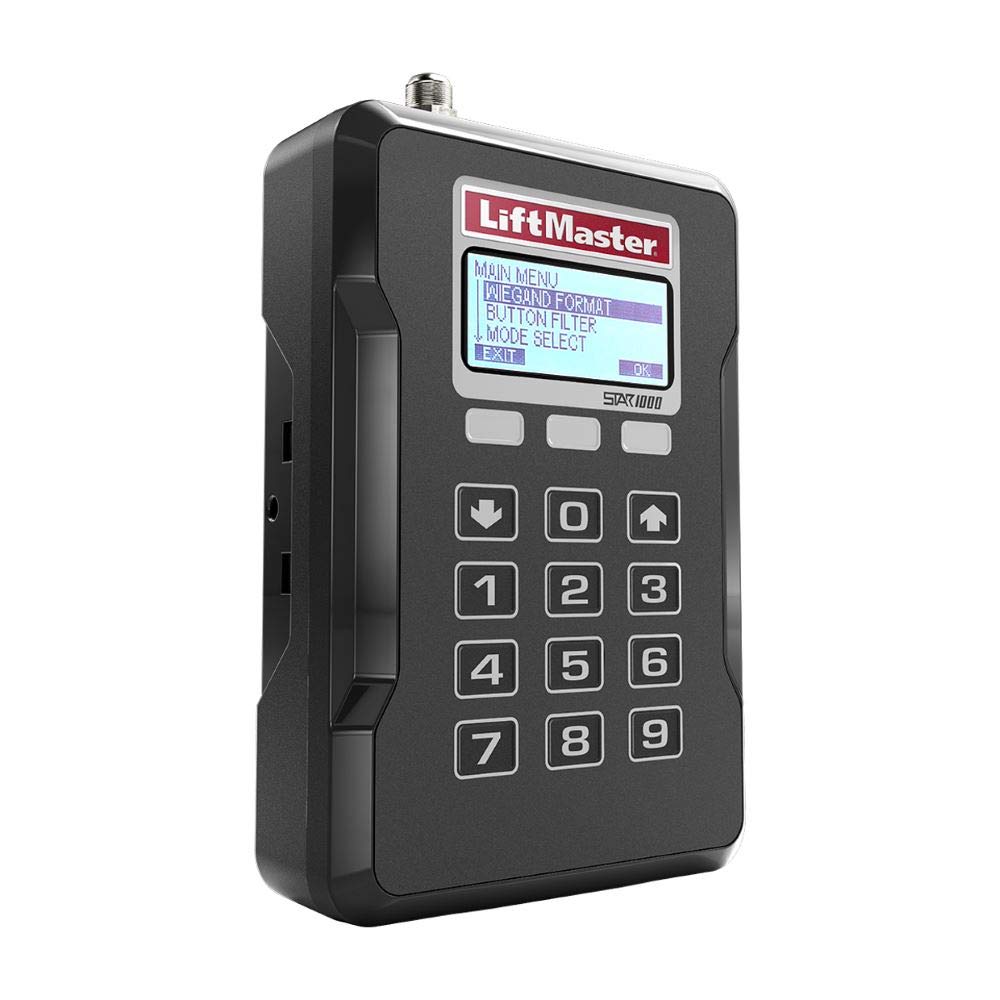
Figura 1: Fronte view of the Liftmaster STAR1000 receiver, showing the LCD display and numeric keypad.
The display shows "MAIN MENU" with options like "WIEGAND FORMAT", "BUTTON FILTER", "MODE SELECT", and "EXIT". A numeric keypad (0-9) and navigation buttons (up, down) are visible below the display.
5.1 Navigazione nel menu
Utilizzare il Up (▲) E Giù (▼) arrow buttons on the keypad to scroll through menu options. Press the OK button (located below the display, to the right) to select an option.
The main menu typically includes:
- MENU PRINCIPALE: The primary entry point for all settings.
- WIEGAND FORMAT: Configures the Wiegand protocol for external card readers or keypads.
- BUTTON FILTER: Adjusts settings related to button presses or remote signals.
- SELEZIONE DELLA MODALITÀ: Allows selection of different operating modes for the receiver.
- USCITA: Returns to the previous menu or exits the menu system.
5.2 Programming Remotes/Users
The STAR1000 supports programming multiple users and remote controls. Specific steps may vary based on the selected operating mode. Generally, the process involves:
- Access the programming menu (e.g., via "MAIN MENU" then a "User Management" or "Add Remote" option).
- Follow the on-screen prompts to enter user codes or activate the remote learning mode.
- Press the button on the remote control to be programmed.
- Confirm the programming on the receiver's display.
Refer to the detailed programming guide for specific remote control models if available.
5.3 Deleting Users/Remotes
To remove access for a specific user or remote, navigate to the user management section in the menu and select the option to delete or suspend an entry. This feature is useful for managing access permissions efficiently.
6. Manutenzione
The Liftmaster STAR1000 receiver is designed for minimal maintenance. Regular checks can help ensure long-term reliability.
- Pulizia: Pulire periodicamente l'esterno dell'unità con un panno morbido e asciutto. Non utilizzare detergenti abrasivi o solventi.
- Ispezioni: Annually inspect all wiring connections for signs of wear, corrosion, or loose terminals. Ensure the antenna is securely attached.
- Aggiornamenti del firmware: Controllare il produttore websito per eventuali aggiornamenti firmware disponibili che potrebbero migliorare le prestazioni o aggiungere funzionalità.
7. Risoluzione Dei Problemi
This section addresses common issues you might encounter with the STAR1000 receiver.
| Problema | Possibile causa | Soluzione |
|---|---|---|
| Il ricevitore non si accende. | Nessuna alimentazione; cablaggio errato; fusibile bruciato. | Check power connections; verify wiring polarity; inspect and replace fuses if necessary. |
| Remotes not working. | Remote not programmed; remote battery low; out of range; interference. | Ensure remote is correctly programmed; replace remote battery; test closer to receiver; check for sources of radio interference. |
| Gate/door not responding. | Receiver output not connected; operator fault; receiver not sending signal. | Verify receiver output wiring to operator; check operator's status; confirm receiver is programmed to send correct signal. |
| Il display mostra un messaggio di errore. | System fault; configuration error. | Note the error code/message and consult the manufacturer's support resources or this manual for specific error explanations. |
If troubleshooting steps do not resolve the issue, contact Liftmaster technical support.
8. Specifiche
| Modello | STAR1000 |
| Marca | Liftmaster (Manufacturer) / FAS (Listing Brand) |
| Materiale | Alluminio, Plastica |
| Peso dell'articolo | 12 once |
| Dimensioni del pacco | 6.73 x 6.06 x 2.56 pollici |
| Codice UPC | 012381002603 |
| Data prima disponibilità | 5 febbraio 2013 |
Nota: le specifiche sono soggette a modifiche senza preavviso.
9. Garanzia e supporto
For warranty information, please refer to the warranty card included with your product or visit the official Liftmaster website. Technical support is available through Liftmaster's customer service channels.
Per ulteriore assistenza, visitare: Liftmaster Support