
1. Introduzione
This manual provides detailed instructions for the installation, operation, and maintenance of your Frigidaire IMK0028A Icemaker Kit. This kit is a genuine OEM replacement part designed to provide a reliable ice production solution for compatible Frigidaire and Electrolux refrigerators. Please read all instructions carefully before beginning installation or operation to ensure proper function and safety.
Nota: Frigidaire and Electrolux are interchangeable names for the same brand. The item received may bear either name.
2. Informazioni sulla sicurezza
- Scollegare sempre l'alimentazione del frigorifero prima di tentare qualsiasi installazione, manutenzione o riparazione.
- Wear appropriate personal protective equipment, such as gloves, during installation to prevent injury.
- Ensure all connections are secure and properly sealed to prevent water leaks.
- In caso di dubbi su qualsiasi fase del processo di installazione, consultare un tecnico qualificato.
- Durante l'installazione, tenere bambini e animali domestici lontani dall'area di lavoro.
3. Contenuto della confezione
Verificare che tutti i componenti siano presenti prima di iniziare l'installazione:
- Montaggio del fabbricatore di ghiaccio
- Contenitore per ghiaccio
- Mounting Brackets (various sizes to fit different models)
- Hardware (screws, clips)
- Water Line Connection Kit (if applicable)
- Manuale di istruzioni (questo documento)
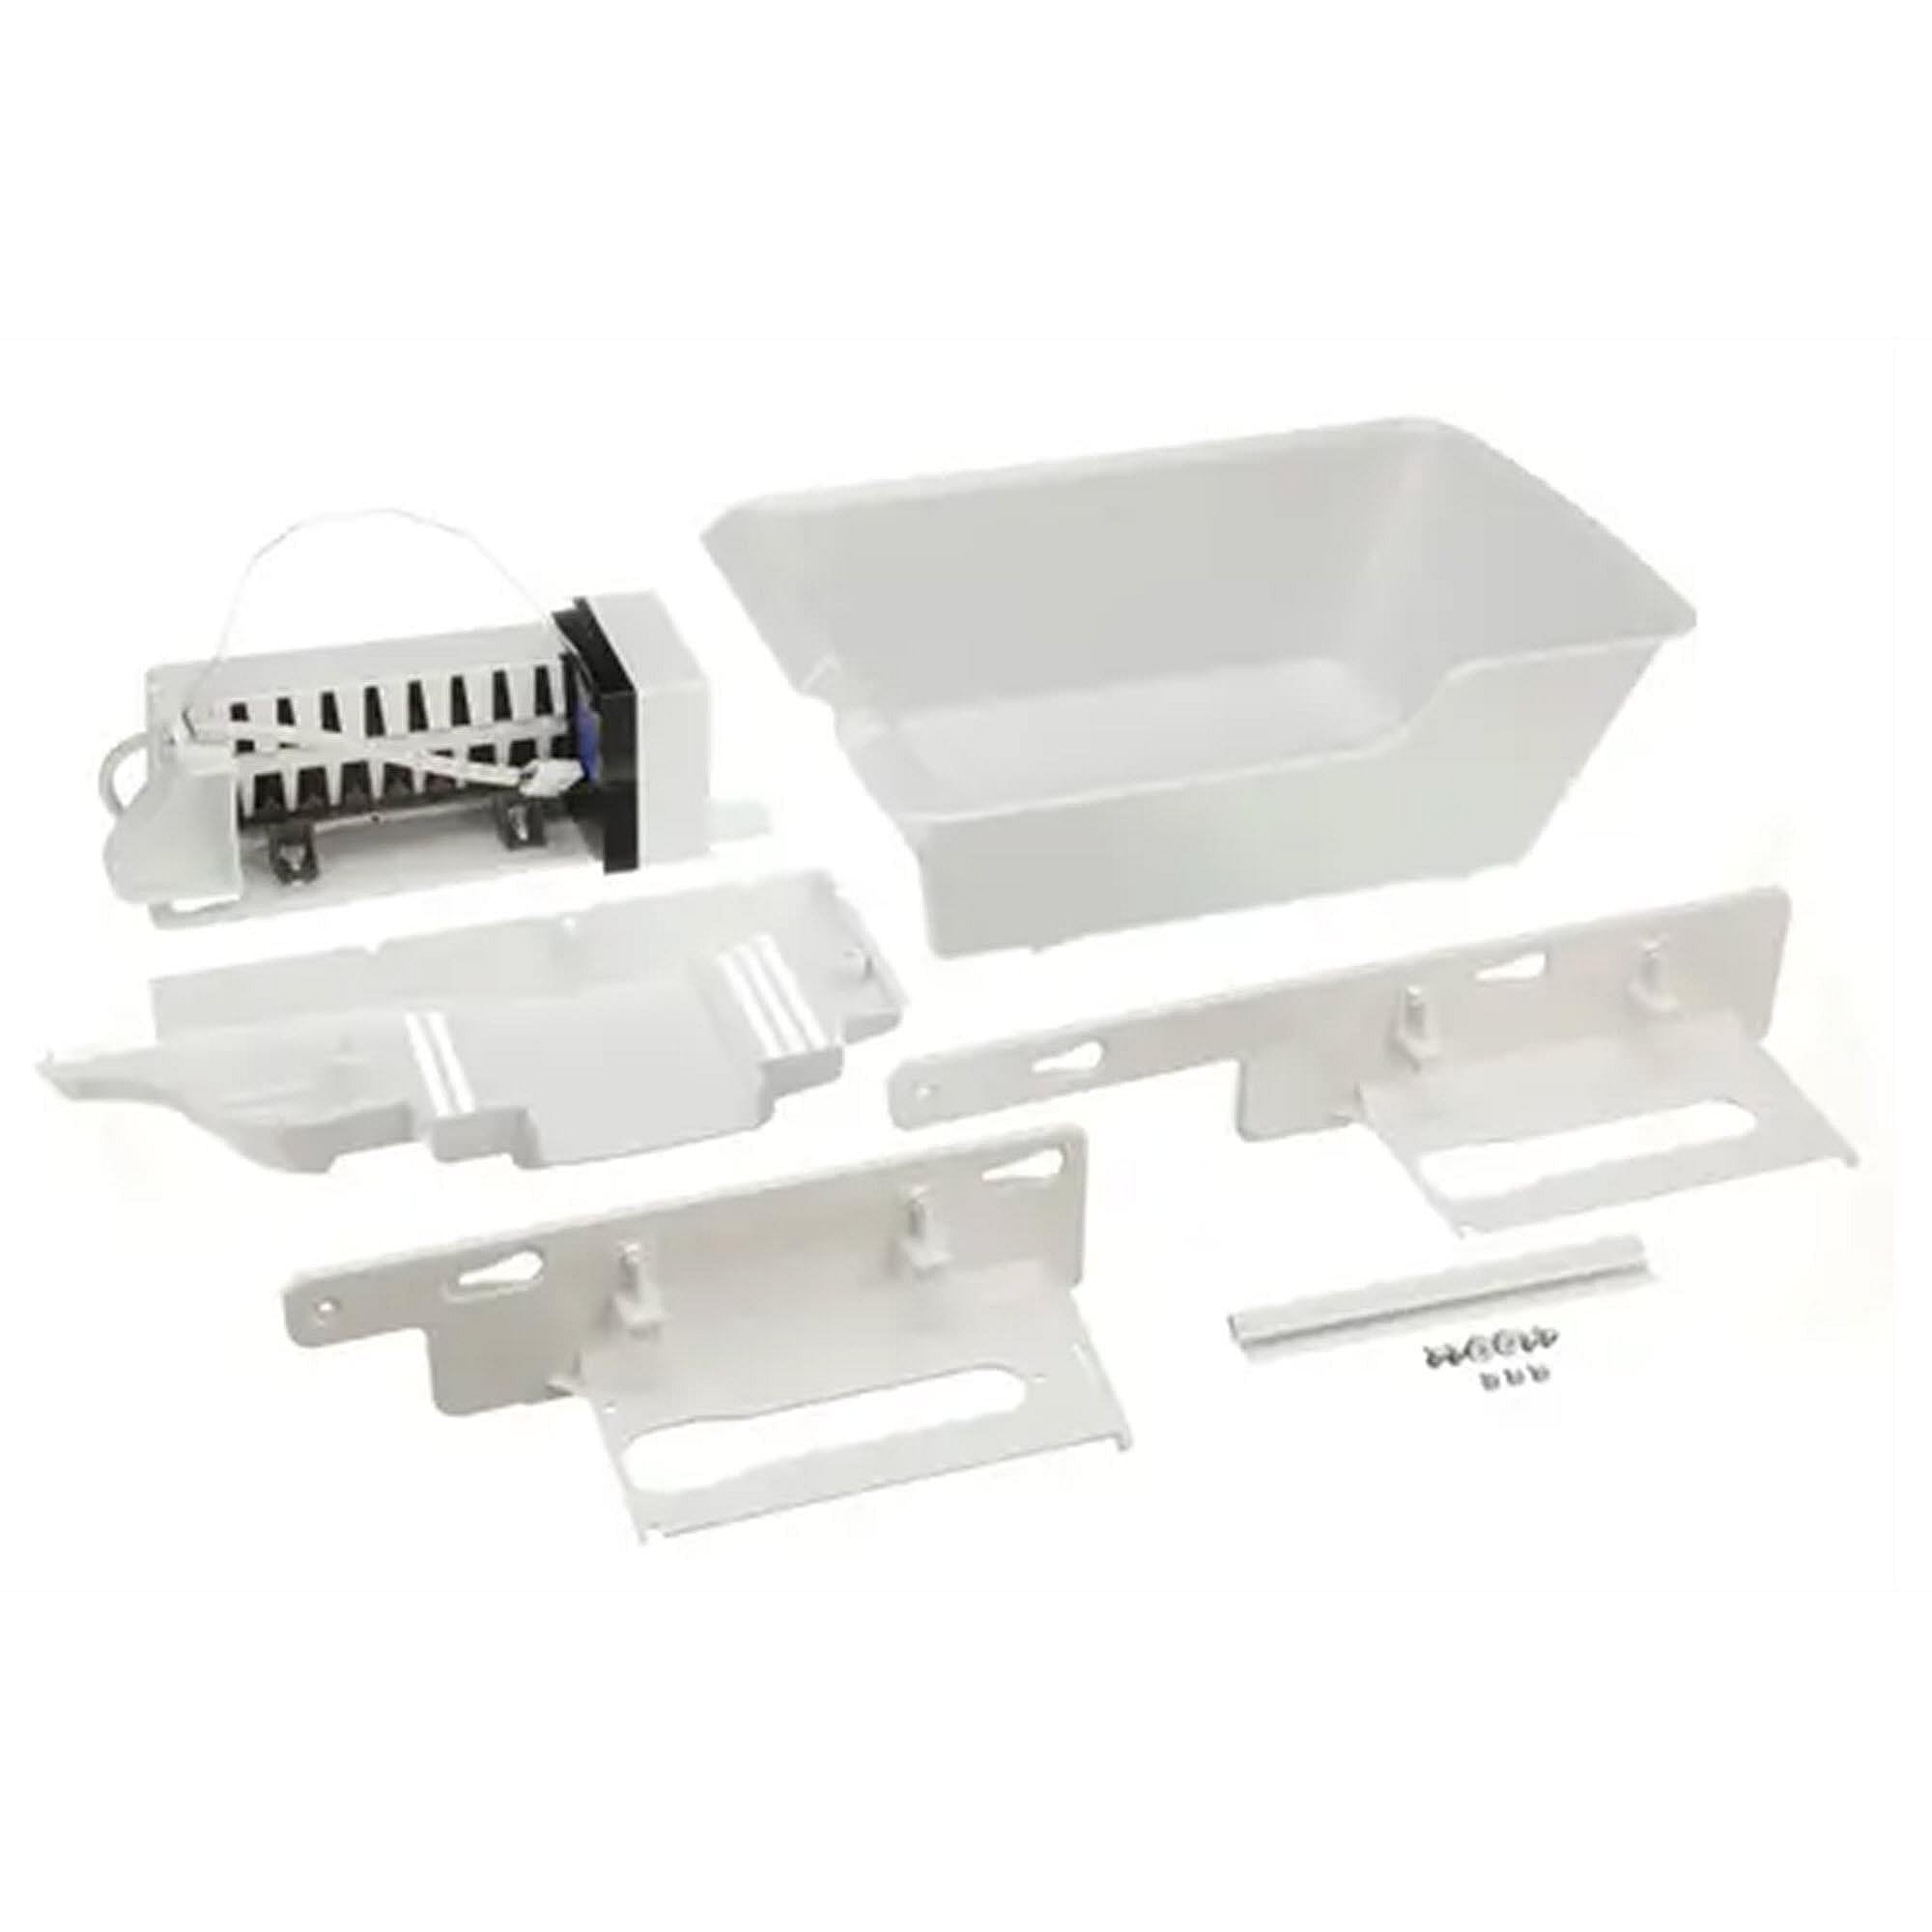
Image 1: Frigidaire IMK0028A Icemaker Kit showing main components.
4. Configurazione e installazione
Installation of the IMK0028A Icemaker Kit can be involved and requires careful attention to detail. It is recommended to have basic tool knowledge and mechanical aptitude. The process typically involves removing the freezer door and internal racks.
4.1 Strumenti necessari
- Cacciavite (a croce e/o a taglio)
- Wrench (for water line connections, if applicable)
- Pliers (for clips)
- Guanti
4.2 Passaggi di pre-installazione
- Scollegare l'alimentazione: Unplug the refrigerator from the electrical outlet or turn off the circuit breaker.
- Chiudere l'erogazione idrica: If your refrigerator has an existing water line, turn off the water supply to the refrigerator.
- Empty Freezer: Remove all food items and shelves from the freezer compartment.
- Remove Freezer Door: Carefully remove the freezer door according to your refrigerator's specific instructions. This often involves disconnecting wiring harnesses and hinge pins.
- Remove Internal Racks/Baskets: Remove any internal racks or baskets to provide clear access to the back panel and mounting locations. This may involve releasing clip.
4.3 Icemaker Installation
- Identificare la posizione di montaggio: Locate the designated area for the icemaker assembly, typically on the upper left side of the freezer compartment. Pre-drilled holes and wiring harnesses should be present.
- Select Correct Bracket: The kit includes multiple mounting brackets. Identify the correct bracket for your specific refrigerator model. The icemaker assembly may come with a shorter bracket pre-installed; you may need to swap it for a longer one if required by your model. Secure the chosen bracket to the icemaker assembly with the provided hardware.
- Mount Icemaker Assembly: Align the icemaker assembly with the pre-drilled holes in the freezer wall. Secure it using the provided screws. Ensure it is firmly attached.
- Collegare il cablaggio: Plug the icemaker's electrical harness into the corresponding receptacle in the freezer wall. Ensure a secure connection.
- Collegare la linea dell'acqua: Connect the water supply line to the icemaker's inlet valve. Ensure the connection is tight to prevent leaks. Some models may require replacing a back panel with a new one provided in the kit, though this is not always necessary.
- Install Ice Bin: Place the ice storage bin beneath the icemaker assembly. Ensure it is properly seated and positioned to catch ice.

Immagine 2: Es.ample of Frigidaire IMK0028A Icemaker Kit installed within a freezer compartment.
4.4 Passaggi successivi all'installazione
- Reinstall Racks and Door: Reinstall the internal freezer racks/baskets and the freezer door. Ensure all clips and connections are secure.
- Ripristinare l'approvvigionamento idrico: Turn on the water supply to the refrigerator. Check for any leaks around the water line connection to the icemaker.
- Ripristina alimentazione: Ricollegare il frigorifero alla presa elettrica o accendere l'interruttore automatico.
- Produzione iniziale di ghiaccio: The icemaker will typically begin producing ice within 12-24 hours. Discard the first few batches of ice to flush the water lines.
5. Istruzioni per l'uso
Once installed and powered, the Frigidaire IMK0028A Icemaker Kit operates automatically to produce ice.
- Funzionamento automatico: The icemaker will fill with water, freeze it, and then eject the ice cubes into the ice storage bin. This cycle repeats automatically as long as the freezer temperature is adequate and the water supply is on.
- Sensore del livello del ghiaccio: The icemaker is equipped with a sensor (often a wire arm) that detects when the ice bin is full. When the ice reaches a certain level, the icemaker will temporarily stop production until more ice is used.
- Initial Production Time: Allow 12-24 hours for the icemaker to produce its first full batch of ice. Full ice production capacity may take a few days to achieve.
- Ice Bin Management: When pulling out the freezer drawer, ensure the ice bin is not overfilled, as ice may fall out of the back of the bin and obstruct the freezer door's full closure.
6. Manutenzione
Regular maintenance helps ensure optimal performance and longevity of your icemaker.
- Contenitore per il ghiaccio pulito: Periodically remove and wash the ice storage bin with mild soap and warm water. Rinse thoroughly and dry completely before returning it to the freezer.
- Check Water Filter: If your refrigerator has a water filter, ensure it is replaced regularly according to the refrigerator manufacturer's recommendations. A clogged filter can reduce water flow to the icemaker.
- Ispezionare la linea dell'acqua: Occasionally inspect the water supply line for kinks, leaks, or damage.
- Clean Icemaker: If mineral deposits build up on the icemaker components, gently wipe them with a damp panno. Non usare detergenti abrasivi.
7. Risoluzione Dei Problemi
If your icemaker is not functioning as expected, refer to the following common issues and solutions:
| Problema | Possibile causa | Soluzione |
|---|---|---|
| Icemaker not producing ice. |
|
|
| Scarsa produzione di ghiaccio. |
|
|
| Water leaking in freezer. |
|
|
| Ice falling out of bin when drawer is opened. |
|
|
If these solutions do not resolve the issue, contact Frigidaire customer support or a qualified service technician.
8. Specifiche
| Caratteristica | Dettaglio |
|---|---|
| Marca | Frigidaire |
| Numero di modello | IMK0028A |
| Numero di parte | IMK0028A |
| Codice UPC | 012505454028 |
| Dimensioni del prodotto (P x L x A) | 1"P x 1"L x 1"A (Note: These dimensions are often placeholder values for small parts and may not reflect the actual installed size.) |
| Peso dell'articolo | 5.2 libbre |
| Tipo di materiale | Plastica |
| Cosatage | 6.41 watt |
| Componenti inclusi | Icemaker Kit, User Manual |
9. Garanzia e supporto
9.1 Informazioni sulla garanzia
The Frigidaire IMK0028A Icemaker Kit comes with a Garanzia del produttore di 1 anniLa presente garanzia copre i difetti di materiali e fabbricazione in condizioni di normale utilizzo. Si prega di conservare la prova d'acquisto per eventuali reclami in garanzia.
For specific warranty terms and conditions, please refer to the documentation included with your original refrigerator or contact Frigidaire customer service.
9.2 Assistenza clienti
For technical assistance, troubleshooting beyond this manual, or warranty service, please contact Frigidaire customer support. You can typically find contact information on the Frigidaire official websito o nel manuale utente principale del frigorifero.
Risorse online: Visita il sito ufficiale Frigidaire website for additional support, FAQs, and service locator tools. www.frigidaire.com