
Introduzione
This manual provides detailed instructions for the installation and operation of the TooQ TQDS-802B Dual Bay SATA Docking Station. This device allows for easy connection of 2.5-inch and 3.5-inch SATA I/II/III hard drives or solid-state drives (SSDs) to your computer via USB 3.0, and features an offline cloning function for direct drive duplication without a PC.
Contenuto della confezione
- TooQ TQDS-802B Dual Bay SATA Docking Station
- Adattatore di alimentazione (CC 12V)
- Cavo USB 3.0 da tipo A a tipo B
- Manuale d'uso
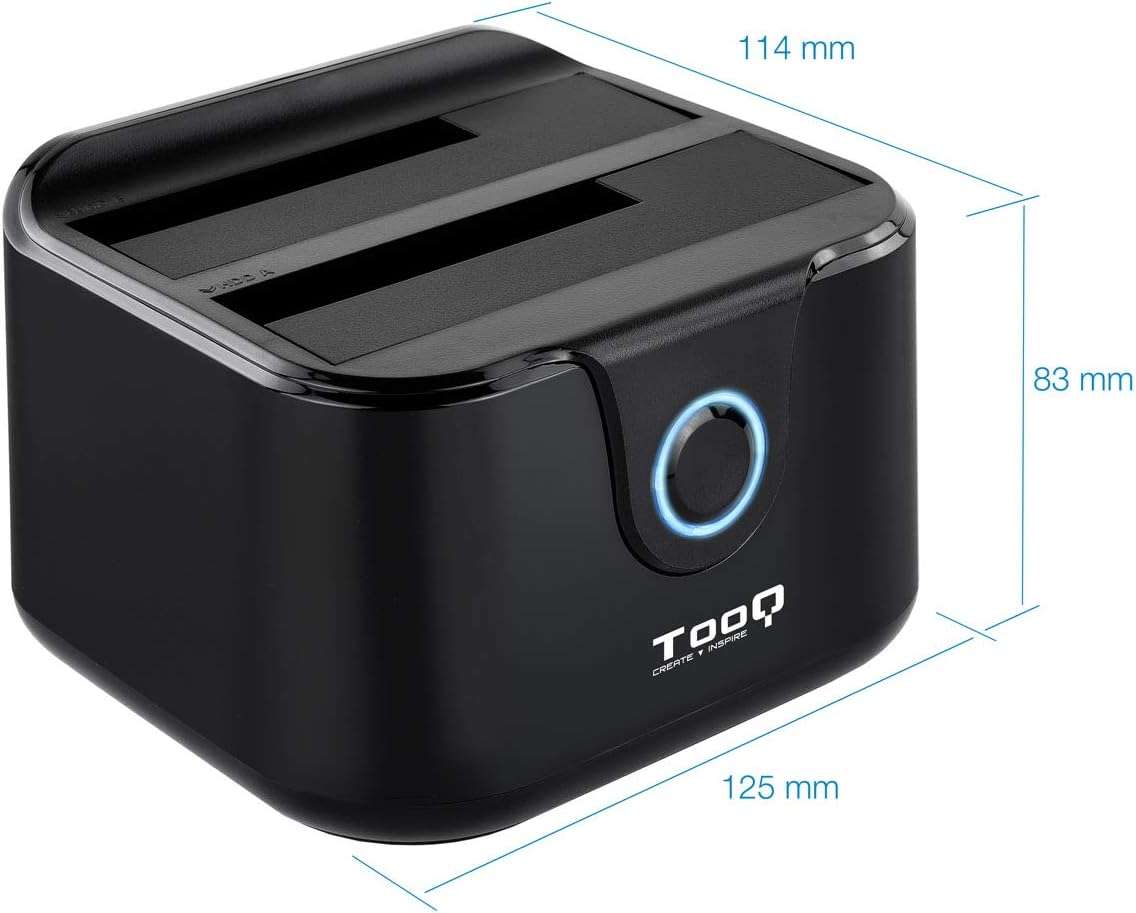
Image: Package contents including the docking station, power adapter, and USB 3.0 cable.
Prodotto finitoview
Pannello frontale

Immagine: Frontale view of the docking station. The central button serves as the Clone button, surrounded by an LED indicator.
- Indicatore LED: Si illumina per indicare alimentazione e attività.
- Pulsante Clona: Initiates the offline disk cloning process.
Pannello posteriore

Immagine: Posteriore view of the docking station, detailing the power switch, DC 12V power input, and USB-B port for computer connection.
- Interruttore ON/OFF: Accende o spegne la docking station.
- Presa CC 12 V: Si collega all'adattatore di alimentazione incluso.
- Porta USB-B: Collega la docking station al computer tramite il cavo USB 3.0.
Superiore View (Drive Bays)

Immagine: in alto view showing two drive bays, labeled A and B, designed to accommodate both 2.5-inch and 3.5-inch SATA HDDs/SSDs.
- Drive Bay A: For inserting the source drive during cloning, or a primary drive for data access. Compatible with 2.5" and 3.5" SATA drives.
- Drive Bay B: For inserting the target drive during cloning, or a secondary drive for data access. Compatible with 2.5" and 3.5" SATA drives.
Impostare
- Connetti alimentazione: Connect the included power adapter to the DC 12V jack on the rear of the docking station, then plug the adapter into a power outlet. Do not power on the device yet.
- Collegamento al computer (facoltativo per il trasferimento dati): If you intend to use the docking station for data transfer with a computer, connect the USB 3.0 cable from the USB-B port on the docking station to an available USB 3.0 port on your computer.
- Inserire le unità: Gently insert your 2.5-inch or 3.5-inch SATA hard drives or SSDs into the drive bays (A and/or B) until they are firmly seated. Ensure the SATA connectors align correctly.
- Accensione: Flip the ON/OFF switch on the rear panel to the 'ON' position. The LED indicator will illuminate.
Istruzioni per l'uso
A. Data Transfer (Connected to PC)
When connected to a computer via USB, the docking station functions as an external drive enclosure. Insert one or two SATA drives into the bays. Your operating system should automatically detect the drives. You can then access, read, and write data to them as you would with any other external storage device.
- Assicurati che la docking station sia accesa e collegata al computer.
- Insert the SATA drive(s) into the bays.
- The drives will appear as removable storage in your computer's file esploratore.
- For safe removal, always eject the drives through your operating system before powering off the docking station or disconnecting the USB cable.
B. Funzione di clonazione offline
The offline clone function allows you to duplicate a source drive to a target drive without needing a computer connection. The target drive must be equal to or larger in capacity than the source drive.
- Preparare le unità: Ensure both the source drive (the drive you want to copy FROM) and the target drive (the drive you want to copy TO) are free of errors. All data on the target drive will be erased during the cloning process.
- Inserire le unità:
- Inserire il Unità sorgente in Baia A.
- Inserire il Unità di destinazione in Baia B.
- Disconnetti dal PC: Ensure the USB cable is disconnected from the computer. The docking station must be operating independently for offline cloning.
- Accensione: Turn on the docking station using the ON/OFF switch.
- Avvia Clone: Premere e tenere premuto il tasto Pulsante Clona for approximately 3-5 seconds until the LED indicator begins to flash. Release the button.
- Monitorare i progressi: The LED indicator will show the cloning progress. It will typically flash or change color to indicate different stages (e.g., 25%, 50%, 75%, 100%).
- Completamento: Once the cloning process is complete, the LED indicator will stop flashing and remain solid. You can then power off the docking station and remove the drives.
Important: Do not interrupt the cloning process by powering off the device or removing drives, as this may lead to data corruption on both drives.
Manutenzione
- Conservare la docking station in un ambiente pulito e asciutto, lontano dalla luce solare diretta e da temperature estreme.
- Evitare di far cadere o sottoporre il dispositivo a forti impatti.
- Pulire l'esterno con un panno morbido e asciutto. Non utilizzare detergenti liquidi o solventi.
- Assicurare una ventilazione adeguata attorno al dispositivo durante il funzionamento.
Risoluzione dei problemi
Drive Not Detected by Computer
- Assicurarsi che la docking station sia accesa e che il cavo USB sia collegato saldamente sia alla docking station che al computer.
- Prova a connetterti a un'altra porta USB del tuo computer.
- Verificare che il disco rigido sia correttamente inserito nell'alloggiamento.
- Controllare Gestione disco (Windows) o Utility Disco (macOS) per verificare se l'unità è riconosciuta ma non formattata o non allocata.
- Test the drive directly in a computer or with another enclosure to rule out drive failure.
Offline Clone Fails or Does Not Start
- Ensure the USB cable is disconnected from the computer. Offline cloning requires the device to be standalone.
- Verify that the source drive is in Bay A and the target drive is in Bay B.
- Verificare che la capacità dell'unità di destinazione sia uguale o superiore alla capacità dell'unità di origine.
- Ensure both drives are properly inserted and seated.
- Press and hold the Clone button for the specified duration (3-5 seconds) until the LED indicator responds.
- Check for any errors on the source drive before attempting to clone.
Specifiche
| Numero di modello | TQDS-802B |
| Marca | TOOQ |
| Unità compatibili | HDD/SSD SATA I/II/III da 2.5" e 3.5" |
| Alloggiamenti unità | 2 (Doppia baia) |
| Interfaccia al computer | USB 3.0 (retrocompatibile con USB 2.0) |
| Velocità di trasferimento dati | Fino a 5.0 Gbps (USB 3.0) |
| Funzione di clonazione offline | Supported (PC-independent) |
| Capacità massima dell'unità | Up to 2.0 TB (32-bit/64-bit systems) and 3.0 TB or more (64-bit systems) |
| Sistema operativo supportato | Windows, macOS, Linux (for USB connection) |
| Alimentazione elettrica | Adattatore di alimentazione CC 12V |
| Dimensioni | Circa 125 mm x 114 mm x 83 mm |
| Peso | 350 grammi |

Image: Dimensions of the TooQ TQDS-802B Dual Bay SATA Docking Station.
Garanzia e supporto
TOOQ products are designed for reliability and performance. For warranty information, please refer to the warranty card included with your product or visit the official TOOQ website. For technical support or further assistance, please contact TOOQ customer service through their official channels.
Manufacturer: Tooq & Nanocable Spain