
1. Introduzione
This manual provides essential instructions for the safe and effective use of the Amphenol Ecomate C016 Series C01620H00310012 Circular Cable Mount Plug Connector. This connector is designed for industrial applications requiring reliable electrical connections, featuring a 3+PE configuration, screw pin contacts, and a threaded coupling mechanism. Please read this manual thoroughly before installation and operation.
2. Informazioni sulla sicurezza
Adherence to safety guidelines is crucial to prevent injury and damage to equipment. Always observe the following:
- Ensure all power sources are disconnected before installing, servicing, or disconnecting the connector.
- Le procedure di installazione e manutenzione devono essere eseguite solo da personale qualificato.
- Verify that the connector's voltage and current ratings are compatible with the application.
- Avoid exposing the connector to environments exceeding its specified operating conditions.
- Do not use damaged connectors or cables.
3. Prodotto finitoview
IL Amphenol C01620H00310012 is a robust circular cable mount plug from the Ecomate C016 series. Key features include:
- Configurazione dei contatti: 3 power contacts plus Protective Earth (3+PE).
- Tipo di contatto: Screw pin for secure and reliable wire termination.
- Coupling Style: Threaded for a strong and vibration-resistant connection.
- Rivestimento dei contatti: Silver for excellent conductivity and corrosion resistance.
- Conformità: Conforme alla direttiva RoHS.
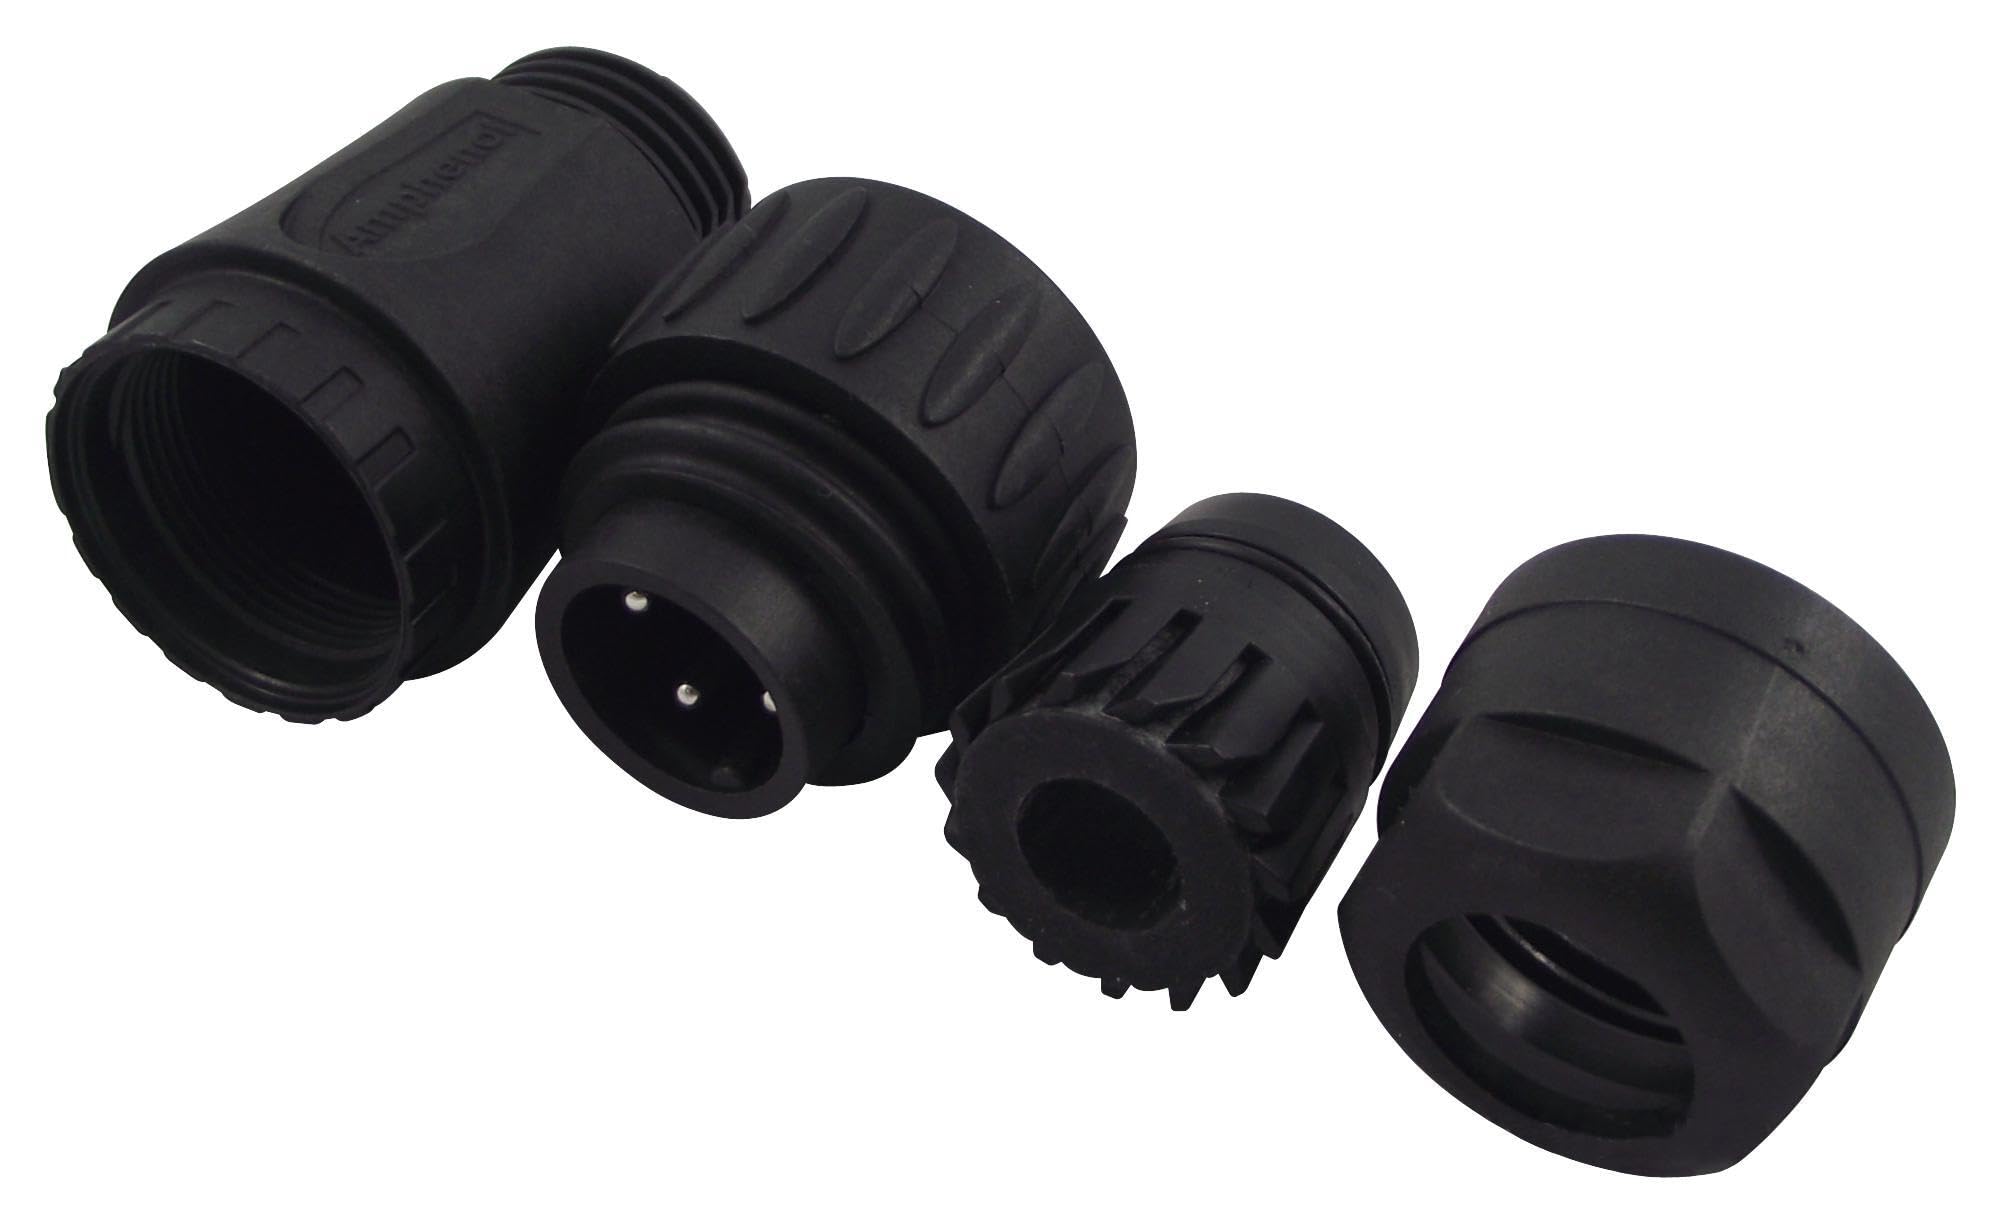
Figure 1: Disassembled components of the Amphenol C01620H00310012 circular connector. From left to right, it shows the cable gland nut, the main plug body with three silver-plated screw pins and a ground pin, an internal insert, and the coupling nut. The 'Amphenol' brand name is visible on the main plug body.
4. Configurazione e installazione
This section outlines the general steps for assembling the cable mount plug. Specific wiring diagrams may vary based on your application and should be consulted separately.
- Preparare il cavo: Strip the outer jacket of the cable to the appropriate length, exposing the individual insulated wires. Strip the insulation from the ends of the wires according to the screw terminal requirements.
- Thread Components: Slide the coupling nut and cable gland nut onto the cable in the correct order.
- Terminazione del filo: Connect each wire to its corresponding screw pin contact within the connector insert. Ensure proper polarity and secure tightening of the screws. The 3+PE configuration typically includes three power contacts and one protective earth contact.
- Assemble Insert: Carefully insert the wired contact assembly into the main plug body, ensuring proper alignment and seating.
- Cavo sicuro: Tighten the cable gland nut onto the plug body to provide strain relief and environmental sealing for the cable.
- Assemblaggio finale: Assicurarsi che tutti i componenti siano fissati saldamente.
5. Istruzioni per l'uso
To connect the C01620H00310012 plug to a compatible receptacle:
- Allineamento: Align the keyways or polarization features of the plug with those of the receptacle.
- Inserimento: Gently push the plug into the receptacle until the contacts engage.
- Accoppiamento: Rotate the threaded coupling nut clockwise until it is fully tightened. This ensures a secure mechanical and electrical connection and maintains environmental sealing. Do not overtighten.
Per disconnettersi:
- Scollegare l'alimentazione: Ensure power to the circuit is OFF before attempting to disconnect.
- Unscrew Coupling: Rotate the threaded coupling nut counter-clockwise until it is loose.
- Withdraw Plug: Gently pull the plug straight out from the receptacle. Avoid twisting or yanking the cable.
6. Manutenzione
Regular maintenance helps ensure the longevity and reliability of the connector.
- Ispezione: Periodically inspect the connector for signs of wear, damage, corrosion, or loose connections. Check the cable entry for proper sealing.
- Pulizia: If necessary, clean the connector contacts and housing with a dry, lint-free cloth. For stubborn dirt, use a contact cleaner specifically designed for electrical components, ensuring it is non-conductive and leaves no residue. Ensure the connector is completely dry before re-energizing.
- Tenuta: Verify that the coupling nut and cable gland nut remain securely tightened.
7. Risoluzione Dei Problemi
If you encounter issues with your connector, consider the following common troubleshooting steps:
- Nessun collegamento elettrico:
- Check if the plug is fully inserted and the coupling nut is securely tightened.
- Inspect for damaged or bent contacts.
- Verify proper wire termination at the screw pins.
- Ensure power supply is active.
- Connessione intermittente:
- Serrare il dado di accoppiamento.
- Inspect for loose wire connections at the screw pins.
- Check for corrosion or debris on contacts and clean if necessary.
- Difficoltà di connessione/disconnessione:
- Ensure proper alignment of keyways.
- Check for physical damage or deformation of the connector housing or pins.
If problems persist, contact a qualified electrician or Amphenol technical support.
8. Specifiche
| Caratteristica | Dettaglio |
|---|---|
| Marca | Amphenolo |
| Numero di modello | C016 20H003 100 12 |
| Gamma di prodotti | Ecomate C016 Series |
| Tipo di connettore | Circular Cable Mount Plug |
| Numero di contatti | 4 (3 power + Protective Earth) |
| Tipo di contatto | Perno a vite |
| Coupling Style | Filettato |
| Contatta Placcatura | Argento |
| Conforme alla direttiva RoHS | SÌ |
| Dimensioni del prodotto | 6 x 2 x 6 pollici; 1.6 once |
| Produttore | AMPHENOL |
9. Garanzia e supporto
For specific warranty information and technical support, please refer to the official Amphenol documentation or contact Amphenol directly through their official websito o tramite i canali di assistenza clienti. Conservare la ricevuta d'acquisto per eventuali reclami in garanzia.