Importanti misure di sicurezza
When using this appliance, basic safety precautions should always be followed to reduce the risk of fire, electric shock, and/or injury to persons, including the following:
- Leggere tutte le istruzioni prima dell'uso.
- Non toccare le superfici calde. Utilizzare maniglie o manopole.
- To protect against fire, electric shock, and injury to persons, do not immerse the appliance in water or other liquid.
- È necessaria un'attenta supervisione quando un elettrodomestico viene utilizzato da bambini o nelle loro vicinanze.
- Lasciare raffreddare prima di montare o smontare componenti e prima di pulire l'apparecchio.
- Do not operate any appliance that has been damaged in any manner.
- L'uso di accessori non consigliati dal produttore dell'apparecchio può causare incendi, scosse elettriche o lesioni alle persone.
- Non utilizzare all'aperto.
- Non posizionare sopra o vicino a un fornello a gas o elettrico caldo, oppure in un forno caldo.
- Non utilizzare l'apparecchio per scopi diversi da quelli previsti.
- This appliance is not suitable for induction cooktops.
Prodotto finitoview
The Jocca Italian Coffee Maker is a classic stovetop moka pot designed to brew rich, aromatic espresso-style coffee. It consists of three main parts:
- Camera inferiore (serbatoio d'acqua): Holds the water that will be heated to create steam.
- Cestino del filtro: A funnel-shaped metal filter where ground coffee is placed.
- Camera superiore (vaso di raccolta): Where the brewed coffee collects.
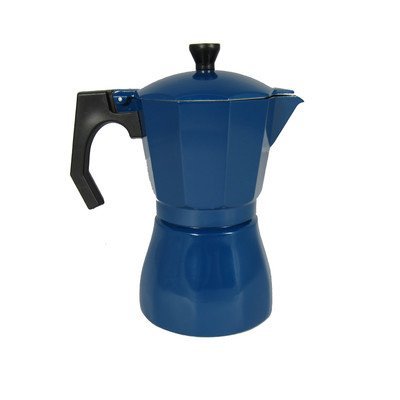
This image shows the Jocca Italian Coffee Maker, a classic stovetop moka pot, in its disassembled state, highlighting the water chamber, filter basket, and upper collection chamber. The navy blue aluminum finish is visible on the upper chamber.
Impostare
Prima del primo utilizzo:
- Disimballare tutti i componenti e rimuovere eventuali materiali di imballaggio.
- Wash all parts (lower chamber, filter basket, upper chamber, gasket, filter plate) with warm soapy water. Rinse thoroughly and dry completely.
- Brew 2-3 batches of coffee using only water (no coffee grounds) to clean the interior and season the pot. Discard this water.
Assembling for Brewing:
- Riempire la Camera Inferiore: Svitare la camera superiore da quella inferiore. Riempire la camera inferiore con acqua fredda fino al livello della valvola di sicurezza. Non riempire eccessivamente.
- Aggiungi fondi di caffè: Insert the filter basket into the lower chamber. Fill the filter basket with medium-fine ground coffee. Do not tamp il caffè. Livellare delicatamente i fondi.
- Assemblaggio del vaso: Screw the upper chamber firmly onto the lower chamber. Ensure a tight seal to prevent steam from escaping. Do not overtighten.
Istruzioni per l'uso
- Posizionare su una fonte di calore: Place the assembled coffee maker on a stovetop burner. Use a heat setting that is appropriate for the size of the pot and your stove. For gas stoves, ensure the flame does not extend beyond the base of the pot.
- Processo di fermentazione: As the water in the lower chamber heats, steam pressure forces the hot water up through the coffee grounds in the filter basket and into the upper chamber.
- Monitoraggio della fermentazione: Listen for a gurgling sound and observe the coffee flowing into the upper chamber. Once the upper chamber is full and you hear a sputtering sound, remove the coffee maker from the heat source immediately.
- Servire: Carefully pour the freshly brewed coffee into cups. The handle may be hot, so use caution or an oven mitt.
Nota: This coffee maker is suitable for all cooktops except induction cookers.
Pulizia e manutenzione
Pulizia giornaliera:
- After each use, allow the coffee maker to cool completely.
- Smontare tutte le parti.
- Gettare via i fondi di caffè usati.
- Wash all parts with warm water and a mild detergent. Avoid abrasive sponges or harsh chemicals, as these can damage the aluminum finish.
- Rinse thoroughly and dry completely before reassembling or storing. Ensure all parts are dry to prevent mineral buildup and corrosion.
Manutenzione periodica:
- Guarnizione e piastra del filtro: Periodically check the rubber gasket and metal filter plate located under the upper chamber for wear or damage. Replace them if they appear brittle, cracked, or if you notice leaks during brewing.
- Decalcificazione: If you notice mineral buildup (white deposits) inside the lower chamber, you can descale the pot. Fill the lower chamber with a solution of equal parts water and white vinegar. Place the filter basket (without coffee) and upper chamber on top. Brew the solution as you would coffee. Discard the vinegar solution and brew 2-3 batches of plain water to rinse thoroughly.
Risoluzione dei problemi
| Problema | Possibile causa | Soluzione |
|---|---|---|
| No coffee brews or very little coffee. |
|
|
| Il caffè ha un sapore debole o acquoso. |
|
|
| Perdite di vapore o acqua dal lato. |
|
|
Specifiche
- Marca: Jocca
- Numero modello: 1909A
- Materiale: Alluminio
- Colore: Blu navy
- Capacità: 385 millilitri
- Peso dell'articolo: 0.82 libbre (circa 372 grammi)
- Compatibilità: All cooktops except induction.
Garanzia e supporto
For warranty information or product support, please refer to the documentation provided at the time of purchase or contact your retailer. Keep your proof of purchase for any warranty claims.