
1. Importanti istruzioni di sicurezza
Always observe basic safety precautions when using electrical appliances to reduce the risk of fire, electric shock, and personal injury. Read all instructions before operating this tool.
- Sicurezza dell'area di lavoro: Mantenere l'area di lavoro pulita e ben illuminata. Aree disordinate o buie possono favorire incidenti. Non utilizzare utensili elettrici in atmosfere esplosive, ad esempio in presenza di liquidi, gas o polveri infiammabili.
- Sicurezza elettrica: Avoid body contact with earthed or grounded surfaces. Do not expose power tools to rain or wet conditions. Do not abuse the cord. Never use the cord for carrying, pulling, or unplugging the power tool.
- Sicurezza personale: Siate vigili, fate attenzione a ciò che fate e usate il buon senso quando utilizzate un elettroutensile. Non utilizzate un elettroutensile quando siete stanchi o sotto l'effetto di droghe, alcol o farmaci. Indossate sempre protezioni per gli occhi e per l'udito.
- Uso e cura dello strumento: Non forzare l'utensile elettrico. Utilizzare l'utensile elettrico corretto per l'applicazione desiderata. Scollegare la spina dalla presa di corrente prima di effettuare qualsiasi regolazione, sostituire accessori o riporre l'utensile elettrico.
2. Prodotto finitoview
The Makita UB1103 Blower is a versatile tool designed for both blowing and vacuuming applications. It features a powerful motor, variable speed control, and an ergonomic design for comfortable use.
Componenti
- Unità soffiante
- Ugello
- Dust Bag (for vacuum mode)

Figure 2.1: Makita UB1103 Blower in its standard blowing configuration.

Figure 2.2: The Makita UB1103 Blower shown with its included dust bag, used for vacuum operations.
3. Impostazione
3.1 Attaching the Nozzle (Blower Mode)
- Align the nozzle with the blower outlet port.
- Push the nozzle firmly onto the port and twist clockwise until it locks securely in place.

Figure 3.1: Illustration of attaching the nozzle to the blower unit for blowing functionality.
3.2 Converting to Vacuum Mode
To use the tool as a vacuum, the nozzle and dust bag must be repositioned.
- Remove the nozzle from the blower outlet port.
- Attach the dust bag to the blower outlet port by aligning and twisting until secure.
- Attach the nozzle to the intake port (where air is normally drawn in for blowing) by aligning and twisting until secure.

Figure 3.2: Attaching the dust bag to the blower's exhaust port for vacuum operation.
4. Istruzioni per l'uso
4.1 Collegamento di alimentazione
Ensure the power switch is in the OFF position before plugging the tool into a suitable power outlet (100 Volts AC).
4.2 Controllo della velocità variabile
The blower features a variable speed control dial and trigger for adjusting airflow. The dial sets the maximum speed, and the trigger allows for fine-tuning within that range.
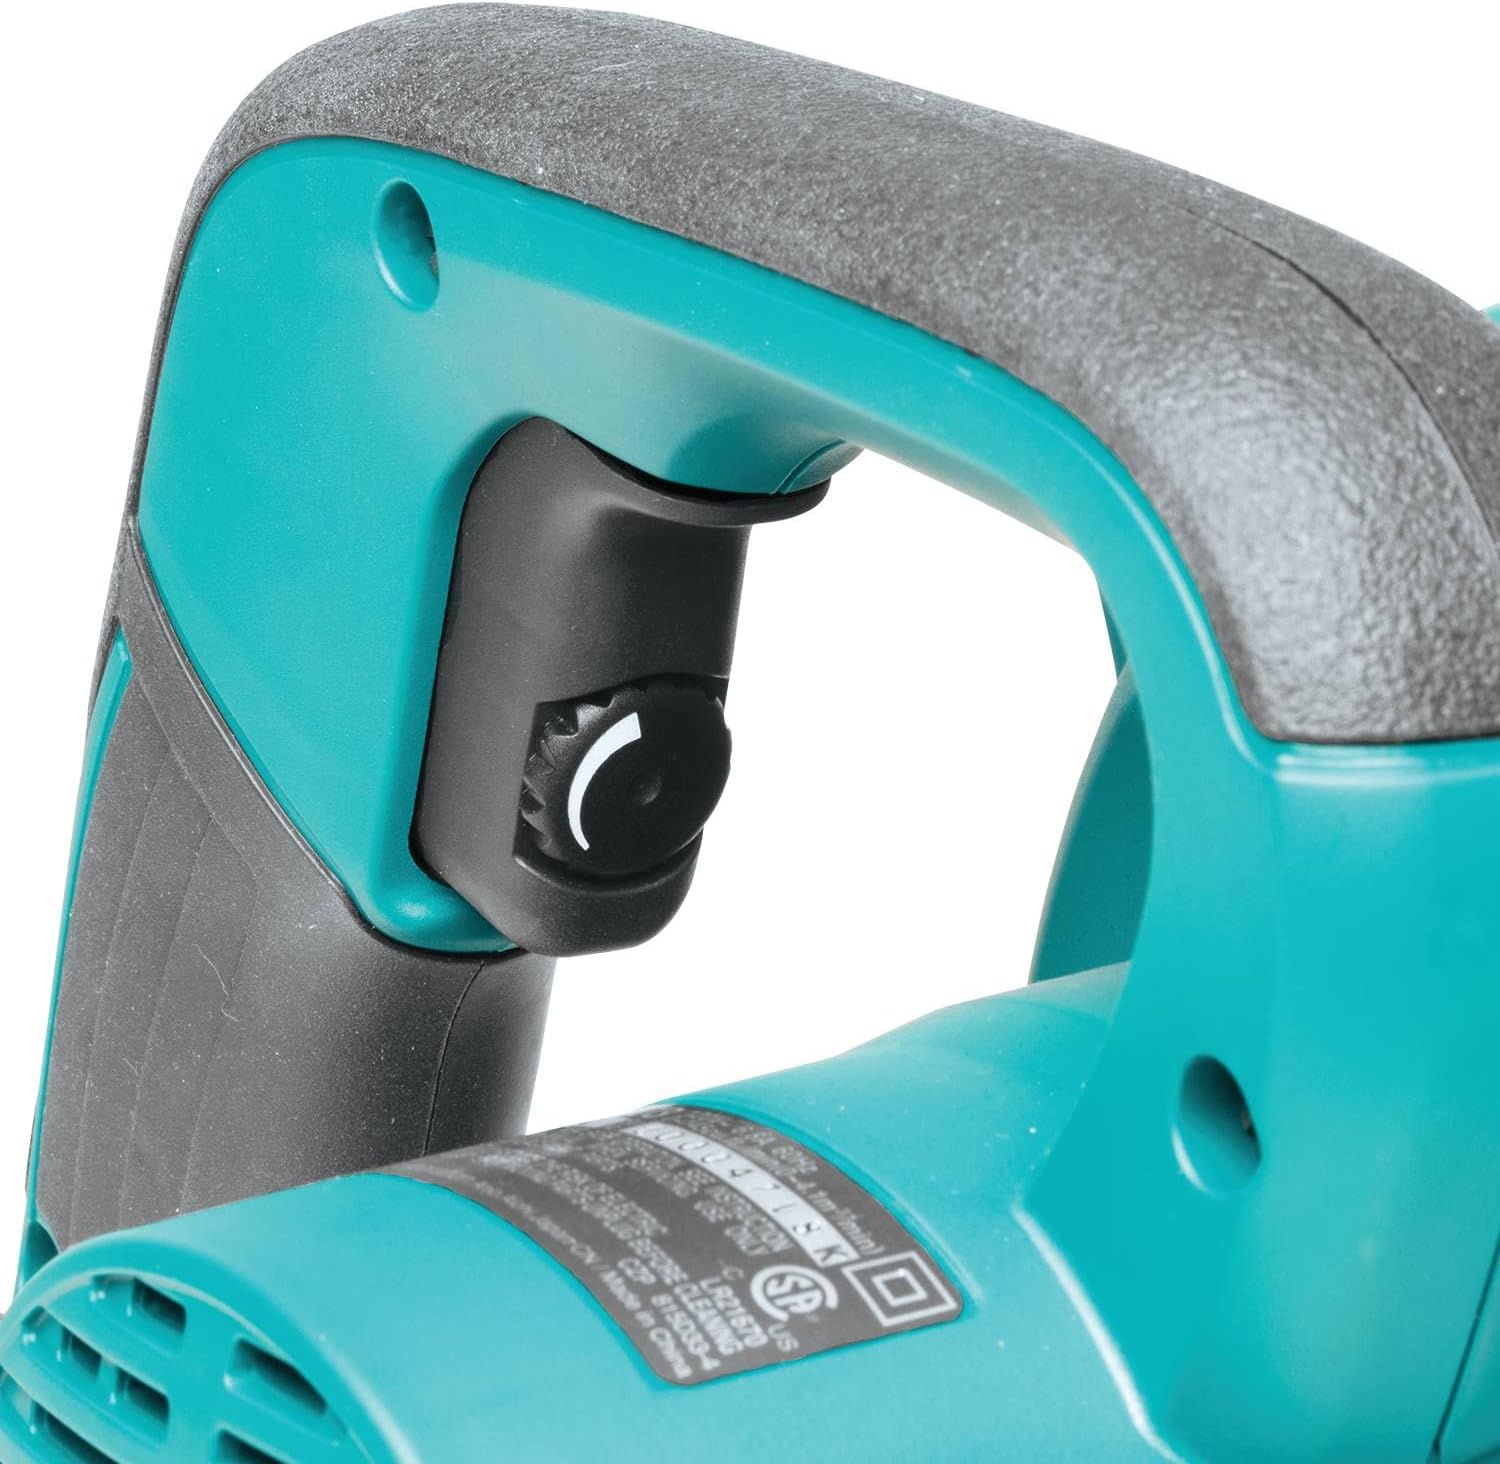
Figure 4.1: Location of the variable speed control dial for adjusting airflow.
4.3 Trigger and Lock-on Button
Press the trigger to start the tool. For continuous operation, press the lock-on button while the trigger is depressed. To release, press the trigger again.
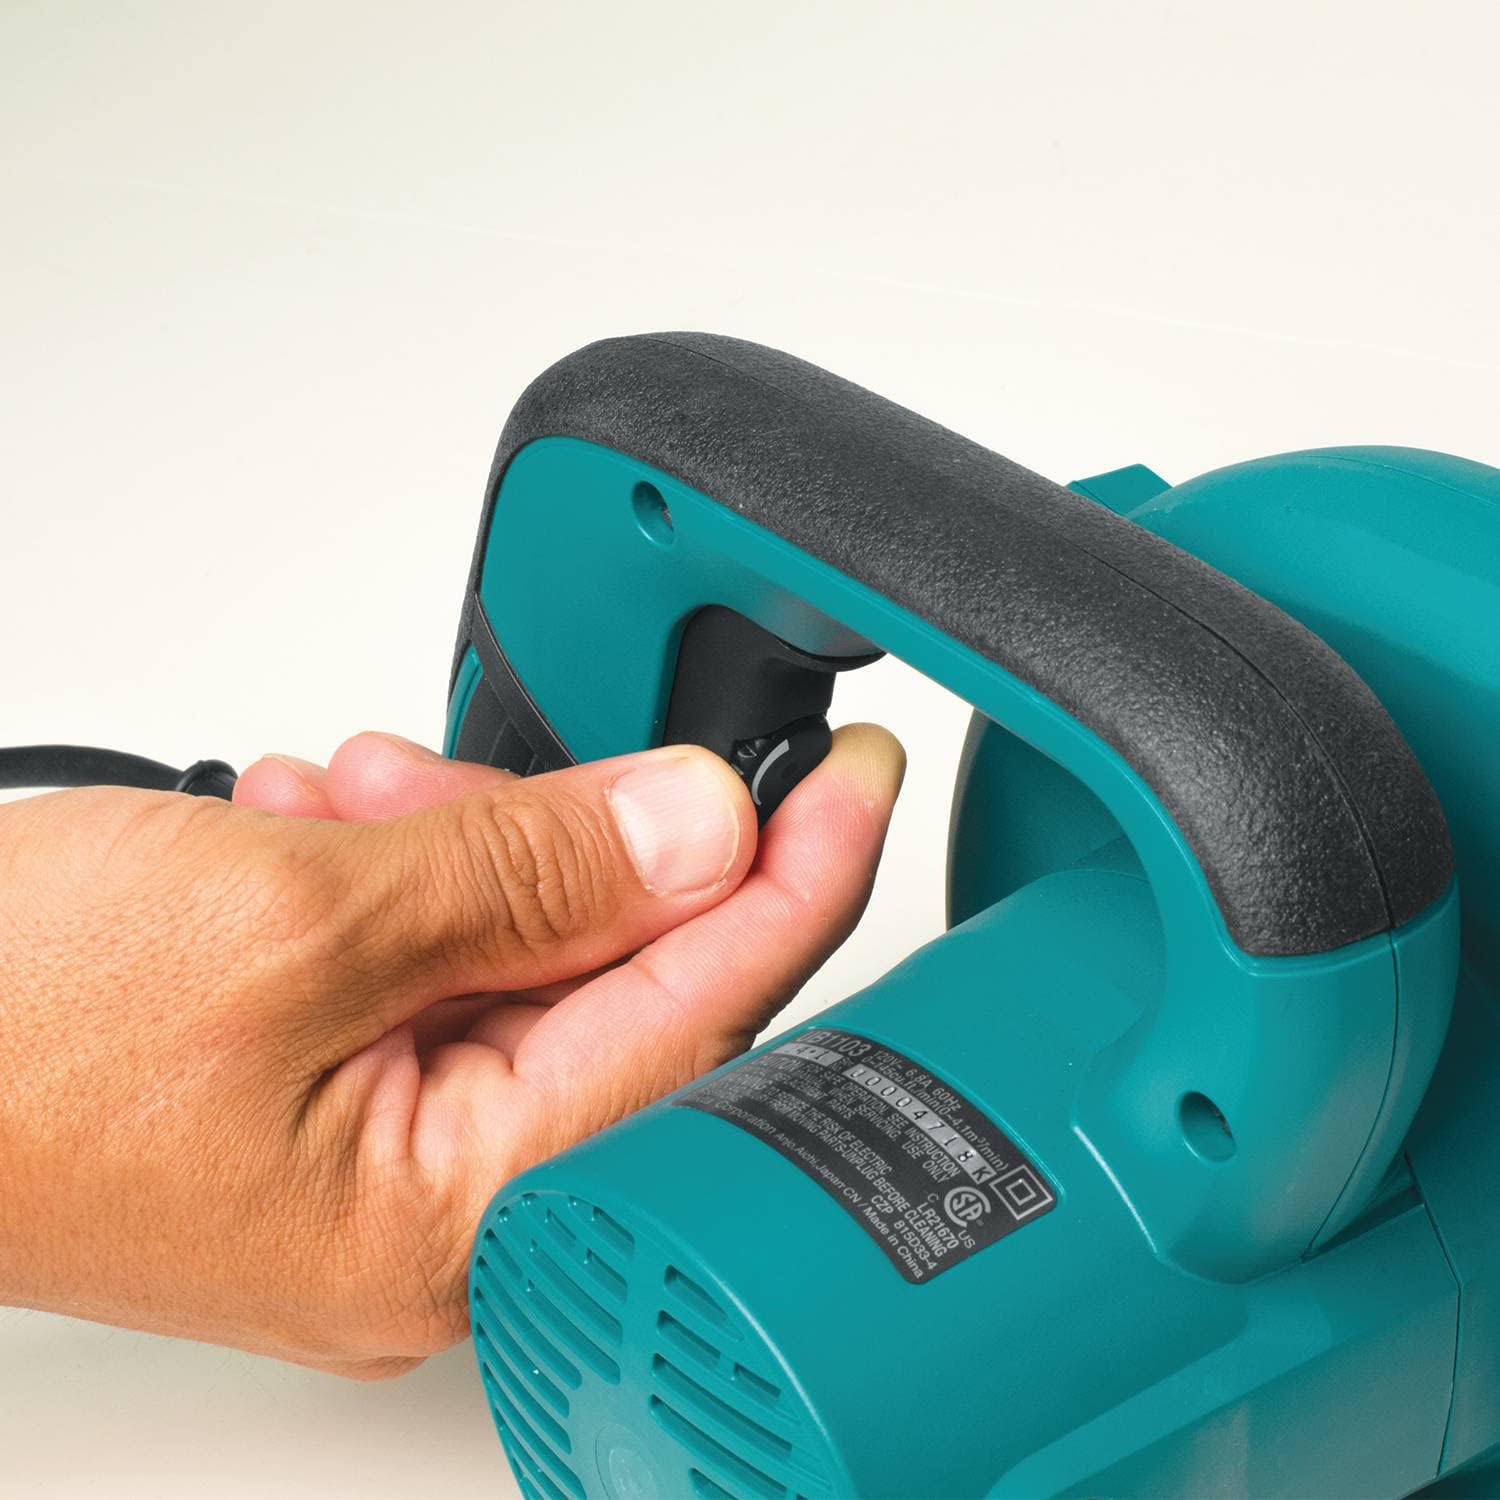
Figure 4.2: The trigger and conveniently located lock-on button for continuous operation.
4.4 Blowing Operation
Direct the nozzle towards the debris you wish to clear. Adjust the speed as needed for the task. The maximum air speed is 203 MPH.

Figure 4.3: Demonstrating the blower in use to clear debris from a floor.
4.5 Funzionamento del vuoto
With the tool configured for vacuuming, position the nozzle over the debris. The tool will draw in debris into the dust bag. Empty the dust bag regularly for optimal performance.

Figure 4.4: The tool being used in vacuum mode to collect wood chips.
5. Manutenzione
5.1 Pulizia
Pulire regolarmente l'esterno dell'utensile con un panno morbido eamp cloth. Do not use strong detergents or solvents. Ensure air vents are clear of obstructions to prevent overheating.
5.2 Svuotamento del sacchetto raccoglipolvere
When operating in vacuum mode, regularly check and empty the dust bag. A full dust bag will reduce vacuum efficiency. The dust bag typically has a slider at the bottom for easy emptying.
5.3 Sostituzione delle spazzole di carbone
The motor's carbon brushes are consumable parts. When they wear down, the motor may lose power or stop functioning. The brushes are accessible from the outside of the tool, allowing for replacement without full disassembly. Refer to the detailed diagram in the full manual for specific instructions on locating and replacing the brushes.
5.4 Conservazione
Store the tool in a clean, dry place, out of reach of children. The unique design allows for self-standing storage.

Figure 5.1: The blower's design allows it to stand upright for convenient storage.
6. Risoluzione Dei Problemi
If you encounter issues with your Makita UB1103 Blower, refer to the following common troubleshooting steps:
- Lo strumento non si avvia:
- Verificare che il cavo di alimentazione sia collegato saldamente a una presa funzionante.
- Ensure the trigger is fully depressed or the lock-on button is engaged correctly.
- Ispezionare il cavo di alimentazione per eventuali danni.
- Flusso d'aria/aspirazione ridotto:
- For blower mode, ensure the nozzle is securely attached and not obstructed.
- For vacuum mode, check if the dust bag is full and needs emptying.
- Verify that the nozzle and dust bag are correctly installed for vacuum operation and that the intake port is clear.
- Check for any blockages in the nozzle or internal passages.
- Rumore o vibrazioni eccessivi:
- Turn off the tool immediately and inspect for any loose parts or foreign objects.
- Se il problema persiste, interrompi l'utilizzo e contatta l'assistenza clienti.
For problems not listed here, or if troubleshooting steps do not resolve the issue, contact Makita customer service or an authorized service center.
7. Specifiche
| Caratteristica | Specificazione |
|---|---|
| Marca | Makita |
| Numero di modello | UB1103 |
| Fonte di alimentazione | Elettrico con cavo |
| Voltage | 100 Volt |
| Peso dell'articolo | 4.3 libbre |
| Velocità massima dell'aria | 203 miglia all'ora |
| Volume d'aria massimo | 145 piedi cubi al minuto (CFM) |
| Velocità | 0-16,000 giri/min (variabile) |
| Fattore di forma | Portatile |
| Caratteristica speciale | Velocità regolabile |
| Componenti inclusi | Extension Nozzle, Dust Bag |
| Materiale | Rubber (Nozzle) |
| Dimensioni articolo (L x P x A) | 15 cm L x 8 cm P x 9 cm A |
8. Garanzia
The Makita UB1103 Blower comes with a Garanzia limitata di 1 anno from the date of purchase. This warranty covers defects in materials and workmanship under normal use. Please retain your proof of purchase for warranty claims. For full warranty terms and conditions, refer to the official Makita warranty documentation or contact Makita customer support.
9. Supporto
For technical assistance, service, or to inquire about replacement parts, please contact Makita customer support. You can typically find contact information on the official Makita website or in the packaging materials that came with your product.
Risorse online: Visita il sito ufficiale Makita website for product information, FAQs, and service center locators.
Centri di assistenza autorizzati: For repairs or professional assistance, locate an authorized Makita service center near you.