1. Introduzione
This manual provides essential information for the proper setup, operation, and maintenance of your Sony SLV-FT5 VHS Video Cassette Recorder (VCR). Please read these instructions thoroughly before using the unit to ensure optimal performance and safety.
2. Informazioni sulla sicurezza
Quando si utilizza questo prodotto, seguire sempre le precauzioni di sicurezza di base per ridurre il rischio di incendi, scosse elettriche e lesioni.
- Non esporre l'unità alla pioggia o all'umidità.
- Non aprire l'armadio. Affidare la manutenzione solo a personale qualificato.
- Assicurare una ventilazione adeguata; non ostruire le aperture di ventilazione.
- Utilizzare solo l'alimentatore specificato per questa unità.
- Tenere l'unità lontano da fonti di calore e dalla luce solare diretta.
3. Impostazione
3.1 Disimballaggio
Carefully remove the VCR and all accessories from the packaging. Verify that all components are present: the SLV-FT5 VCR unit, remote control, and necessary connection cables (e.g., RCA audio/video cables).
3.2 Collegamento a un televisore
To connect the VCR to your television, use the provided RCA audio/video cables. Match the colored plugs to the corresponding colored jacks on both the VCR and your TV (Yellow for Video, White for Left Audio, Red for Right Audio).

Figura 1: Rear panel of the Sony SLV-FT5 VCR. This image displays the various input and output ports, including RCA jacks for audio and video, and the power input. The product label with model number SLV-FT5 and power specifications (100V 18W 50/60Hz) is also visible.
3.3 Collegamento di alimentazione
Plug the VCR's power cord into a standard electrical outlet (AC 100V, 50/60Hz). Ensure the power outlet is easily accessible.
3.4 Configurazione del telecomando
Open the battery compartment on the back of the remote control and insert two AA batteries, observing the correct polarity (+/-). Close the compartment securely.

Figura 2: The Sony RMT-V219 remote control, designed for the SLV-FT5 VCR. This image also shows the included RCA audio/video cables, which are typically used for connecting the VCR to a television.
4. Funzionamento del videoregistratore
4.1 Accensione/Spegnimento
Premere il tasto ENERGIA button on the VCR's front panel or the remote control to turn the unit on or off.
4.2 Loading and Unloading a VHS Tape
- Caricamento: Insert a VHS cassette into the tape slot on the front of the VCR with the tape window facing forward. The VCR will automatically pull the tape in.
- Scarico: Premere il tasto ESPELLERE button on the VCR or remote control. The tape will be ejected.
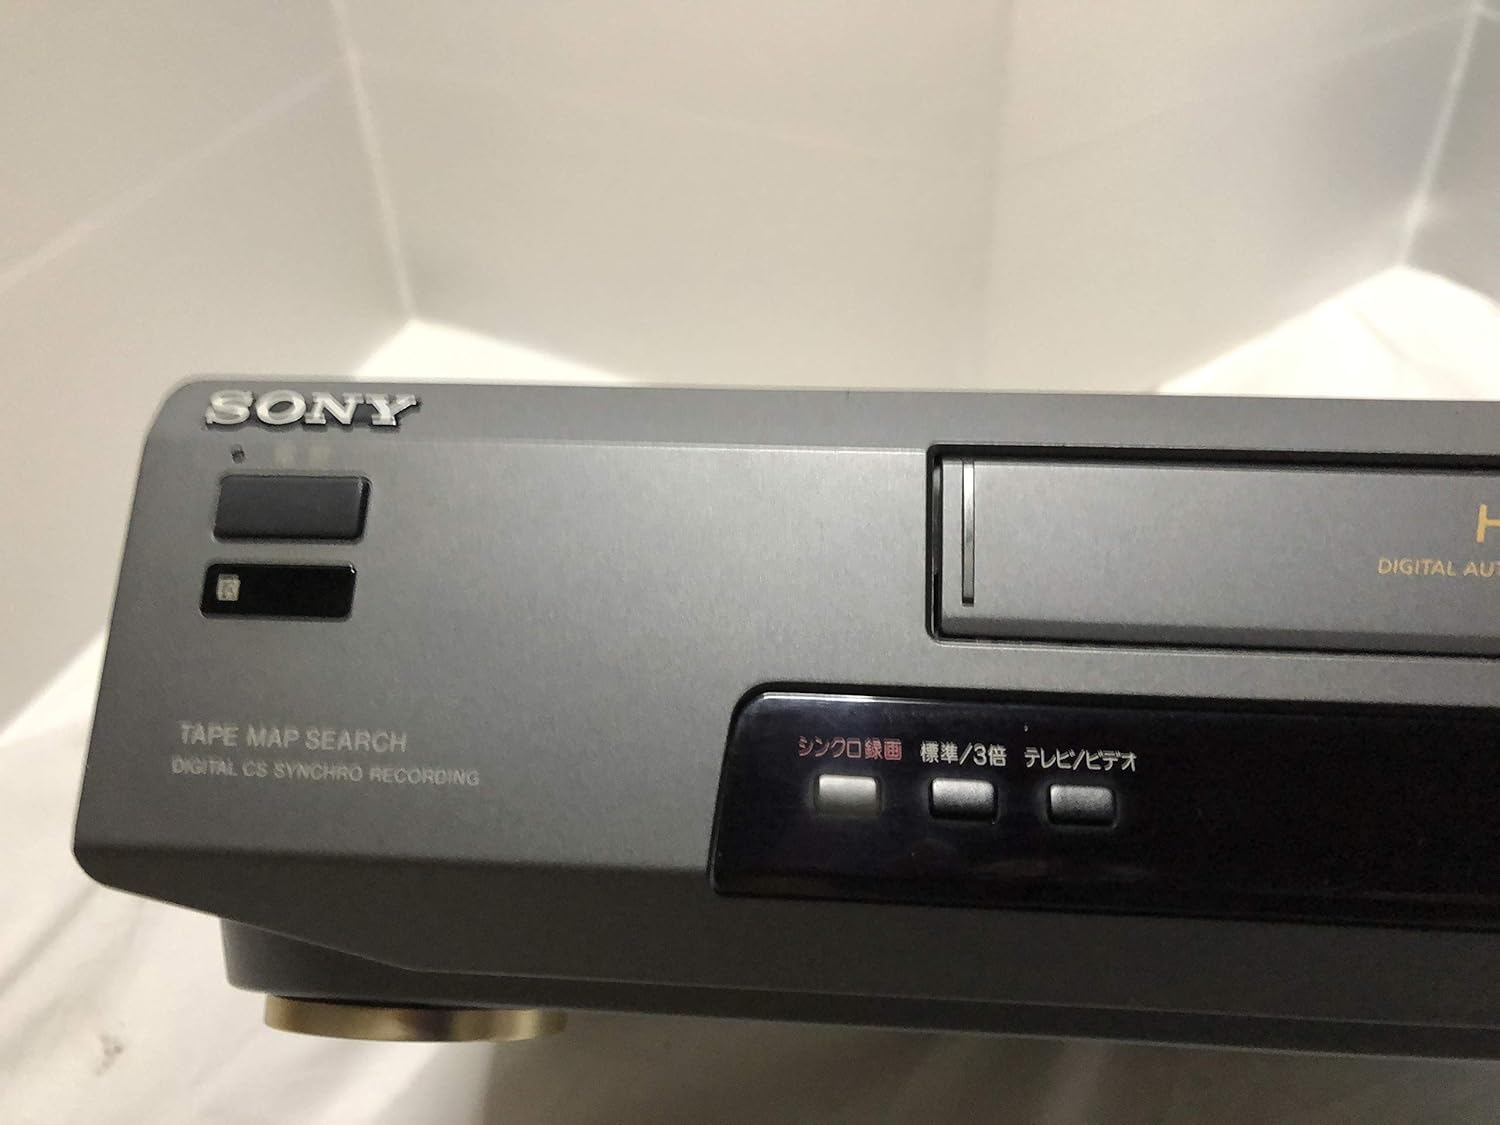
Figura 3: Front left section of the Sony SLV-FT5 VCR. This view highlights the tape loading slot and the 'TAPE MAP SEARCH' feature, which assists in navigating recorded content on a tape.
4.3 Riproduzione
After loading a tape, press the GIOCARE button (►) on the VCR or remote control to begin playback. Use the PAUSA (∥), FERMARE (■), RIAVVOLGERE (◀◀), e AVANTI VELOCE Pulsanti (►►) per controllare la riproduzione.

Figura 4: Front right section of the Sony SLV-FT5 VCR. This image displays the main playback controls (Play, Stop, Rewind, Fast Forward, Pause) and additional buttons for 'Quick Timer' and 'Tracking' adjustments.
4.4 Registrazione
To record, ensure a blank or recordable tape is inserted. Select the desired input source (e.g., TV channel). Press the RICORDA (●) button on the VCR or remote control. Press FERMARE (■) to end recording.
4.5 Tracking Adjustment
If the picture quality during playback is poor (e.g., horizontal lines or noise), use the TRACCIAMENTO buttons on the front panel or remote control to fine-tune the tape's alignment with the VCR's heads.
5. Manutenzione
5.1 Pulizia dell'unità
Wipe the exterior of the VCR with a soft, dry cloth. For stubborn stains, use a cloth lightly dampPulire con una soluzione detergente delicata, quindi asciugare. Non utilizzare detergenti abrasivi o solventi.
5.2 Pulizia della testina
Over time, VCR heads can accumulate dirt, leading to poor picture and sound quality. Use a commercially available dry-type VHS head cleaning cassette according to its instructions. Avoid wet-type cleaners as they can damage the heads.
5.3 Conservazione
When not in use for extended periods, disconnect the VCR from the power outlet. Store the unit in a cool, dry place, away from dust and direct sunlight.
6. Risoluzione Dei Problemi
If you encounter issues with your VCR, refer to the following common problems and solutions before seeking professional service.
| Problema | Possibile causa | Soluzione |
|---|---|---|
| Nessun potere | Cavo di alimentazione scollegato; problema con la presa di corrente | Controllare il collegamento del cavo di alimentazione; provare una presa diversa. |
| Nessuna immagine/audio | Incorrect TV input; loose A/V cables | Select correct TV input (e.g., Video 1, AV); ensure A/V cables are securely connected. |
| Scarsa qualità dell'immagine (neve, linee) | Dirty VCR heads; tracking issue; old/damaged tape | Clean VCR heads; adjust tracking; try a different tape. |
| Il nastro non viene espulso | Power issue; mechanical malfunction | Ensure power is on; try pressing EJECT multiple times. If issue persists, seek service. |
| Il telecomando non funziona | Dead batteries; obstructed sensor | Replace batteries; ensure no obstacles between remote and VCR sensor. |
7. Specifiche
| Caratteristica | Specificazione |
|---|---|
| Marca | Sony |
| Numero di modello | SLV-FT5 |
| Tipo di supporto | Videocassetta |
| Risoluzione | 720 x 480 pixel |
| Peso del prodotto | 4160 grammi |
| Modalità di uscita audio | Stereo |
| Formati audio supportati | Monaural, Stereo |
| Codifica video | Analogico |
| Dispositivi compatibili | Televisione |
| Compatibilità video in ingresso | Formato NTSC |
| Requisiti di potenza | 100V, 18W, 50/60Hz |
8. Garanzia e supporto
For warranty information and customer support, please refer to the documentation included with your purchase or visit the official Sony websito. Conservare la prova d'acquisto per eventuali reclami in garanzia.