
Bios 4745928
Termometro professionale wireless per carne BIOS
Modello: 4745928
Introduzione
The BIOS Professional Wireless Meat Thermometer is designed to accurately measure the internal temperature of various meats during cooking. It features a wireless monitor that receives temperature readings from a stainless steel probe, allowing you to monitor your food from a distance. This manual provides instructions for setup, operation, maintenance, and troubleshooting to ensure optimal performance of your device.

Image: The BIOS Professional Wireless Meat Thermometer, showing the main display unit, the stainless steel probe connected by a wire, and the base unit.
Componenti del prodotto
Your BIOS Professional Wireless Meat Thermometer package includes the following components:
- Wireless Display Unit: The main unit with a digital screen for displaying temperature and timer.
- Sonda in acciaio inossidabile: A durable probe designed to be inserted into meat for temperature measurement.
- Cavo della sonda: Connects the stainless steel probe to the display unit.
- Base Unit/Stand: Provides stability for the display unit and may house the wireless transmitter.
- Clip da cintura: Located on the back of the display unit for easy portability.

Immagine: un primo piano view of the stainless steel meat probe and its connecting cable.
Impostare
- Installazione della batteria:
Locate the battery compartment on the back of the wireless display unit. Insert the required batteries (typically AAA, not included) ensuring correct polarity (+/-). Close the battery compartment securely.
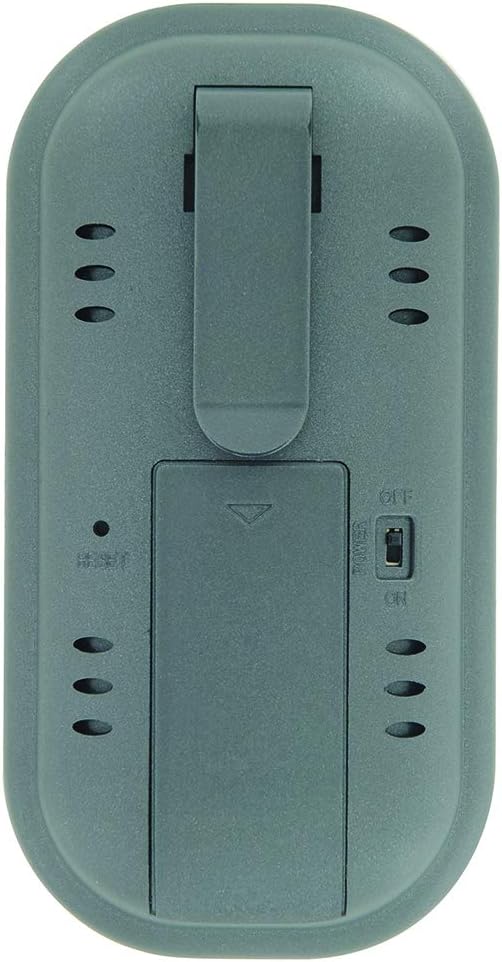
Image: The rear side of the thermometer, displaying the battery compartment cover and the integrated belt clip.
- Connessione sonda:
Insert the jack end of the stainless steel probe cable firmly into the designated port on the side of the wireless display unit. Ensure a secure connection for accurate readings.
- Accensione:
Slide the ON/OFF switch, usually located on the back or side of the unit, to the "ON" position. The display should illuminate.
Istruzioni per l'uso
1. Selecting Meat Type and Doneness (Pre-programmed Settings)
- Premere il tasto CARNE button to cycle through different meat types (e.g., Beef, Poultry, Pork, Fish).
- Once the desired meat type is selected, press the GUSTO button to select the desired doneness level (e.g., Rare, Medium, Well Done). The target temperature will automatically adjust based on your selection.
2. Impostazione manuale della temperatura
If you prefer to set a custom target temperature:
- Premere il tasto MODALITÀ button until the target temperature setting is highlighted or blinking.
- Utilizzare il MINIMO E SEC buttons (or up/down arrows if present) to adjust the target temperature to your desired value.
- Premere MODALITÀ again to confirm the setting or to exit the setting mode.
3. Utilizzo della funzione Timer
The thermometer includes a count up/down timer:
- To set a countdown timer: Premere il tasto MINIMO E SEC pulsanti per impostare l'ora desiderata. Premere AVVIO/ARRESTO per iniziare.
- To use as a count-up timer: Ensure the timer is at 0:00, then press AVVIO/ARRESTO.
- Premere CHIARO per reimpostare il timer.
4. Inserimento della sonda
Carefully insert the stainless steel probe into the thickest part of the meat, avoiding bones or gristle. Ensure the probe tip is fully embedded for accurate internal temperature readings.
5. Monitoring Temperature and Alarm
The current internal temperature of the meat will be displayed on the screen. When the meat reaches the set target temperature, an alarm will sound to notify you. The wireless range is approximately 30 meters (100 feet), allowing you to monitor from a distance.
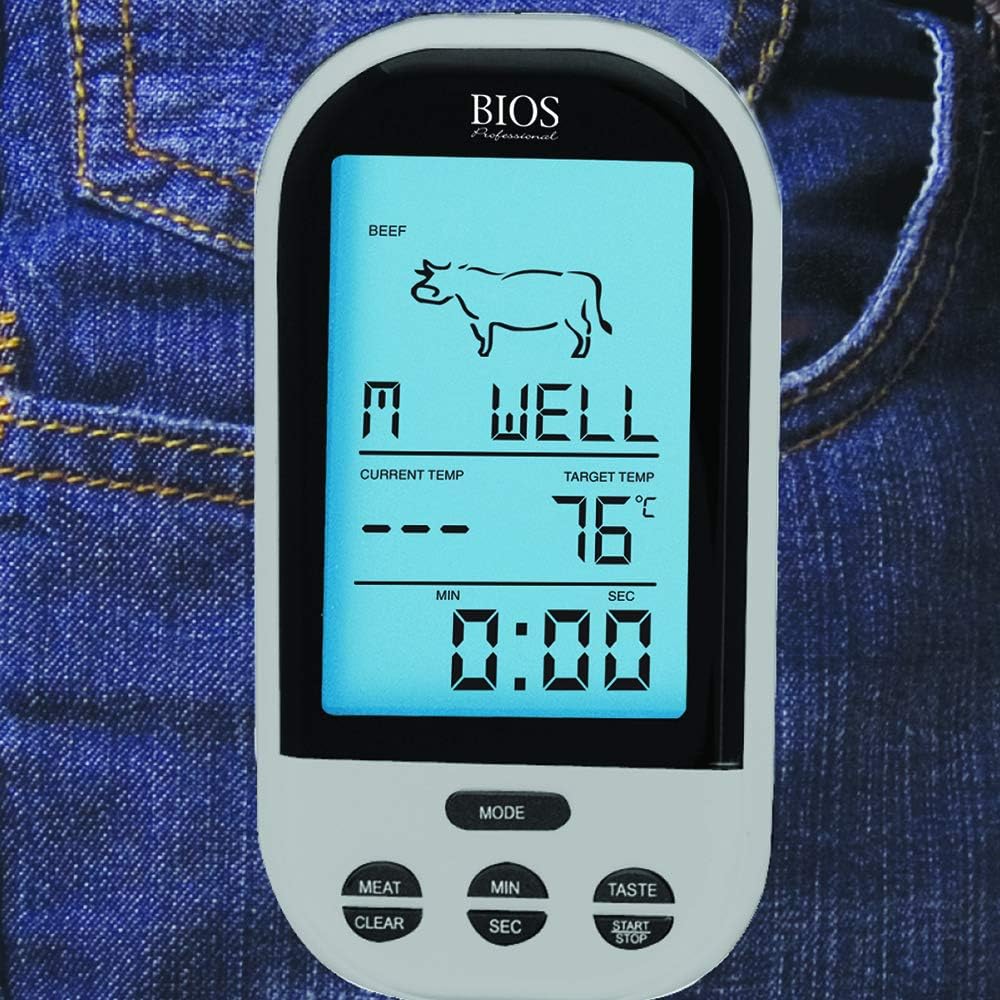
Image: The wireless display unit shown clipped to a jeans pocket, demonstrating its portability during use.
Manutenzione
- Pulizia della sonda: After each use, carefully clean the stainless steel probe with warm, soapy water. Wipe thoroughly with a damp panno e asciugare completamente. Do not immerse the probe cable or the display unit in water. The product care instructions specify "Hand Wash Only" for the probe.
- Pulizia dell'unità display: Pulire l'unità display con un panno morbido eamp stoffa. Non utilizzare detergenti abrasivi né immergere in acqua.
- Magazzinaggio: Quando non vengono utilizzati, conservare il termometro e la sonda in un luogo pulito e asciutto.
- Sostituzione della batteria: Replace batteries when the display becomes dim or the unit stops functioning correctly. Remove batteries if storing for extended periods to prevent leakage.
Risoluzione dei problemi
| Problema | Possibile causa | Soluzione |
|---|---|---|
| Nessun display o display poco luminoso | Batterie scariche o esaurite; installazione errata della batteria. | Replace batteries with new ones; Check battery polarity. |
| Letture della temperatura imprecise | Probe not fully inserted; Probe tip touching bone/gristle; Damaged probe or cable. | Re-insert probe into thickest part of meat, away from bones; Inspect probe and cable for damage. If damaged, replace probe. |
| Nessuna connessione wireless | Out of range; Obstructions between units; Interference. | Move display unit closer to the probe; Reduce obstructions; Avoid strong electromagnetic sources. |
| L'allarme non suona | Alarm function not enabled; Volume too low. | Ensure alarm is activated in settings; Check for volume controls if available. |
Specifiche
| Caratteristica | Dettaglio |
|---|---|
| Numero di modello | 4745928 |
| Marca | Biografie |
| Tecnologia di connettività | Senza fili |
| wireless Range | Fino a 30 m (100 piedi) |
| Tipo di visualizzazione | Digitale |
| Materiale | Stainless Steel (Probe), Plastic (Unit) |
| Caratteristiche speciali | Temperature Alarm, Count up/down timer, Pre-programmed settings, Manual temperature setting, Easy-Use Belt Clip |
| Dimensioni del prodotto | 5.08 x 6.6 x 13.51 cm (circa 2 x 2.6 x 5.3 pollici) |
| Peso dell'articolo | 185 g (circa 0.4 libbre) |
| Fonte di alimentazione | Batteria |
Garanzia e supporto
For information regarding warranty coverage, product support, or to purchase replacement parts, please refer to the manufacturer's official webo contattare il servizio clienti. Conservare la ricevuta d'acquisto come prova d'acquisto per eventuali reclami in garanzia.
Manufacturer: Thermor LTD
Ask a question about this manual
Ask about setup, troubleshooting, compatibility, parts, safety, or missing instructions. Manuals+ will review the question and use this page’s manual context to help answer it.