Electro-Voice EKX Series / MG16XU Bundle
Electro-Voice EKX Series Portable Loudspeaker Bundle User Manual
Marca: Electro-Voice
This manual provides comprehensive instructions for the setup, operation, and maintenance of your Electro-Voice EKX Series Portable Loudspeaker Bundle with Yamaha MG16XU Mixing Console and Accessories.
1. Introduzione
This user manual is designed to guide you through the proper installation, operation, and care of your Electro-Voice EKX Series Portable Loudspeaker Bundle. This comprehensive sound system is ideal for various applications, including live performances, DJ sets, presentations, and events requiring high-quality audio reinforcement. Please read this manual thoroughly before operating the equipment to ensure safe and optimal performance.

Figura 1.1: Oltreview of the Electro-Voice EKX Series Portable Loudspeaker Bundle, including loudspeakers, subwoofers, mixing console, microphones, and cables.
2. Informazioni sulla sicurezza
Per evitare scosse elettriche, incendi o lesioni, osservare sempre le seguenti precauzioni di sicurezza:
- Alimentazione elettrica: Connect the equipment only to a power supply of the type described in the specifications and marked on the unit.
- Messa a terra: Ensure all equipment is properly grounded to prevent electric shock.
- cavi: Use only high-quality, undamaged audio and power cables. Avoid placing cables in high-traffic areas where they could be tripped over or damaged.
- Ventilazione: Do not block ventilation openings. Ensure adequate airflow around all components, especially amplifiers and the mixing console, to prevent overheating.
- Umidità: Do not expose equipment to rain or moisture. Do not place objects filled with liquids, such as vases, on the apparatus.
- Manutenzione: Non tentare di riparare questa apparecchiatura da soli. Affidare tutta la manutenzione a personale di assistenza qualificato.
- Volume alto: Prolonged exposure to high sound pressure levels can cause permanent hearing damage. Use caution when operating the system at high volumes.
3. Contenuto della confezione
Verifica che tutti gli articoli elencati di seguito siano inclusi nel tuo pacchetto:
- Electro-Voice EKX Series Portable Loudspeakers (Quantity: 2)
- Electro-Voice EKX Series Portable Subwoofers (Quantity: 2)
- Yamaha MG16XU Mixing Console (Quantity: 1)
- Microphones (Quantity: 3)
- Microphone Stands (Quantity: 3)
- Alto Professional Bluetooth Receiver (Quantity: 1)
- XLR Cables (Various lengths and quantities for speakers, subwoofers, and microphones)
- Power Cables for all active components
- User Manuals for individual components (if applicable)
4. Impostazione
4.1 Componente suview
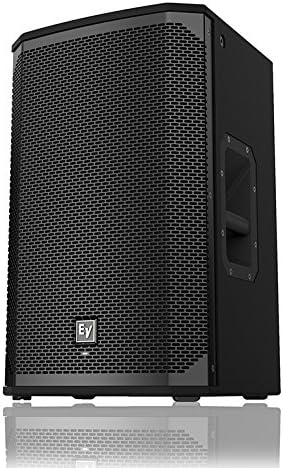
Figura 4.1.1: Fronte view of an Electro-Voice EKX Series Portable Loudspeaker, showcasingrazie alla sua griglia robusta e al design compatto.

Figure 4.1.2: Rear panel of an Electro-Voice EKX Series Portable Loudspeaker, featuring XLR inputs, output, and DSP controls.

Figura 4.1.3: Fronte view of an Electro-Voice EKX Series Portable Subwoofer, designed for powerful low-frequency reproduction.

Figure 4.1.4: Rear panel of an Electro-Voice EKX Series Portable Subwoofer, showing XLR inputs, outputs, and power connection.

Figura 4.1.5: in alto view of the Yamaha MG16XU Mixing Console, displaying its 16 channels, faders, EQ knobs, and effects section.

Figura 4.1.6: Posteriore view of the Yamaha MG16XU Mixing Console, showing the power input, USB port, and other connectivity options.

Figure 4.1.7: The Alto Professional Bluetooth Receiver, a compact device for wireless audio streaming.

Figure 4.1.8: A typical dynamic microphone included in the bundle, suitable for vocals and instruments.
4.2 Posizionamento iniziale
Position the Electro-Voice EKX loudspeakers on their stands, ensuring they are stable and at an appropriate height for your audience. Place the EKX subwoofers on the floor, ideally centered or symmetrically placed relative to the main loudspeakers for optimal bass distribution. The Yamaha MG16XU mixing console should be placed on a stable surface within easy reach of the operator, away from excessive heat or moisture.
4.3 Collegamenti di alimentazione
- Ensure all equipment is switched OFF before making any power connections.
- Connect the provided power cables to the power inlets of the EKX loudspeakers, EKX subwoofers, and the Yamaha MG16XU mixing console.
- Plug the other end of the power cables into grounded electrical outlets.
- Do not power on any equipment until all audio connections are complete.
4.4 Collegamenti audio
- Mixer to Subwoofers: Connect the MAIN STEREO OUT (XLR) of the Yamaha MG16XU mixing console to the INPUT (XLR) of the EKX subwoofers using XLR cables. If using two subwoofers, connect the Left output to one subwoofer and the Right output to the other.
- Subwoofers to Loudspeakers: Connect the THRU/OUTPUT (XLR) of the EKX subwoofers to the INPUT (XLR) of the EKX loudspeakers. This allows the subwoofers to pass the signal to the full-range loudspeakers.
- Microphones to Mixer: Connect the microphones to the XLR INPUTs of the Yamaha MG16XU mixing console using XLR cables. Use channels 1-3 for the microphones.
- Bluetooth Receiver to Mixer: Connect the Alto Professional Bluetooth Receiver to an available stereo input channel on the Yamaha MG16XU mixing console (e.g., channels 15/16 or a dedicated stereo input) using appropriate cables (e.g., XLR to 1/4" TRS or RCA to 1/4" TRS, depending on the receiver's output and mixer's input).
5. Istruzioni per l'uso
5.1 Powering On/Off Sequence
To prevent damage to your equipment and unpleasant pops/clicks, follow this power sequence:
- Ensure all volume controls on the mixing console and loudspeakers are turned down to their minimum.
- Power on the Yamaha MG16XU mixing console first.
- After the mixer has fully initialized, power on the EKX subwoofers.
- Finally, power on the EKX loudspeakers.
- To power off, reverse the sequence: turn off loudspeakers, then subwoofers, then the mixing console.
5.2 Yamaha MG16XU Mixing Console Basics
- Controllo di guadagno: Adjust the GAIN knob for each input channel to achieve an optimal input level. The PEAK LED should flash only occasionally.
- Sezione EQ: Use the HIGH, MID, and LOW knobs to shape the tone of each input.
- Invii Aux: Use AUX 1 and AUX 2 to send signals to external effects processors or monitor mixes.
- Fader di canale: Adjust the volume of individual channels using the faders.
- Fader principale: Control the overall output volume of the mix using the STEREO master fader.
- Effetti: The MG16XU features built-in SPX effects. Use the FX RTN fader to control the level of the effects return.
5.3 Electro-Voice EKX Series Loudspeaker Operation
- Livello di ingresso: Adjust the INPUT LEVEL knob on the rear panel of each EKX loudspeaker and subwoofer to match the output level from the mixing console. Start with the knob at the 12 o'clock position.
- Preimpostazioni DSP: The EKX series features integrated DSP with various presets (e.g., Music, Live, Speech). Select the appropriate preset for your application using the rear panel controls.
- Crossover del subwoofer: Ensure the subwoofer's crossover frequency is set appropriately to blend seamlessly with the full-range loudspeakers. Refer to the individual EKX subwoofer manual for detailed DSP settings.
5.4 Utilizzo del microfono
- Posizionamento: Position microphones appropriately for the sound source. For vocals, maintain a consistent distance from the microphone.
- Guadagno Stagin: Adjust the GAIN on the mixer channel for each microphone to prevent clipping (distortion) while ensuring a strong signal.
- Prevenzione del feedback: Avoid pointing microphones directly at loudspeakers. Use the mixer's EQ to reduce frequencies that cause feedback.
5.5 Bluetooth Connectivity (Alto Professional Receiver)
- Power on the Alto Professional Bluetooth Receiver.
- Attiva il Bluetooth sul tuo dispositivo audio (smartphone, tablet, laptop).
- Cercare and select the Alto Professional receiver in your device's Bluetooth settings.
- Once paired, audio from your device will stream wirelessly to the mixing console. Adjust the channel fader on the mixer for the Bluetooth input.
6. Manutenzione
- Pulizia: Use a soft, dry cloth to clean the exterior surfaces of all components. For stubborn dirt, a slightly damp È possibile utilizzare un panno, ma assicurarsi che non penetri umidità nelle unità. Non utilizzare detergenti abrasivi o solventi.
- Magazzinaggio: When not in use, store the equipment in a cool, dry place, away from direct sunlight and extreme temperatures. Use protective covers or cases if transporting or storing for extended periods.
- Cura del cavo: Regularly inspect all cables for signs of wear, cuts, or damage. Replace damaged cables immediately. Coil cables neatly after use to prevent tangles and damage.
- Ventilazione: Periodically check that ventilation grilles on loudspeakers, subwoofers, and the mixer are free from dust and debris. Use a soft brush or compressed air to clear blockages.
7. Risoluzione Dei Problemi
7.1 Nessuna uscita audio
- Controlla la potenza: Ensure all components (mixer, loudspeakers, subwoofers) are powered on and their power indicators are lit.
- Controllare le connessioni: Verify all audio cables are securely connected between the mixer, subwoofers, and loudspeakers.
- Livelli del volume: Confirm that the master fader on the mixer is up, individual channel faders are up, and the input level knobs on the loudspeakers/subwoofers are not at minimum.
- Sorgente di input: Ensure the correct input source is selected on the mixer and that the source device (e.g., Bluetooth device) is playing audio.
7.2 Suono distorto
- Guadagno Stagin: Reduce the GAIN knob on the mixer channel if the PEAK LED is constantly lit. Also, check the input level on the loudspeakers/subwoofers.
- Volume principale: Lower the master fader on the mixer if the overall output is too high.
- Integrità del cavo: Ispezionare i cavi audio per verificare che non siano danneggiati o che i collegamenti siano allentati.
7.3 Feedback (High-pitched Squeal)
- Posizionamento del microfono: Move microphones further away from loudspeakers. Avoid pointing microphones directly at speakers.
- Regolazione dell'equalizzazione: Use the EQ on the mixer to cut frequencies that are causing feedback. Common feedback frequencies are often in the mid-range.
- Riduzione del guadagno: Lower the gain of the microphone channel or the master volume.
7.4 Problemi di connessione Bluetooth
- Potenza del ricevitore: Ensure the Alto Professional Bluetooth Receiver is powered on.
- Modalità di accoppiamento: Put the receiver into pairing mode if it's not automatically discoverable.
- Dispositivo Bluetooth: Confirm Bluetooth is enabled on your audio device and it's not connected to another device.
- Distanza: Ensure the audio device is within the effective range of the Bluetooth receiver.
8. Specifiche
- Marca:
- Elettro-Voce
- Modello:
- EKX Series Loudspeakers & Subwoofers, Yamaha MG16XU Mixing Console
- Fonte di energia:
- Elettrico con cavo
- Uscita Wattage (Loudspeakers):
- 1500 Watts (Peak per loudspeaker)
- Number of Channels (Mixer):
- 16
- Ingresso audio:
- XLR, 1/4 in
- Tipo di connettore:
- RCA, XLR, 1/4" TRS
- Colore:
- Nero
- Dispositivi compatibili:
- Audio Player, DJ Mixer, Guitar, Keyboard, Microphone, Smartphone
- Tipo di montaggio:
- Floor Standing (for loudspeakers and subwoofers)
- Codice UPC:
- 797698476070
- ASIN:
- B00XNW2ATG
9. Garanzia e supporto
This product bundle is covered by the individual manufacturer's warranties for each component (Electro-Voice for loudspeakers/subwoofers, Yamaha for the mixing console, etc.). Please refer to the warranty documentation provided with each specific item for details on coverage, duration, and terms.
For technical support, troubleshooting assistance, or warranty claims, please contact the respective manufacturer's customer service department. Contact information can typically be found on their official websites or in the individual product manuals.
Ask a question about this manual
Ask about setup, troubleshooting, compatibility, parts, safety, or missing instructions. Manuals+ will review the question and use this page’s manual context to help answer it.