1. Introduzione
The GoWISE Power 2000W Pure Sine Wave Power Inverter converts 12V DC power from a battery source into 120V AC household power. This inverter is designed for use in various applications, including vehicles, boats, camping, and during power outages. It provides a stable and clean power source suitable for sensitive electronic equipment, offering 2000W of continuous power and a 4000W surge capacity.
1.1. Cosa c'è nella scatola
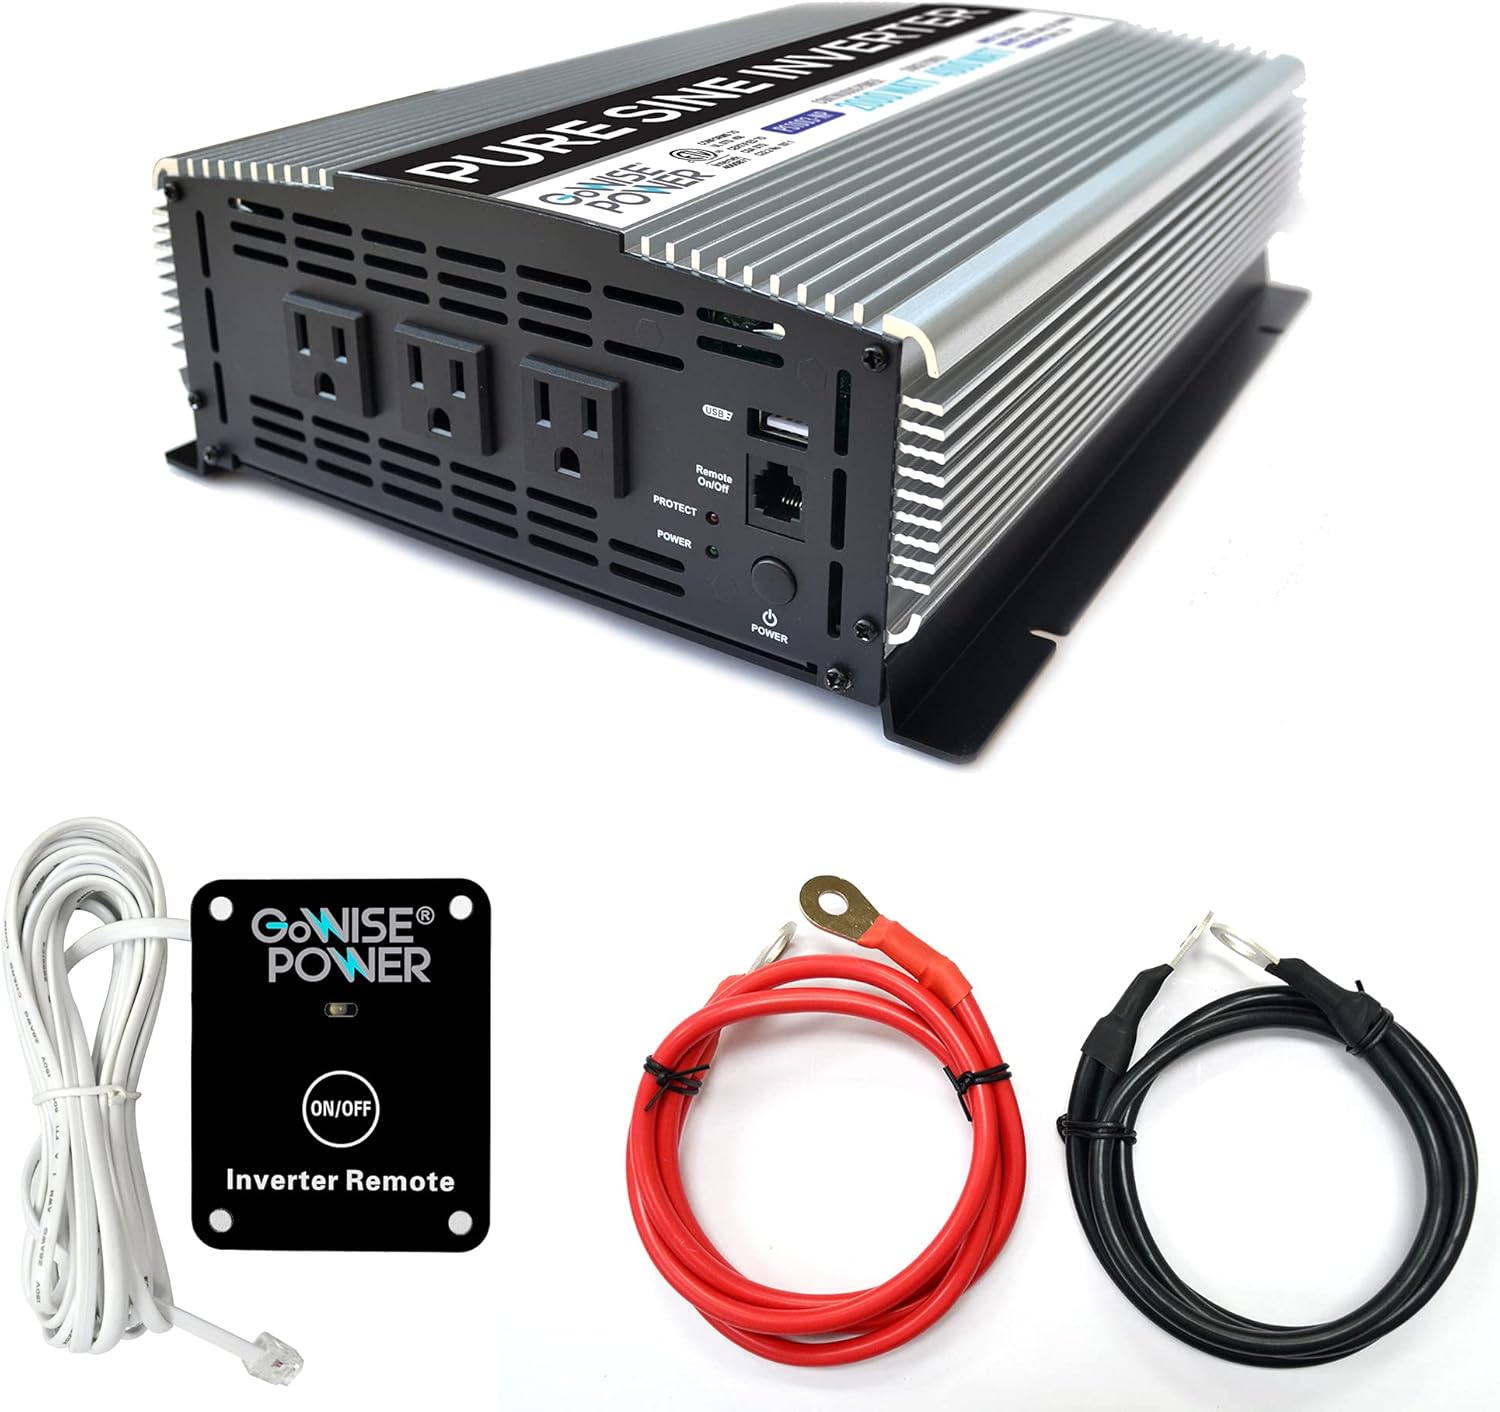
Image 1.1: GoWISE Power 2000W Pure Sine Wave Power Inverter with included accessories.
- GoWISE Power 2000W Pure Sine Wave Power Inverter (Model PS1003)
- Remote Switch with connecting cable
- One pair of Black and Red Battery Cables with ring terminals
- Manuale di istruzioni (questo documento)
2. Informazioni sulla sicurezza
Read all safety warnings and instructions carefully before installing or operating the inverter. Failure to follow these instructions may result in electric shock, fire, serious injury, or property damage.
2.1. Precauzioni generali di sicurezza
- Keep the inverter away from moisture, water, rain, and snow.
- Non utilizzare l'inverter se è caduto o è danneggiato.
- Do not disassemble the inverter. Incorrect reassembly may result in electric shock or fire.
- Per ridurre il rischio di scosse elettriche, scollegare l'inverter dalla presa di corrente prima di effettuare qualsiasi operazione di manutenzione o pulizia.
- Avoid placing the inverter in direct sunlight or near heating vents.
- Assicurare un'adeguata ventilazione attorno all'inverter. Non ostruire le aperture di ventilazione.
- Questo dispositivo non è destinato all'uso da parte di persone (compresi i bambini) con capacità fisiche, sensoriali o mentali ridotte o prive di esperienza e conoscenza, a meno che non siano state supervisionate o istruite sull'uso dell'apparecchio da una persona responsabile della loro sicurezza .
2.2. Sicurezza elettrica
- Collegare l'inverter solo a una fonte di alimentazione da 12 V CC.
- Ensure the battery cables are connected with correct polarity (red to positive, black to negative). Incorrect connection will damage the inverter.
- Non collegare l'inverter al cablaggio di distribuzione CA.
- Collegare sempre l'inverter a un impianto elettrico correttamente messo a terra.
- Before connecting or disconnecting any cables, ensure the inverter is turned off.
- Verificare che il totale wattagLa potenza di tutti gli apparecchi collegati non superi la potenza nominale continua dell'inverter (2000 W).
3. Configurazione e installazione
3.1. Scelta di una posizione
Select a location for the inverter that is:
- Dry and protected from water.
- Ben ventilato per consentire la dissipazione del calore.
- Lontano dalla luce solare diretta e da fonti di calore.
- Montato saldamente per evitare movimenti.
- As close as possible to the 12V DC power source to minimize cable length and voltage goccia.
3.2. Istruzioni per il cablaggio
Follow these steps to connect the inverter to your 12V DC power source:
- Preparare l'inverter: Assicurarsi che l'interruttore di alimentazione dell'inverter sia in posizione OFF.
- Collegare il filo di terra: Connect one end of a suitable ground wire (not supplied) to the inverter's ground terminal (marked with a ground symbol) and the other end to a proper earth ground point (e.g., vehicle chassis, ground rod).
- Connect DC Cables to Inverter:Connect the ring terminal of the red battery cable to the positive (+) DC input terminal on the inverter. Connect the ring terminal of the black battery cable to the negative (-) DC input terminal on the inverter. Tighten the terminal nuts securely.

Image 3.1: Rear panel of the inverter with DC input terminals.
- Connect DC Cables to Battery: Connect the other end of the red battery cable to the positive (+) terminal of your 12V DC battery. Connect the other end of the black battery cable to the negative (-) terminal of your 12V DC battery. Ensure these connections are tight and secure.
- Remote Switch Connection (Optional): If using the remote switch, plug its cable into the RJ45 port labeled 'Remote On/Off' on the front panel of the inverter.

Image 3.2: Remote switch and battery cables.
Important: Always ensure proper cable gauge for your application. Inadequate cable size can lead to voltage drop and reduced performance or damage.
4. Istruzioni per l'uso
4.1. Accensione/Spegnimento

Image 4.1: Front panel of the inverter.
- Per attivare: Press and hold the main POWER button on the inverter's front panel for a few seconds until the green POWER indicator light illuminates. If using the remote switch, ensure the main power button on the inverter is in the ON position, then press the ON/OFF button on the remote.
- Per spegnere: Press and hold the main POWER button on the inverter's front panel until the green POWER indicator light turns off. If using the remote switch, press the ON/OFF button on the remote.
4.2. Using AC Outlets and USB Port
- Once the inverter is powered on, you can plug your 120V AC appliances into the three standard AC outlets.
- Per caricare i dispositivi USB, collegarli alla porta USB da 5 V.
- Assicurarsi che il consumo energetico totale di tutti i dispositivi collegati non superi i 2000 W.
4.3. Funzionamento del telecomando
The included remote switch allows you to turn the inverter on and off from a distance. Simply plug the remote cable into the designated RJ45 port on the inverter's front panel. The remote has an ON/OFF button and an indicator light.
5. Funzionalità di protezione
The GoWISE Power Inverter is equipped with multiple protection systems to ensure safe operation and protect both the inverter and your connected devices.

Image 5.1: Inverter protection systems.
- Protezione termica: Automatically shuts down the inverter if its internal temperature exceeds a safe limit. This prevents damage from overheating.
- Protezione da sovraccarico: Activates if the total power draw from connected devices exceeds the inverter's rated capacity. The inverter will shut down to prevent damage.
- oltre il volumetage Protezione: Protects the inverter from damage if the input DC voltage from the battery exceeds a safe operating level.
- Sotto il volumetage Protezione: Shuts down the inverter if the input DC voltage drops below a critical level, protecting the battery from deep discharge.
- Basso volumetage Protection Alarm: An audible alarm will sound when the battery voltage is getting low, providing a warning before the inverter shuts down due to under voltage.
When a protection system is triggered, the inverter will typically shut down, and the PROTECT indicator light on the front panel may illuminate. Disconnect the load, resolve the issue, and then restart the inverter.
6. Manutenzione
Una manutenzione regolare garantisce prestazioni ottimali e longevità del vostro inverter.
- Pulizia: Periodically clean the exterior of the inverter with a soft, dry cloth. Do not use abrasive cleaners or solvents. Ensure ventilation openings are free from dust and debris.
- Ispezione dei cavi: Regularly inspect battery cables and connections for any signs of wear, corrosion, or looseness. Tighten connections as needed.
- Ventilazione: Assicurarsi che l'area attorno all'inverter rimanga libera per consentire un corretto flusso d'aria e un adeguato raffreddamento.
- Magazzinaggio: Se si conserva l'inverter per un periodo prolungato, scollegarlo dalla batteria e conservarlo in un luogo fresco e asciutto.
7. Risoluzione Dei Problemi
Questa sezione affronta i problemi più comuni che potresti riscontrare con il tuo inverter.
| Problema | Possibile causa | Soluzione |
|---|---|---|
| L'inverter non si accende. | No DC input power; Loose battery connections; Inverter switch off; Remote switch off (if used). | Controllare il volume della batteriatage; Ensure battery cables are securely connected; Turn on inverter's main power switch; Turn on remote switch. |
| No AC output, PROTECT light on. | Sovraccarico; surriscaldamento; basso livello della batteriatage; High battery voltage. | Reduce connected load; Allow inverter to cool down; Recharge battery; Check battery charging system. |
| Basso volumetagL'allarme suona. | Volume della batteriatage è basso. | Recharge or replace the battery. Reduce load to extend battery life. |
| L'apparecchio collegato non funziona. | Appliance requires more power than inverter can provide; Appliance is faulty. | Controllare l'acqua dell'apparecchiotage; Try appliance with a standard AC outlet; Ensure inverter is providing power. |
| Fans are running loudly. | L'inverter è sottoposto a un carico elevato o funziona in un ambiente caldo. | Si tratta di un funzionamento normale. Assicurare una ventilazione adeguata. |
8. Specifiche
Technical details for the GoWISE Power 2000W Pure Sine Wave Power Inverter (Model PS1003).

Image 8.1: Inverter dimensions.
| Caratteristica | Specificazione |
|---|---|
| Modello | PS1003 |
| Potenza continua | 2000 Watt |
| Potenza di picco | 4000 Watt |
| Ingresso volumetage | 12 V CC (200 A) |
| Volume di uscitatage | 120 V CA |
| Frequenza di uscita | 60 Hz |
| Forma d'onda di uscita | Onda sinusoidale pura |
| Uscita USB | 5V DC, 2.1A |
| Distorsione armonica totale (THD) | <3% |
| Dimensioni (L x P x A) | 17.1 x 9.3 x 4 inches (approx. 13" x 9.75" x 3.5" based on image) |
| Peso dell'articolo | 11.4 libbre |
| Sistemi di protezione | Thermal, Overload, Over Voltage, sotto il volumetage, basso voltage Allarme |
9. Garanzia e supporto
9.1. Informazioni sulla garanzia
GoWISE Power products are designed for reliability. For specific warranty terms and conditions, please refer to the documentation included with your purchase or contact GoWISE Power customer support.
9.2. Assistenza clienti
If you require further assistance or have questions not covered in this manual, please contact GoWISE Power customer support. You can also refer to the official PDF user manual for additional details: