
1. Introduzione
This manual provides detailed instructions for installing, configuring, and maintaining your GIGABYTE GA-B150M-D3H Micro ATX motherboard. The GA-B150M-D3H is designed to support 6th Generation Intel Core Processors and features Dual Channel DDR4 memory, PCIe Gen3 x4 M.2 connector, SATA Express, and 8-channel HD audio with Audio Noise Guard.
Please read this manual thoroughly before beginning installation to ensure proper setup and operation.
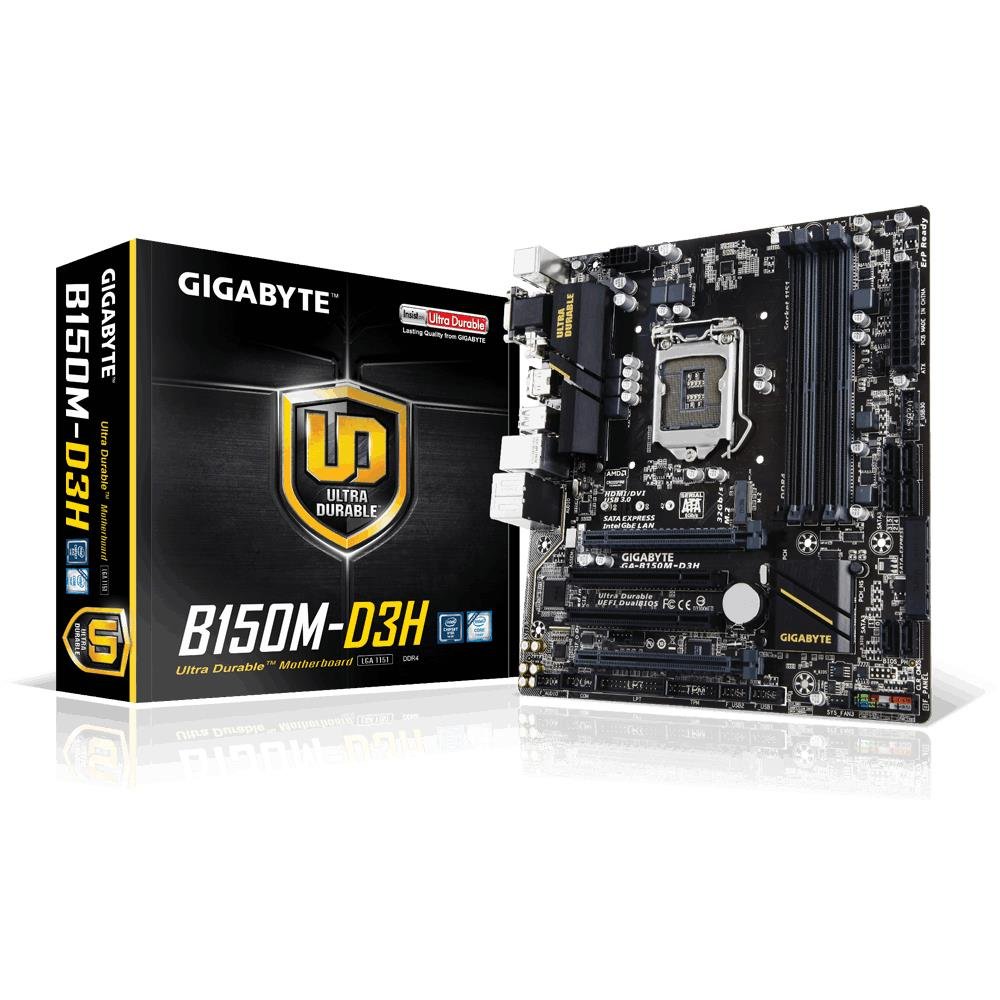
Image 1.1: GIGABYTE GA-B150M-D3H Micro ATX Motherboard. This image displays the overall layout of the motherboard, highlighting its compact Micro ATX form factor and various component slots.
2. Informazioni sulla sicurezza
Per evitare danni alla scheda madre e lesioni personali, osservare le seguenti precauzioni di sicurezza:
- Scollegare sempre il cavo di alimentazione dalla presa a muro prima di toccare qualsiasi componente.
- Indossare un braccialetto antistatico o toccare frequentemente un oggetto metallico collegato a terra per scaricare l'elettricità statica.
- Maneggiare la scheda madre tenendola per i bordi per evitare di toccare i componenti sensibili.
- Tenere la scheda madre lontana dall'umidità e dalle temperature estreme.
- Assicurare una corretta ventilazione all'interno del case del computer per evitare il surriscaldamento.
3. Contenuto della confezione
Verificare che tutti gli elementi siano presenti nella confezione della scheda madre:
- GIGABYTE GA-B150M-D3H Motherboard
- Manuale d'uso
- Schermo I / O
- Cavi SATA
- Driver CD/DVD
Note: Contents may vary slightly depending on region or revision.
4. Layout della scheda madre
Familiarize yourself with the various components and connectors on the GA-B150M-D3H motherboard.
Image 4.1: GIGABYTE GA-B150M-D3H Motherboard Layout. This image provides a visual reference for the location of key components such as the CPU socket, DIMM slots, PCIe slots, SATA ports, and M.2 connector.
Componenti chiave:
- Socket CPU LGA 1151: For 6th Generation Intel Core Processors.
- DDR4 DIMM Slots (4): Supports Dual Channel DDR4 memory up to 2133 MHz.
- Slot PCIe: Includes PCIe Gen3 x16 for graphics cards and PCIe x1 slots for expansion.
- M.2 Connector: Supports PCIe NVMe & SATA SSDs with up to 32Gb/s data transfer.
- SATA Express Connector: For up to 16Gb/s data transfer.
- Porte SATA 6Gb/s: Per collegare dispositivi di archiviazione SATA tradizionali.
- 24-Pin ATX Power Connector: Ingresso alimentazione principale.
- 8-Pin ATX 12V Power Connector: Potenza assorbita dalla CPU.
- Intestazioni del pannello frontale: For power button, reset button, LED indicators, and USB ports.
- Connettori audio: 8-channel HD Audio with high quality capacitors and Audio Noise Guard.
5. Configurazione e installazione
Per una corretta installazione della scheda madre e dei componenti, seguire questi passaggi.
5.1. Installazione della CPU
- Locate the LGA 1151 CPU socket.
- Aprire la leva del socket della CPU e sollevare la piastra di carico.
- Allineare attentamente la CPU con il socket, assicurandosi che il triangolo dorato sulla CPU corrisponda al triangolo sul socket. Non forzare la CPU nel socket.
- Abbassare la piastra di carico e fissarla con la leva.
5.2. Installazione del dissipatore della CPU
Refer to your CPU cooler's instruction manual for specific installation steps. Ensure thermal paste is applied correctly between the CPU and cooler base.
5.3. Installazione della memoria (RAM)
- Aprire le clip su entrambe le estremità degli slot DIMM DDR4.
- Allineare il modulo di memoria allo slot, assicurandosi che la tacca sul modulo corrisponda alla chiave nello slot.
- Premere con decisione su entrambe le estremità del modulo di memoria finché le clip non scattano in posizione.
- For dual-channel performance, install memory modules in matching colored slots (e.g., DIMM1 and DIMM2).
5.4. Installazione delle schede di espansione
- Remove the metal bracket from the desired PCIe slot on your computer case.
- Allineare la scheda di espansione con lo slot PCIe e premere con decisione finché non è posizionata correttamente.
- Fissare la scheda al case del computer con una vite.
5.5. Collegamento dei dispositivi di archiviazione
- Dispositivi SATA: Connect one end of the SATA data cable to a SATA 6Gb/s port on the motherboard and the other end to your hard drive or SSD. Connect the SATA power cable from your power supply to the device.
- SSD M.2: Inserire l'SSD M.2 nello slot M.2 inclinandolo, quindi spingerlo delicatamente verso il basso e fissarlo con la vite in dotazione.
- SATA Express: If using a SATA Express device, connect it to the designated SATA Express connector.
5.6. Collegamento dei connettori del pannello frontale
Connect the cables from your computer case's front panel (power button, reset button, HDD LED, power LED, front USB, front audio) to the corresponding headers on the motherboard. Refer to the motherboard layout diagram for exact locations and pin assignments.
5.7. Collegamento dell'alimentazione
- Collegare il connettore di alimentazione principale ATX a 24 pin dell'alimentatore alla presa di alimentazione a 24 pin sulla scheda madre.
- Connect the 8-pin ATX 12V CPU power connector to the 8-pin socket near the CPU.
- Assicurarsi che tutti i collegamenti elettrici siano saldi.
6. Istruzioni per l'uso
6.1. Primo avvio
After assembling all components, connect your monitor, keyboard, and mouse. Power on the system. The system should display the GIGABYTE splash screen and then enter the BIOS/UEFI setup or attempt to boot from a connected storage device.
6.2. Configurazione BIOS/UEFI
Per accedere alla configurazione BIOS/UEFI, premere il tasto DEL key repeatedly during the boot process when the GIGABYTE logo appears. Here you can configure system settings, boot order, and monitor hardware status. The GA-B150M-D3H features GIGABYTE UEFI Dual BIOS for enhanced reliability.
6.3. Installazione del driver
After installing your operating system, install the necessary drivers for the motherboard components. These can be found on the included driver CD/DVD or downloaded from the official GIGABYTE website. Key drivers include chipset, audio (Realtek ALC892 codec), LAN, and any integrated graphics drivers.
6.4. Installazione del sistema operativo
Insert your operating system installation media (USB drive or DVD) and configure the boot order in the BIOS/UEFI to boot from it. Follow the on-screen instructions to install your preferred operating system (e.g., Windows 8.1, Windows 10).
7. Manutenzione
7.1. Pulizia
Regularly clean the interior of your computer case to prevent dust buildup, which can lead to overheating. Use compressed air to remove dust from fans, heatsinks, and motherboard components. Ensure the system is powered off and unplugged before cleaning.
7.2. Aggiornamenti del BIOS
GIGABYTE periodically releases BIOS updates to improve system stability, compatibility, and performance. Visit the official GIGABYTE website for your motherboard model (GA-B150M-D3H) to check for the latest BIOS version and follow the provided instructions for updating. Exercise caution during BIOS updates, as an interruption can render the motherboard inoperable.
8. Risoluzione Dei Problemi
Questa sezione affronta i problemi più comuni che potresti incontrare.
8.1. Nessuna alimentazione / Il sistema non si accende
- Check if the power supply is connected correctly to the motherboard (24-pin and 8-pin connectors).
- Assicurarsi che l'interruttore di alimentazione sia in posizione ON.
- Verificare che il cavo del pulsante di accensione del pannello frontale sia collegato correttamente al connettore della scheda madre.
- Testare l'alimentatore con un altro sistema o con un tester per alimentatori.
8.2. Nessuna uscita di visualizzazione
- Ensure the monitor is connected to the correct graphics output (either integrated graphics on the motherboard or a dedicated graphics card).
- Reinstallare la scheda grafica e i moduli di memoria.
- Provare ad avviare il sistema con un solo modulo di memoria installato.
- Verificare che il monitor sia acceso e impostato sulla sorgente di ingresso corretta.
8.3. Instabilità del sistema / arresti anomali
- Controllare le temperature della CPU e della GPU per assicurarsi che siano entro i limiti operativi di sicurezza.
- Verify that all drivers are installed and up to date.
- Eseguire strumenti di diagnostica della memoria per verificare la presenza di RAM difettosa.
- Assicurarsi che l'alimentatore fornisca energia sufficiente e stabile a tutti i componenti.
9. Specifiche
Detailed technical specifications for the GIGABYTE GA-B150M-D3H motherboard:
| Caratteristica | Specificazione |
|---|---|
| Nome del modello | GA-B150M-D3H |
| Fattore di forma | MicroATX (24.4 cm x 22.5 cm) |
| Presa CPU | LGA1151 |
| Processori compatibili | Processori Intel Core di ottava generazione |
| Chipset | Chipset Intel B150 Express |
| Tecnologia della memoria | DDR4 |
| Slot di memoria | 4 x DDR4 DIMM sockets (Dual Channel) |
| Capacità massima di memoria | 16 GB |
| Velocità di clock della memoria | 2133 MHz |
| Slot PCIe | 1 x PCI Express x16, 1 x Total PCIe Ports |
| Interfacce di archiviazione | PCIe Gen3 x4 M.2, SATA Express, SATA 6Gb/s |
| Codice audio | Realtek ALC892 codec, 8-channel HD Audio |
| Porte USB | Totale 8 porte USB (inclusa USB 2.0) |
| Connettore di alimentazione principale | ATX a 24 pin |
| Connettore di alimentazione della CPU | 8-Pin ATX 12V |
| Caratteristiche uniche | GIGABYTE UEFI Dual BIOS, Audio Noise Guard with LED Trace Path Lighting, App Center (Easy Tune, Cloud Station) |
10. Garanzia e supporto
For warranty information, please refer to the warranty card included in your product package or visit the official GIGABYTE websito. I termini e le condizioni della garanzia possono variare in base alla regione.
For technical support, driver downloads, BIOS updates, and further product information, please visit the GIGABYTE official support websito:
https://www.gigabyte.com/Support
When contacting support, please have your motherboard model (GA-B150M-D3H) and serial number ready.