
1. Informazioni importanti sulla sicurezza
Read all instructions carefully before attempting installation or maintenance. Failure to follow these safety guidelines may result in electric shock, fire, property damage, or personal injury.
- Scollegare l'alimentazione: Always disconnect the dryer from its power supply before performing any service or maintenance.
- Installazione professionale consigliata: L'installazione deve essere eseguita da un tecnico qualificato.
- Indossare dispositivi di protezione: Utilizzare dispositivi di protezione individuale adeguati, come guanti e protezioni per gli occhi.
- Verifica compatibilità: Ensure this heating element kit (Part #964P3) is compatible with your specific Speed Queen dryer model.
- Maneggiare con cura: Heating elements can be fragile. Avoid bending or damaging the coils.
2. Contenuto del kit
The Speed Queen Dryer Heating Element Kit 964P3 typically includes the following components:
- Heating Element Assembly (240V, 5350W)
- Thermal Cut-Off Fuse
- Termostato di alto limite
- Cycling Thermostat
Note: Contents may vary slightly. Refer to your specific kit packaging for exact items.
3. Strumenti richiesti
The following tools are generally required for the installation of the heating element kit:
- Cacciaviti (Phillips e a testa piatta)
- Nut Drivers or Socket Set (various sizes, typically 1/4" and 5/16")
- Pinze
- Multimeter (for testing continuity, optional but recommended)
- Guanti da lavoro
- Occhiali di sicurezza
4. Istruzioni per l'installazione
These instructions provide a general guide for replacing a dryer heating element. Specific steps may vary depending on your Speed Queen dryer model. Always refer to your dryer's service manual for detailed, model-specific instructions.
- Scollegare l'alimentazione: Unplug the dryer from the electrical outlet or turn off the circuit breaker supplying power to the dryer.
- Accedi all'elemento riscaldante: Depending on your dryer model, you may need to remove the back panel, front panel, or top panel to access the heating element housing. This often involves removing several screws.
- Individuare il vecchio elemento: Identify the existing heating element assembly. It is typically housed in a metal duct.
- Scollegare i fili: Carefully disconnect all electrical wires attached to the heating element, thermal cut-off, and thermostats. Note their positions for reassembly.
- Rimuovi vecchio elemento: Unscrew or unclip the old heating element assembly from its housing and carefully remove it.
- Installa nuovo elemento: Position the new Speed Queen 964P3 heating element assembly into the housing. Ensure it is seated correctly and secure it with screws or clips.
- Collegare i fili: Reconnect all electrical wires to the new heating element, thermal cut-off, and thermostats in their original positions. Ensure connections are secure.
- Rimontare l'asciugatrice: Replace any panels or components that were removed to access the element. Ensure all screws are tightened.
- Controllo post-installazione: Proceed to the 'Post-Installation Check' section to verify proper operation.
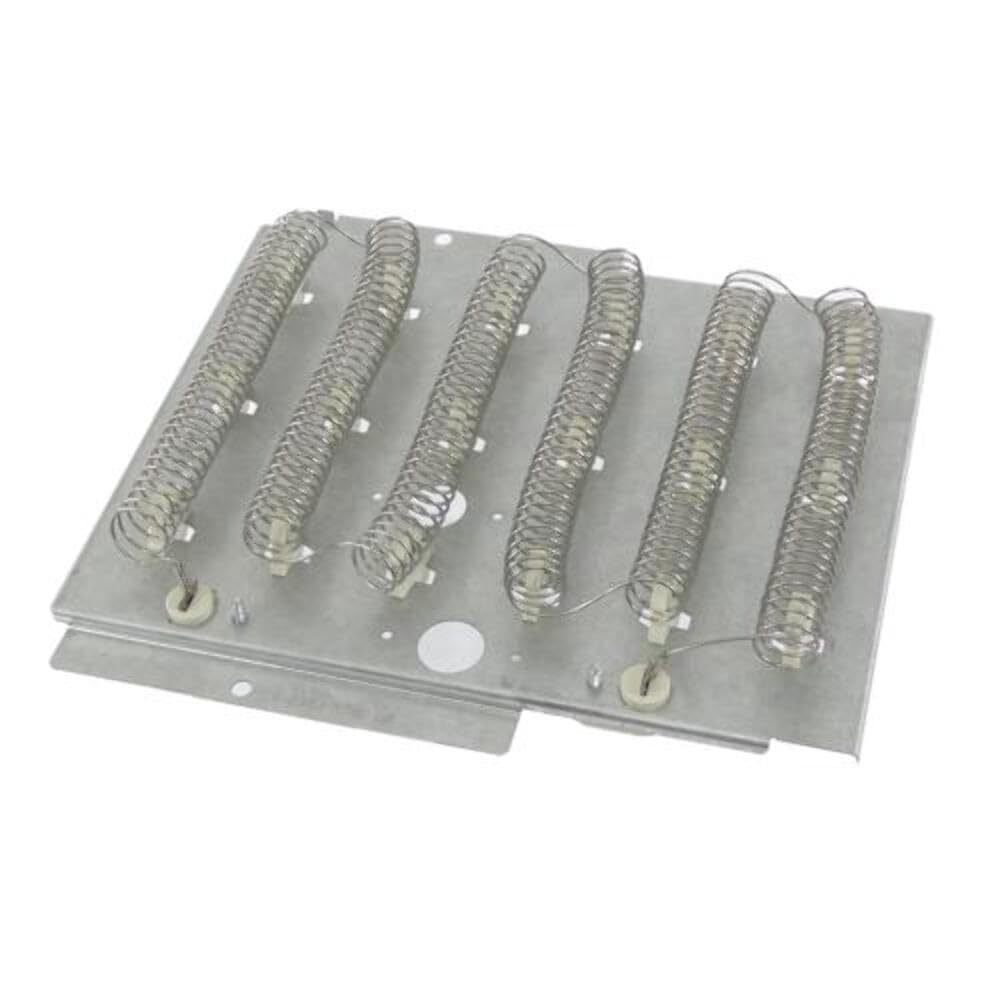
Image 1: Speed Queen Dryer Heating Element Kit 964P3. This image shows the complete heating element assembly, including the coiled element, thermal cut-off, and thermostats, ready for installation.
5. Controllo post-installazione
After installation, perform the following checks to ensure the dryer is functioning correctly and safely:
- Ispezionare le connessioni: Double-check all electrical connections to ensure they are tight and correctly wired.
- Controllare eventuali ostruzioni: Ensure no tools, screws, or debris are left inside the dryer.
- Ripristina alimentazione: Ricollegare l'asciugatrice alla presa elettrica o accendere l'interruttore automatico.
- Operazione di prova: Run a short, unheated cycle to ensure the drum rotates properly. Then, run a heated cycle (e.g., 'Air Fluff' or 'Timed Dry' with heat) and verify that the dryer is producing heat.
- Monitorare i problemi: Listen for unusual noises and observe for any smoke or burning smells during the first few cycles. If any issues arise, immediately disconnect power and investigate.
6. Manutenzione
While the heating element itself requires minimal maintenance, proper dryer care ensures its longevity and efficient operation:
- Pulisci il filtro anti-pelucchi: Clean the lint filter before or after every load to maintain airflow and prevent overheating.
- Ispezionare lo sfiato: Periodically check the dryer's exhaust vent for lint buildup and obstructions. A clogged vent can cause the heating element to overheat and fail prematurely.
- Ispezione professionale: Consider having your dryer professionally inspected every few years to ensure all components, including the heating element and safety thermostats, are functioning correctly.
7. Risoluzione dei problemi comuni
If your dryer is experiencing issues related to heating after installing the new element, consult the table below:
| Problema | Possibile causa | Soluzione |
|---|---|---|
| L'asciugatrice funziona ma non produce calore. |
|
|
| L'asciugatrice impiega troppo tempo ad asciugare i vestiti. |
|
|
| Odore di bruciato durante il funzionamento. |
|
|
8. Specifiche tecniche
| Caratteristica | Valore |
|---|---|
| Numero di parte | 964P3 |
| Voltage | 240V |
| Cosatage | 5350W |
| Frequenza | 60 Hz |
| Peso dell'articolo | Circa 2.01 libbre |
| Dimensioni del pacco | Circa 12.56 x 10.12 x 3.43 pollici |
9. Garanzia e supporto
For warranty information, please refer to the documentation included with your purchase or visit the official Speed Queen website. For technical support or further assistance, contact Speed Queen customer service or an authorized service provider.
Official Speed Queen Websito: www.speedqueen.com


