Introduzione
This instruction manual provides essential information for the safe and effective installation, operation, and maintenance of your Technical Precision replacement lamp and housing for the Ask PROXIMA C110 Projector. Please read this manual thoroughly before attempting any installation or maintenance procedures. Retain this manual for future reference.
This product is a high-quality replacement component designed to meet the specifications of the original Ask PROXIMA C110 lamp. It is not manufactured by Ask PROXIMA.
Informazioni sulla sicurezza
- Disconnessione dell'alimentazione: Always disconnect the projector from the main power supply and allow it to cool down completely (at least 30 minutes) before attempting lamp replacement. Hot lamppossono causare gravi ustioni.
- Maneggiare con cura: proiettore lampcontengono vapori di mercurio ad alta pressione. Maneggiare il lamp module carefully to avoid breakage. Do not touch the glass bulb directly with bare hands, as oils can reduce lamp vita.
- Protezione degli occhi: Evitare di guardare direttamente nell'obiettivo del proiettore quando lamp is operating, as intense light can damage your eyes.
- Ventilazione: Ensure the projector's ventilation system is clear and unobstructed to prevent overheating, which can shorten lamp life and damage the projector.
- Disposizione: Smaltire il vecchio lamps according to local environmental regulations. Many lamps contain mercury and should not be discarded with regular household waste.
Configurazione e installazione
Follow these steps carefully to replace the projector lamp. Refer to your specific Ask PROXIMA C110 projector manual for exact lamp compartment location and screw types.
- Preparare il proiettore: Turn off the projector and unplug the power cord from the wall outlet. Allow the projector to cool down for at least 30 minutes.
- Localizza Lamp vano: Individuare la lamp compartment cover on your Ask PROXIMA C110 projector. This is typically secured by one or more screws.
- Rimuovi la copertura: Using an appropriate screwdriver, carefully loosen and remove the screws securing the lamp compartment cover. Set the screws and cover aside in a safe place.
- Rimuovi la vecchia Lamp: Il vecchio lamp module will be visible. It is usually secured by one or two screws. Loosen these screws and gently pull the handle on the lamp module to slide it out of the projector.
- Inspect New Lamp: Carefully unpackage your new Technical Precision replacement lamp. Inspect it for any visible damage. Do not touch the glass bulb.
- Installa nuova Lamp: Align the new lamp module with the slot in the projector. Gently slide the lamp module into place until it is fully seated. Ensure it clicks or locks into position.
- Nuovo L sicuroamp: Tighten the screws that secure the new lamp modulo. Non serrare eccessivamente.
- Sostituisci la copertura: Posizionare la lamp compartment cover back into position and secure it with its screws.
- Reimposta Lamp Timer: Plug the projector back in and power it on. Navigate to the projector's menu settings and locate the "Lamp Timer Reset" or similar option. Follow the on-screen instructions to reset the lamp hour counter. This is crucial for accurate lamp life tracking.
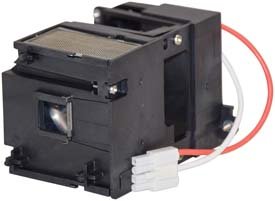
Image: The Technical Precision C110 replacement lamp and housing module. This image shows the complete unit ready for installation into the projector.
Istruzioni per l'uso
After successful installation, your projector is ready for use. Observe the following for optimal performance:
- Accensione iniziale: Power on the projector as you normally would. The new lamp may take a few moments to reach full brightness.
- Periodo di rodaggio: Some new projector lamps benefit from a short "break-in" period. It is recommended to operate the projector for at least 10-20 hours without frequent on/off cycles immediately after installation to stabilize the lampla prestazione di .
- Avoid Rapid Cycling: Frequent turning on and off of the projector can reduce lamp life. Allow the projector to run for a reasonable period once started.
- Spegnimento corretto: Always allow the projector to complete its cool-down cycle before unplugging it or moving it. This protects the lamp from thermal shock.
Manutenzione
Regular maintenance helps extend the life of your projector and its lamp.
- Filtri dell'aria puliti: Periodically clean or replace the projector's air filters according to your projector's manual. Clogged filters restrict airflow, leading to overheating and reduced lamp vita.
- Rimozione della polvere: Keep the projector free of dust. Use compressed air to gently clear dust from vents and external surfaces when the projector is off and cool.
- Lamp Vita: La durata tipica di un proiettore lamp varies, but it is generally indicated by the projector's lamp timer. Replace the lamp when the projector indicates it is nearing the end of its life or when brightness significantly diminishes.
Risoluzione dei problemi
Se riscontri problemi dopo l'installazione del nuovo lamp, consider the following common problems and solutions:
| Problema | Possibile causa | Soluzione |
|---|---|---|
| Lamp non si accende. | Lamp not seated correctly; power issue; lamp compartment cover not closed properly; lamp timer not reset. | Assicurare lamp is fully inserted and secured. Check power connections. Verify lamp cover is closed and screws are tightened. Reset lamp timer in projector menu. |
| Image is dim or flickering. | Lamp nearing end of life (unlikely for new lamp); projector settings; dirty lens/filters. | Check projector brightness settings. Clean projector lens and air filters. If problem persists, contact support. |
| Il proiettore visualizza tuttoamp warning message. | Lamp timer not reset; lamp problema. | Reimposta lamp timer in the projector's menu. If the warning persists, re-check lamp installazione. |
| Projector overheats and shuts down. | Blocked ventilation; dirty air filters. | Ensure projector vents are clear. Clean or replace air filters. |
If these steps do not resolve the issue, please contact Technical Precision customer support or your retailer for further assistance.
Specifiche
| Caratteristica | Dettaglio |
|---|---|
| Marca | Precisione tecnica |
| Nome del modello | C110 lAMP & HOUSING |
| Tipo di sorgente luminosa | proiettore lamp |
| Materiale | Bicchiere |
| Conteggio unità | 1.0 Conteggio |
| Caratteristiche speciali | Alta efficienza, accensione istantanea |
| Fonte di alimentazione | AC |
| Uso interno/esterno | Al chiuso |
Informazioni sulla garanzia
Specific warranty terms for this Technical Precision replacement lamp are provided by the seller at the time of purchase. Please refer to your purchase documentation or contact the retailer directly for details regarding warranty coverage, duration, and claims procedures.
Assistenza clienti
For technical assistance, questions about installation, or troubleshooting that is not covered in this manual, please contact Technical Precision customer support or the retailer from whom you purchased this product. Have your product model number (C110 LAMP & HOUSING) and purchase date available when contacting support.
You can often find contact information on the seller's page or your order details.