
1. Introduzione
This manual provides detailed instructions for the setup, operation, and maintenance of your ELECROW 7 Inch 1024x600 IPS Capacitive Touchscreen Monitor. This display is designed for broad compatibility with devices such as Raspberry Pi (5/4/3B+/3B/2B+), BB Black, Banana Pi, Jetson Nano, and Windows 11/10/8/7 systems.
Caratteristiche principali:
- Immagini HD: 7-inch IPS screen with 1024x600 resolution and 170° wide viewing angle for consistent colors and clear viewing.
- Touch capacitivo: Supports up to 5-point touch functionality without requiring driver installation for most compatible systems.
- Collega e usa: Simple connectivity via HD (HDMI) and Micro USB ports for immediate use.
- Applicazione versatile: Suitable for use as a Raspberry Pi display, mini PC monitor, gaming console screen, or a computer temperature monitor.
2. Cosa c'è nella scatola
Verificare che tutti i componenti siano presenti prima di procedere con l'installazione.
- 7 Inch Capacitive Display x 1
- Cavo HD x 1
- Cavo USB x 1
- Micro HD Adapter x 1
- Copper Screws Pack (4pcs) x 1
- DVD x 1 (Contains drivers and documentation)
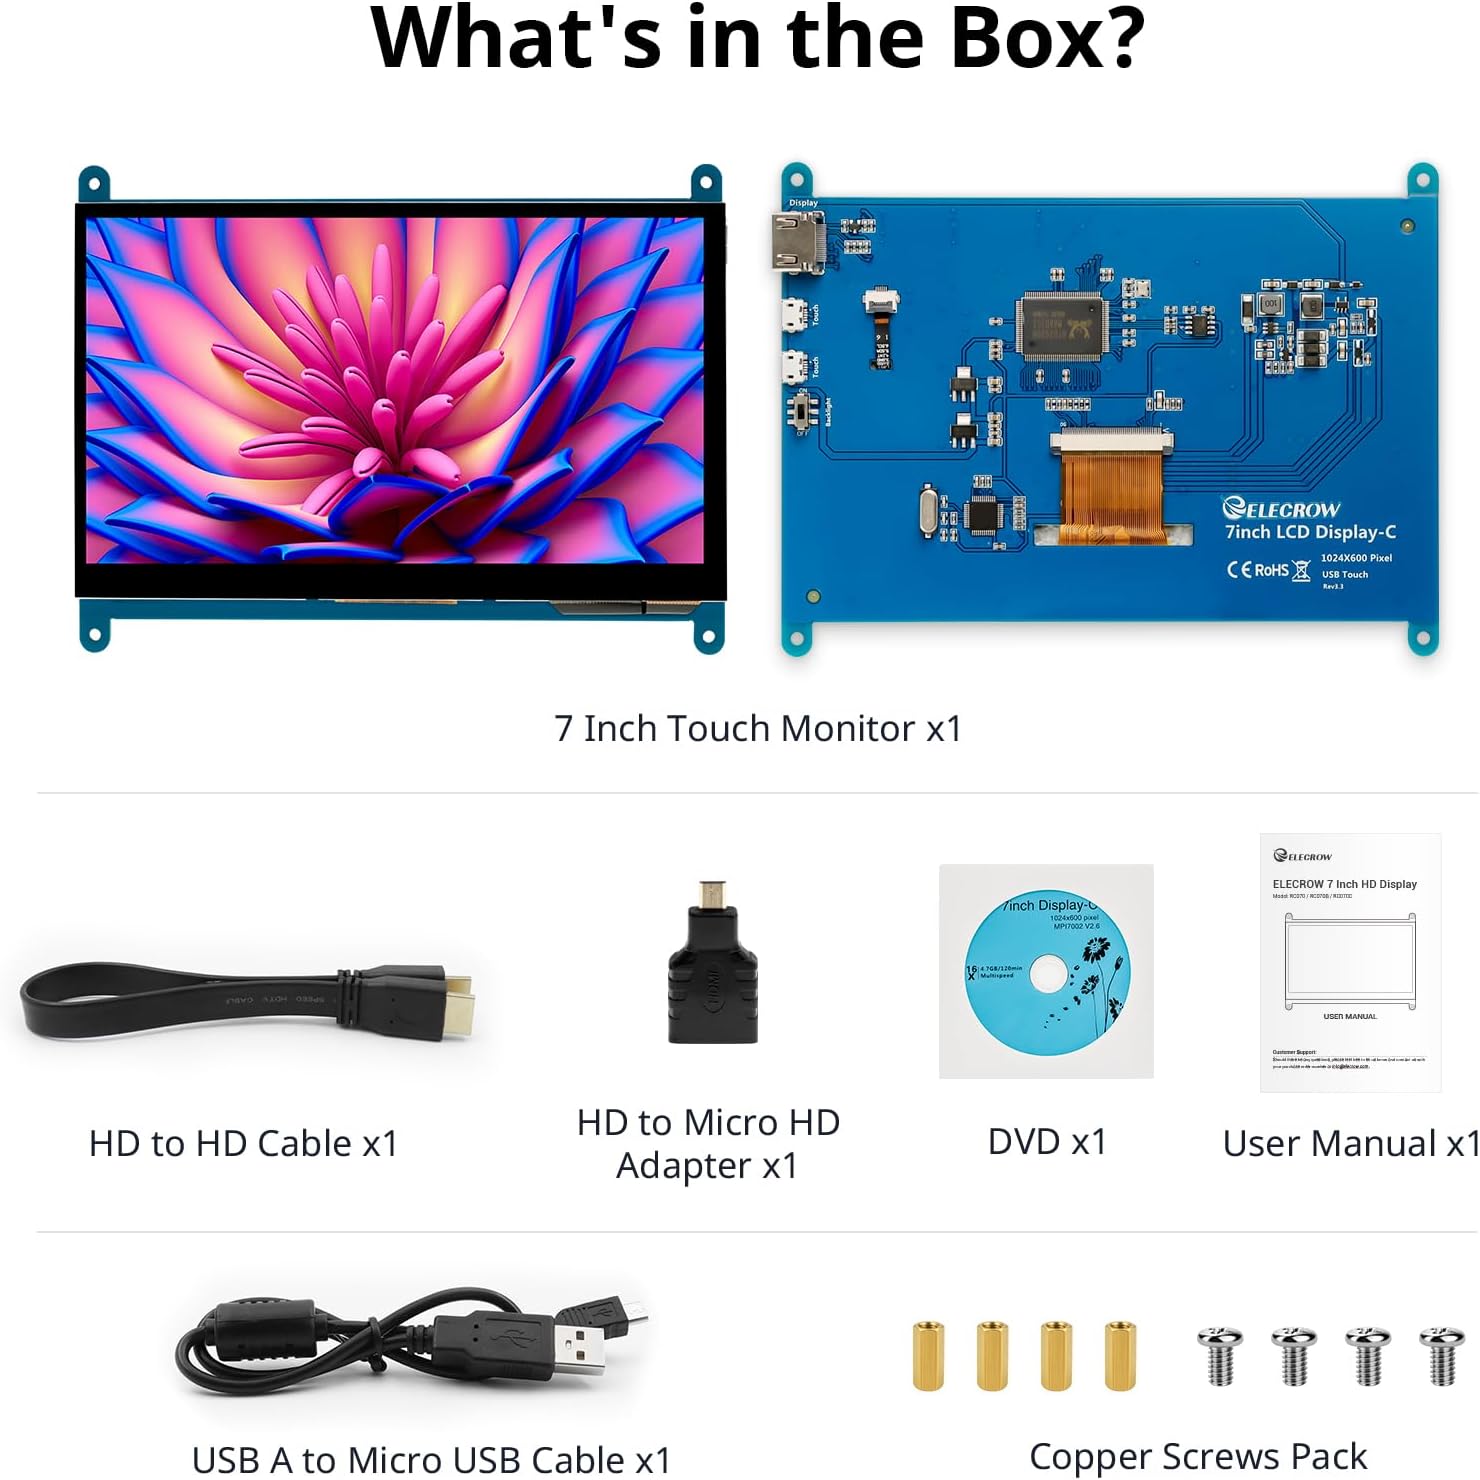
Immagine: Tutti i componenti inclusi nella confezione del prodotto.
3. Configurazione e connessioni
Follow these steps to connect your ELECROW 7 Inch Touchscreen Monitor to your device.
3.1 Hardware in eccessoview

Immagine: Posteriore view of the monitor highlighting the Standard HD Port, Micro USB Port for touch and power, and Backlight switch.
- Standard HD Port: For video data transfer.
- Porta micro USB: For touch functionality and power supply.
- Interruttore di retroilluminazione: To turn the display backlight on or off.
3.2 Connessione al Raspberry Pi
To connect the monitor to a Raspberry Pi, you will need both the HD cable for video and the USB cable for touch and power.
- Connect one end of the HD cable to the Standard HD Port on the monitor and the other end to the HDMI port on your Raspberry Pi. Use the Micro HD adapter if necessary for your Raspberry Pi model.
- Connect the Micro USB cable to the Micro USB Port on the monitor. Connect the other end of the USB cable to a USB port on your Raspberry Pi for power and touch data.
- Ensure the backlight switch on the monitor is in the 'On' position.
- Power on your Raspberry Pi. The display should automatically detect and show the output.
For touch functionality with Raspberry Pi, power can be supplied via the Raspberry Pi's USB port. If using an external power source for the Raspberry Pi, ensure it is sufficient. For optimal performance, especially with older Raspberry Pi models, an external power supply for the monitor might be beneficial if the Pi cannot provide enough current.
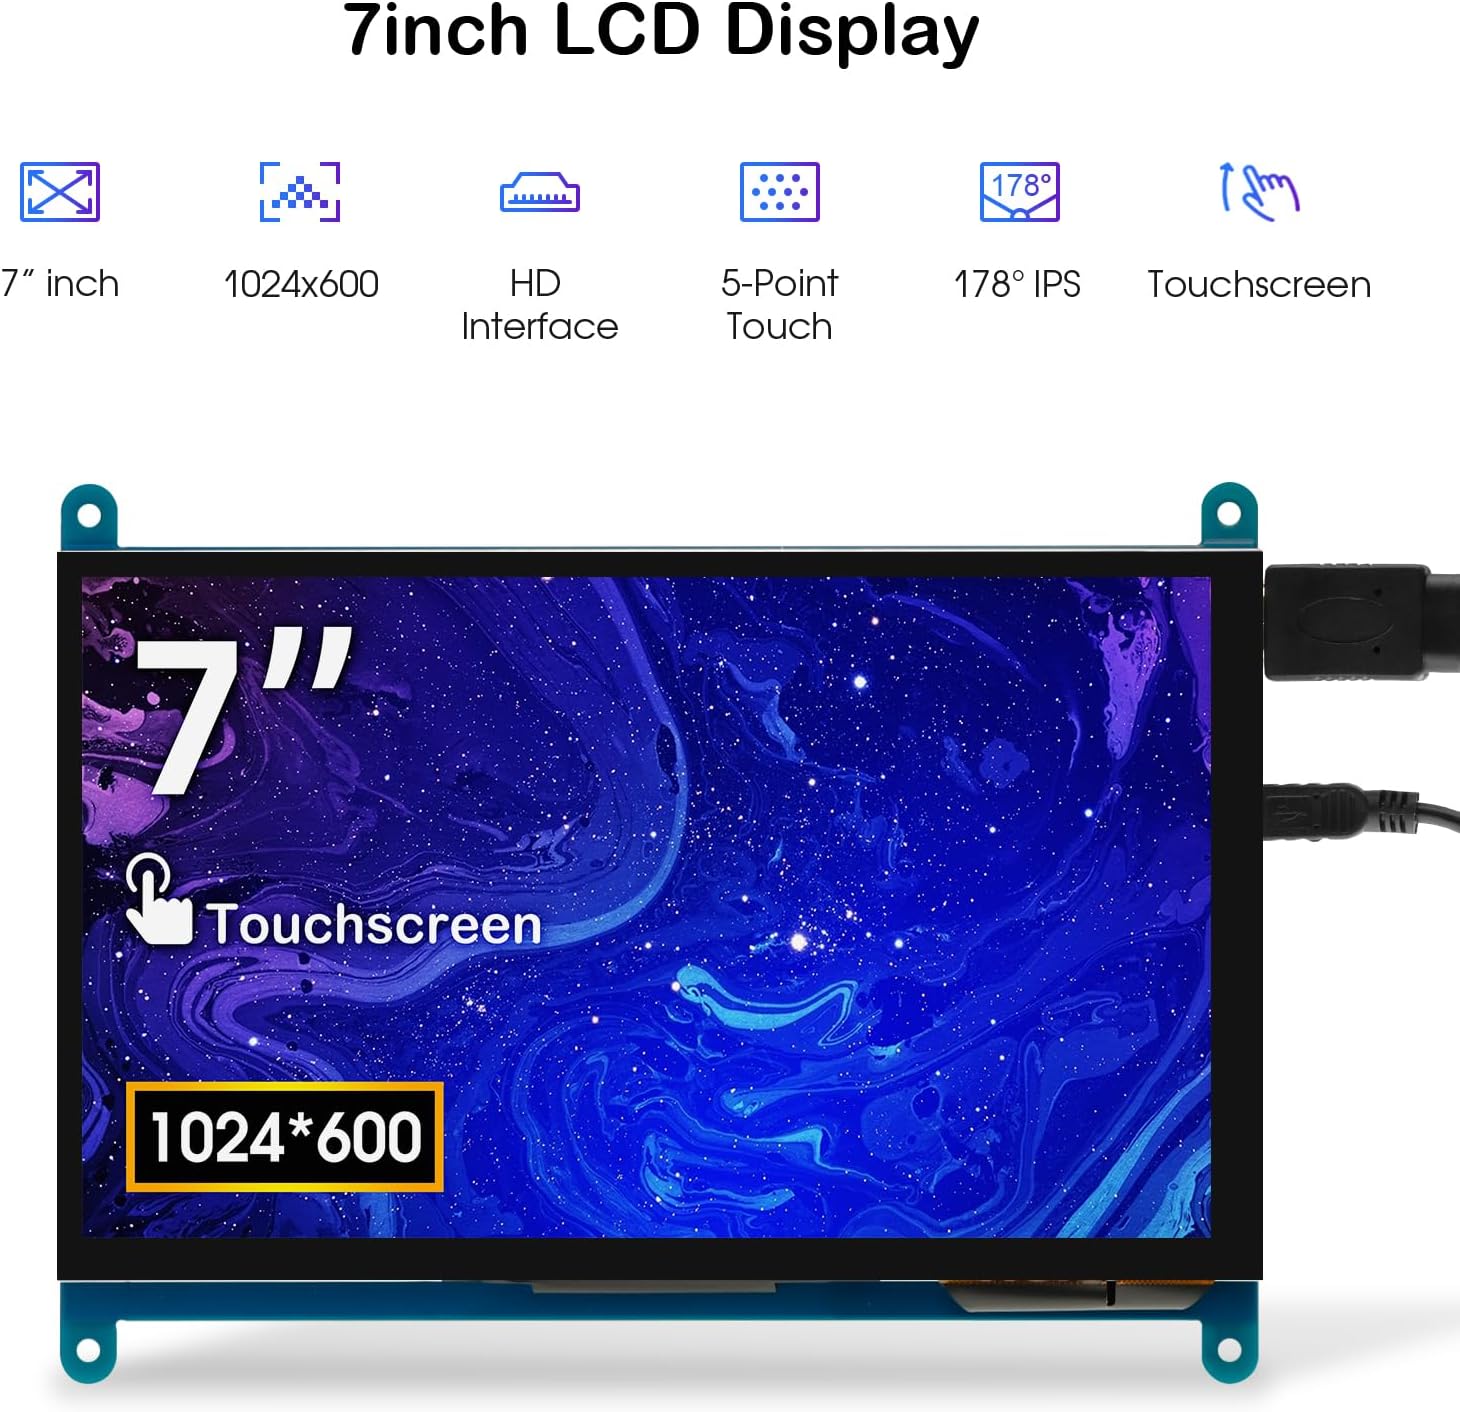
Image: The 7-inch touchscreen connected to a Raspberry Pi board, displaying a graphical user interface.
3.3 Connecting to Windows PC/Laptop
For Windows systems, the monitor functions as a plug-and-play display and touchscreen.
- Connect the HD cable from the monitor's Standard HD Port to an HDMI port on your PC or laptop.
- Connect the Micro USB cable from the monitor's Micro USB Port to a USB-A port on your PC or laptop. This provides power and enables touch functionality.
- Ensure the backlight switch is 'On'.
- Your Windows system should automatically detect the display and touchscreen. No additional drivers are typically required for Windows 7/8/10/11 for basic display and 5-point touch.

Image: The 7-inch touchscreen connected to a laptop, demonstrating seamless connectivity with various operating systems including Windows.
4. Istruzioni per l'uso
4.1 Funzionalità touch
The monitor supports 5-point capacitive touch, allowing for various gestures.
- Rubinetto: Singolo tocco per la selezione o l'attivazione.
- Premere: Sustained touch for context menus or drag operations.
- Zoom avanti/indietro: Gesti di pizzicamento con due dita.
- Clic del mouse: A single tap typically registers as a left-click.
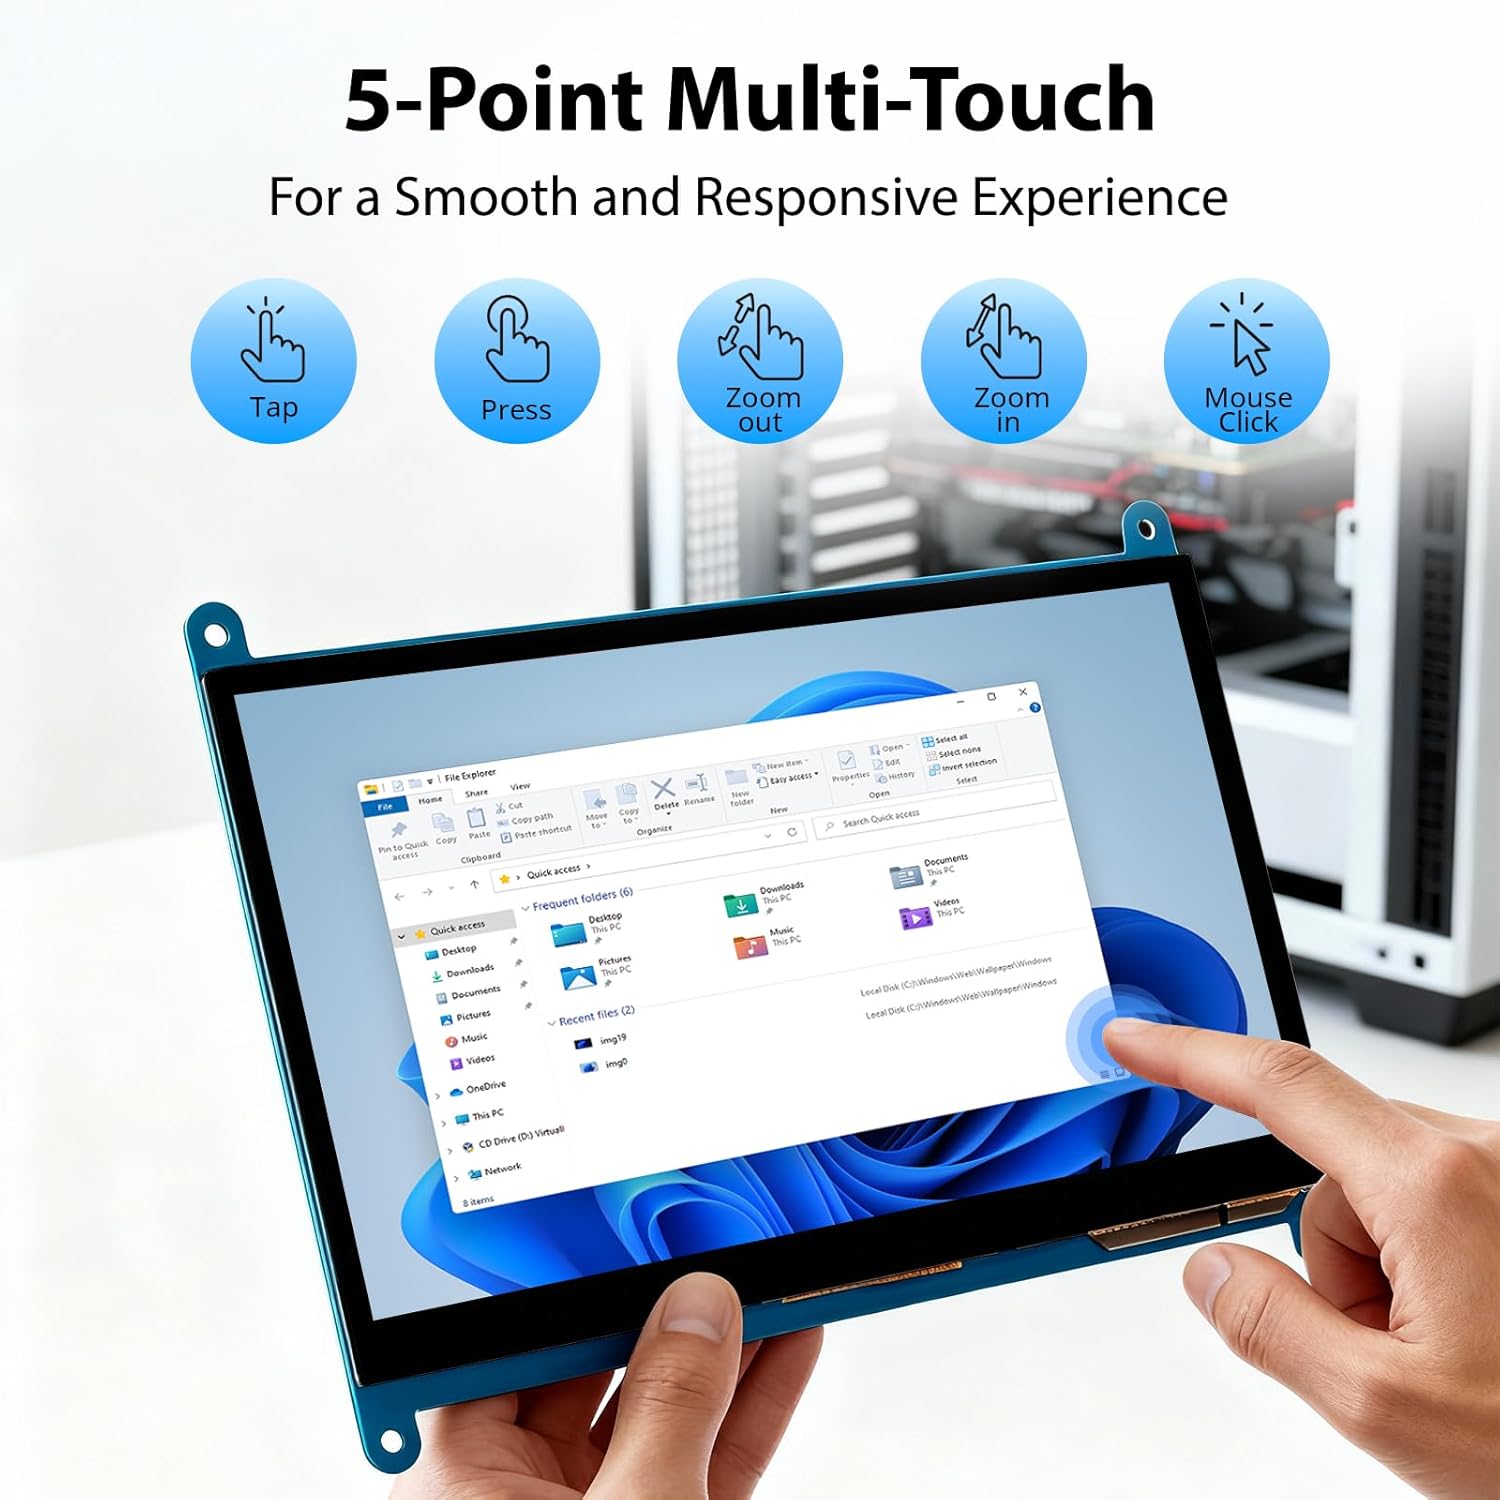
Image: Visual guide to the 5-point multi-touch capabilities of the screen, showing common gestures.
4.2 Modalità di visualizzazione
When connected to a computer, the monitor can operate in several display modes:
- Modalità duplicata: Il monitor riproduce il contenuto del display principale.
- Modalità estesa: The monitor acts as an extension of your primary display, providing additional screen space.
- Modalità secondo schermo: The monitor functions as the sole display, with the primary display turned off.
These modes can typically be configured through your operating system's display settings.

Image: Illustrations demonstrating the three display modes: Duplicate, Extend, and Second Screen, showing how the monitor can be used with a laptop.
4.3 Controllo della retroilluminazione
The monitor features a physical switch to control the backlight. This allows you to turn the display illumination on or off without disconnecting power. Note that there is no granular brightness control; it is an on/off function only.
Video: This video demonstrates the backlight control switch on the ELECROW 7 Inch Touchscreen, showing how to turn the display illumination on and off.
5. Manutenzione
Una corretta manutenzione garantisce la longevità e le prestazioni ottimali del monitor.
- Pulizia dello schermo: Utilizzare un panno morbido e privo di lanugine leggermente dampcon acqua o una soluzione detergente per schermi. Evitare prodotti chimici aggressivi o materiali abrasivi che potrebbero danneggiare la superficie dello schermo.
- Cura generale: Keep the monitor in a clean, dry environment. Avoid exposing it to extreme temperatures, direct sunlight, or high humidity.
- Gestione: Handle the monitor by its edges. Avoid applying excessive pressure to the screen.
6. Risoluzione Dei Problemi
Se riscontri problemi con il monitor, fai riferimento ai seguenti problemi comuni e alle relative soluzioni.
| Problema | Possibile causa | Soluzione |
|---|---|---|
| Nessuna visualizzazione/Schermo nero |
|
|
| Il touchscreen non risponde |
|
|
| Display resolution incorrect |
|
|
| Nessun controllo della luminosità | The monitor only has an on/off switch for the backlight, not adjustable brightness. | This is expected behavior. The monitor does not support adjustable brightness. |
7. Specifiche
Detailed technical specifications for the ELECROW 7 Inch Touchscreen Monitor.
| Caratteristica | Dettaglio |
|---|---|
| Marca | ELETTROCROSS |
| Nome del modello | RC070 |
| Dimensioni dello schermo | 7 pollici |
| Risoluzione massima dello schermo | 1024x600 |
| Risoluzione nativa | 1024x600 |
| Tipo di visualizzazione | LCD |
| Tecnologia di visualizzazione | Informazione pubblica |
| Proporzioni | 1.71:1 |
| Frequenza di aggiornamento | Frequenza 60 Hz |
| Tempo di risposta | 8 millisecondi |
| Rapporto di contrasto | 800:1 |
| Luminosità | 300 lumen |
| Viewangolo di ing | 170 gradi |
| Descrizione della superficie dello schermo | Lucido |
| Tecnologia di connettività | Cavo HDMI |
| Connettività Hardware | HDMI, USB |
| Numero totale di porte HDMI | 1 |
| Porte USB totali | 2 (Micro USB for power/touch, USB-A for power/touch) |
| Consumo energetico | 12.5 Watt |
| Voltage | 5 Volt |
| Dimensioni dell'articolo (P x L x A) | 0.3"P x 6.1"L x 4.8"A |
| Peso dell'articolo | 7.36 once |
| Dispositivi compatibili | Raspberry Pi, BB Black, Banana Pi, Jetson Nano, Computers, Laptops, Gaming Consoles |
8. Garanzia e supporto
Your ELECROW 7 Inch Touchscreen Monitor comes with a manufacturer's warranty.
- Tipo di garanzia: Garanzia del produttore di 1 anni
- Descrizione della garanzia: 1 anno produttore
For technical support or warranty claims, please contact ELECROW customer service through their official websito o piattaforma in cui è stato acquistato il prodotto.