
1. Introduzione
The Rain Bird XC-801I-E is an advanced indoor electric irrigation programmer designed for efficient residential watering systems. This unit provides simple, reliable control for up to 8 irrigation stations. It features three independent programs, each capable of four daily start times, offering flexible scheduling options. The XC-801I-E is engineered for compatibility with the intelligent Solar Sync sensor, allowing for automatic adjustments to irrigation schedules based on local climate conditions, thereby optimizing water usage. Additionally, it supports connection with other sensors for enhanced control. This manual provides essential information for the installation, operation, and maintenance of your irrigation programmer.
2. Informazioni sulla sicurezza
Please read all safety instructions before installing or operating the Rain Bird XC-801I-E irrigation programmer. Failure to follow these instructions may result in electric shock, fire, or damage to the product.
- Sicurezza elettrica: This device operates on 24 Volts. Ensure the power supply is disconnected before performing any wiring or maintenance. Only use the provided external transformer. Do not expose the unit to water or extreme moisture.
- Installazione: Install the programmer indoors, away from direct sunlight, rain, or excessive humidity. Ensure proper ventilation around the unit.
- Bambini: Tenere il dispositivo fuori dalla portata dei bambini.
- Manutenzione: Refer to the maintenance section for cleaning and care instructions. Do not attempt to repair the unit yourself; contact qualified service personnel.
3. Contenuto della confezione
Verificare che tutti i componenti siano presenti nella confezione:
- Rain Bird XC-801I-E Indoor Irrigation Programmer
- External Transformer (Power Supply)
- Manuale dell'utente (questo documento)
- Hardware di montaggio (viti, tasselli)
4. Configurazione e installazione
Follow these steps for proper installation of your irrigation programmer.
4.1 Montaggio del controller
- Choose an indoor location near a standard electrical outlet, protected from extreme temperatures and moisture.
- Use the provided mounting hardware to securely attach the controller to a wall. Ensure it is at a convenient height for programming and viewing.
4.2 Cablaggio delle valvole
The XC-801I-E supports up to 8 irrigation zones and operates with 24V solenoid valves.
- Scollegare l'alimentazione: Ensure the external transformer is unplugged from the electrical outlet.
- Collegare il filo comune: Connect one common wire from all your solenoid valves to the 'COMMON' terminal on the controller.
- Connect Zone Wires: Connect the individual control wire from each solenoid valve to its corresponding station terminal (e.g., Station 1, Station 2, etc.) on the controller.
4.3 Collegamento del sensore (opzionale)
The controller allows for the installation of a sensor, such as the Rain Bird Solar Sync or other compatible sensors.
- Refer to your sensor's instruction manual for specific wiring details.
- Connect the sensor wires to the designated sensor terminals on the XC-801I-E controller.
4.4 Collegamento di alimentazione
- Plug the external transformer into a standard 230V AC electrical outlet.
- Connect the transformer's output cable to the power input port on the XC-801I-E controller.
- The controller display should illuminate, indicating power is supplied.
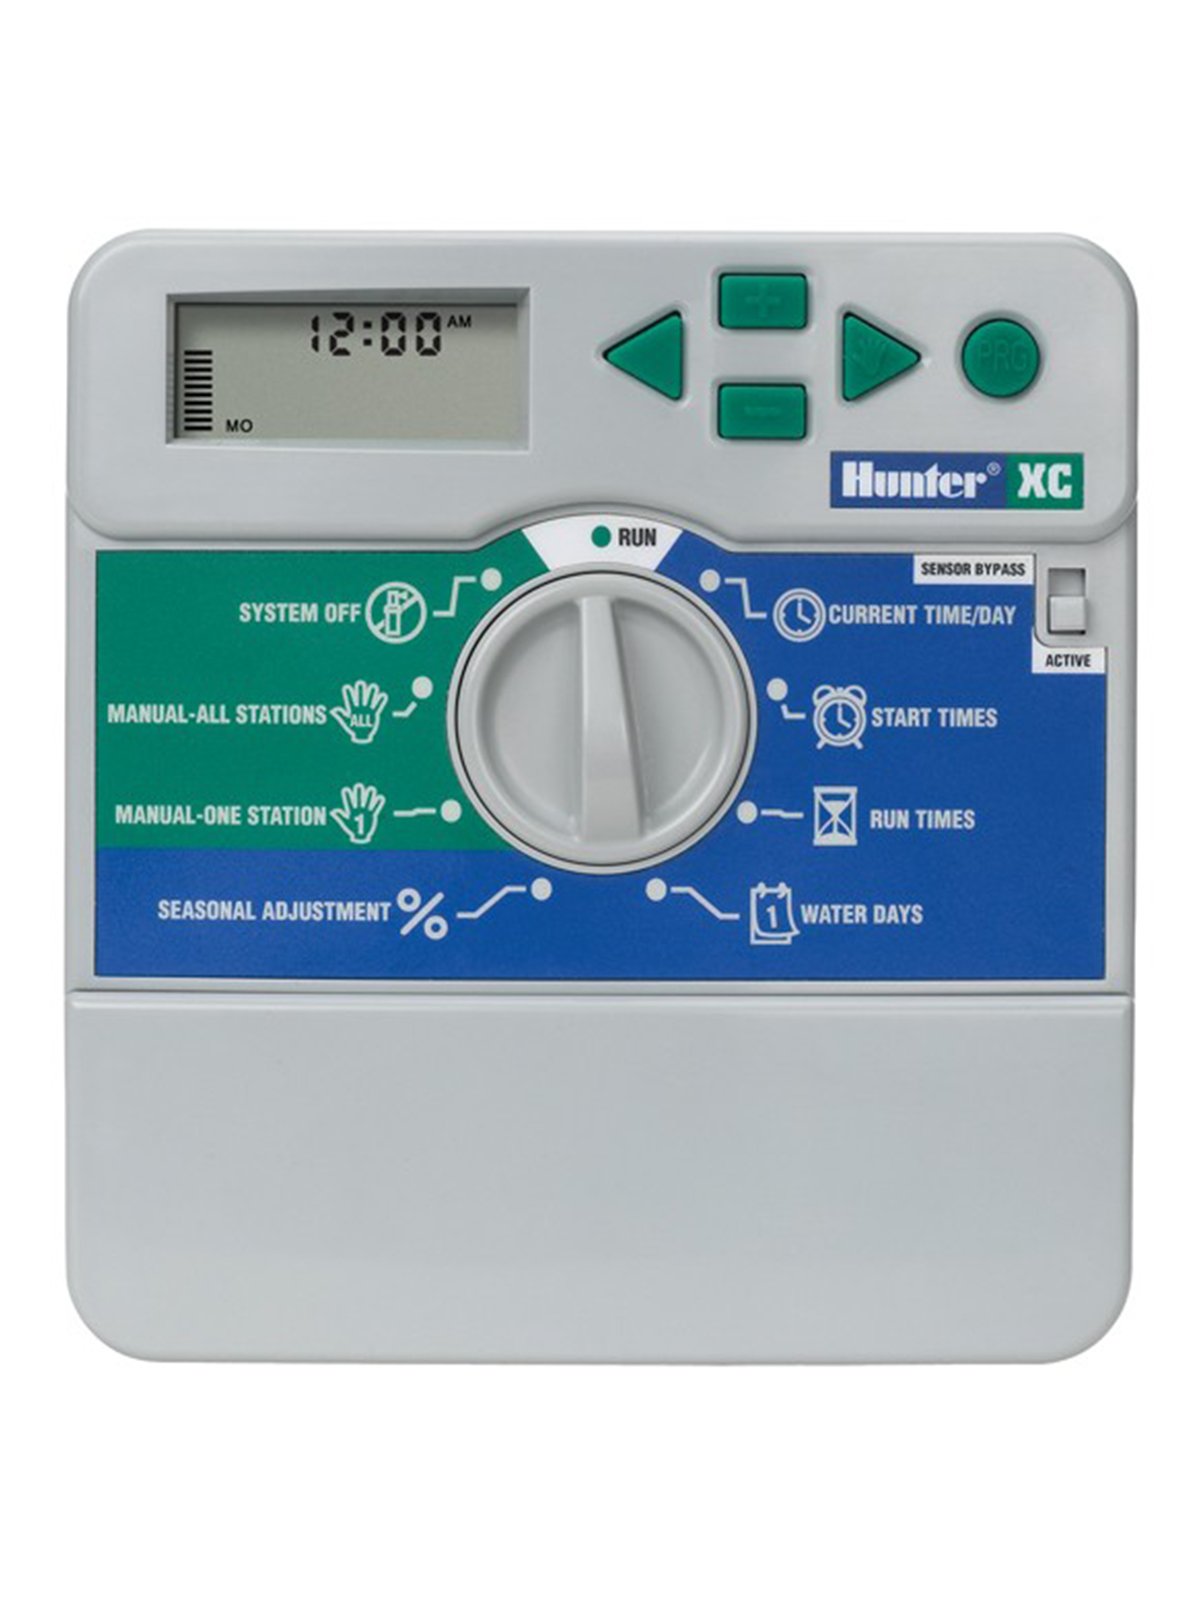
Figura 1: Davanti view of the Rain Bird XC-801I-E Indoor Electric Irrigation Programmer. This image shows the display, programming buttons, and the dial for mode selection.
5. Istruzioni per l'uso
The XC-801I-E features a user-friendly interface for programming your irrigation schedules.
5.1 Impostazione dell'ora e della data correnti
- Turn the dial to the 'SET TIME/DATE' position.
- Use the arrow buttons to adjust the current time and date.
- Press the 'NEXT' button to move between settings (hour, minute, day, month, year).
5.2 Programmazione dei programmi di irrigazione
The controller offers three independent programs (A, B, C) and four start times per program.
- Seleziona programma: Turn the dial to 'PROGRAMS'. Use the 'PROGRAM' button to select Program A, B, or C.
- Imposta orari di inizio: For the selected program, use the arrow buttons to set up to four start times. Each start time initiates the watering sequence for all zones assigned to that program.
- Imposta i tempi di esecuzione della zona: Turn the dial to 'RUN TIMES'. Select the desired program and then use the arrow buttons to set the watering duration for each individual station (zone).
- Imposta i giorni di irrigazione: Turn the dial to 'WATER DAYS'. Select the desired program and then choose the specific days of the week for irrigation, or select an interval schedule (e.g., every 2 days).
5.3 Funzionamento manuale
To manually operate a single station or all stations:
- Single Station: Turn the dial to 'MANUAL SINGLE STATION'. Use the arrow buttons to select the station and set its run time. Press 'START'.
- Tutte le stazioni: Turn the dial to 'MANUAL ALL STATIONS'. Set the run time for each station sequentially. Press 'START'.
5.4 System Off / Rain Delay
To temporarily suspend irrigation:
- Sistema spento: Turn the dial to 'SYSTEM OFF' to halt all automatic irrigation.
- Ritardo pioggia: Turn the dial to 'RAIN DELAY'. Use the arrow buttons to set the number of days for the delay. Irrigation will resume automatically after the set period.
6. Manutenzione
Regular maintenance ensures the longevity and optimal performance of your irrigation programmer.
- Pulizia: Pulisci l'esterno del controller con un panno morbido eamp panno. Non usare detergenti abrasivi o solventi.
- Connessioni: Controllare periodicamente tutti i collegamenti elettrici per accertarsi che siano saldi e privi di corrosione.
- winterization: In regions with freezing temperatures, it is recommended to disconnect the controller and store it indoors during winter months to prevent damage. Drain all water from the irrigation system.
- Batteria (se applicabile): If your model includes a backup battery for settings retention during power outages, check and replace it as recommended by the manufacturer (typically every 1-2 years).
7. Risoluzione Dei Problemi
If you encounter issues with your Rain Bird XC-801I-E, refer to the following common problems and solutions:
| Problema | Possibile causa | Soluzione |
|---|---|---|
| Il display del controller è vuoto | No power; faulty transformer; internal fuse (if applicable) | Check power outlet; ensure transformer is securely connected; test transformer output; consult a technician if fuse is suspected. |
| Zone non irrigate | Rain delay active; system off; faulty wiring; valve issues; low water pressure | Check rain delay/system off settings; inspect wiring connections; manually test valves; check water supply. |
| Incorrect watering times | Incorrect programming; sensor interference | Review program start times, run times, and water days; check sensor operation and settings. |
| Messaggio di errore sul display | Wiring fault; sensor fault; internal error | Note the error code and refer to the full product manual or contact support. Check wiring for shorts. |
Se il problema persiste dopo aver provato queste soluzioni, contattare l'assistenza clienti.
8. Specifiche
| Caratteristica | Specificazione |
|---|---|
| Modello | XC-801I-E |
| Marca | Cacciatore |
| Produttore | Uccello della pioggia |
| Numero di zone | 8 |
| Programmi | 3 (A, B, C) |
| Orari di inizio per programma | 4 |
| Volume di eserciziotage | 24 Volt CA |
| Materiale | Plastica |
| Colore | Grigio |
| Peso dell'articolo | 1.57 chilogrammi |
| Temperatura di esercizio | 20 gradi Celsius |
| Compatibilità con la casa intelligente | Compatible with smart home systems (via sensor integration) |
9. Garanzia e supporto
Per informazioni sulla garanzia, supporto tecnico o richieste di assistenza, contattare il rivenditore autorizzato o direttamente il produttore. Conservare la ricevuta d'acquisto come prova d'acquisto.
Produttore: Uccello della pioggia
Marca: Cacciatore
For further assistance, visit the official Rain Bird websito o consultare il distributore locale.


