
1. Importanti istruzioni di sicurezza
Please read all instructions carefully before operating the SPM Nina Slush Machine. Retain this manual for future reference.
- Sicurezza elettrica: Assicurarsi che l'apparecchio sia collegato a una presa di corrente con messa a terra e con la tensione correttatage (230V, 50Hz). Do not operate with a damaged cord or plug. Keep the power cord away from hot surfaces.
- Posizionamento: Place the machine on a stable, level, and dry surface. Ensure adequate ventilation around the unit; do not block air vents. Maintain a minimum distance of 10 cm from walls or other objects.
- Pulizia: Always unplug the machine before cleaning. Do not immerse the main unit in water. Use a damp panno per la pulizia esterna.
- Operazione: Do not operate the machine without liquid in the reservoir. Avoid placing hands or objects into the moving parts during operation.
- Bambini: This appliance is not intended for use by children. Keep children away from the machine during operation and cleaning.
- Manutenzione: Any servicing other than cleaning should be performed by authorized service personnel.
2. Prodotto finitoview
The SPM Nina Slush Machine is a compact and elegant appliance designed for preparing slush and shakes. It features a 1.5-liter insulated reservoir and an intuitive LED control panel.
Caratteristiche principali:
- 1.5-liter insulated reservoir
- Minimal dimensions for space-saving placement
- LED control panel for easy operation
- Elegant design suitable for various settings
- Quick cleaning and handling
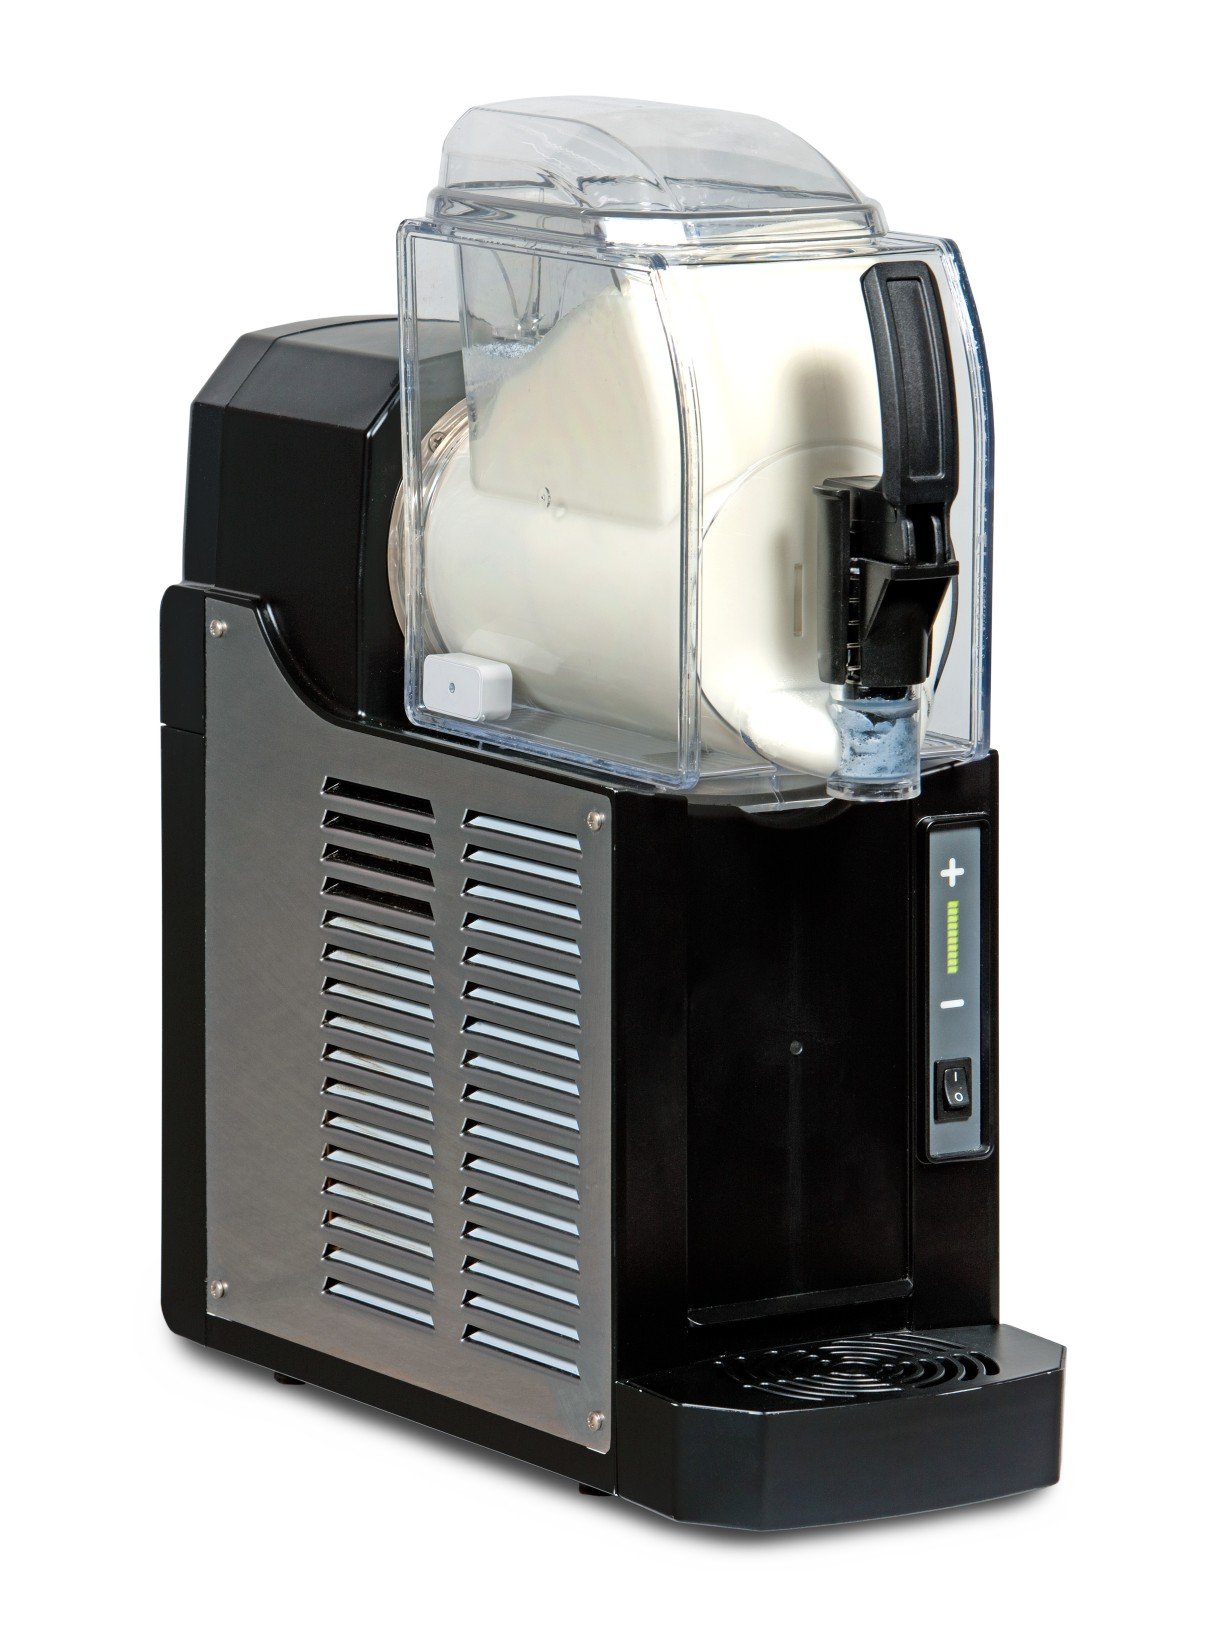
Figura 2.1: Davanti view of the SPM Nina Slush Machine, showing the clear 1.5-liter reservoir filled with slush, the dispenser tap, and the LED control panel on the base.
3. componenti
Familiarize yourself with the main components of your slush machine:
- Serbatoio: The transparent container where the slush mixture is prepared and stored.
- Coperchio: Covers the reservoir to maintain temperature and hygiene.
- Rubinetto erogatore: Located at the front of the reservoir for dispensing the finished slush.
- Pannello di controllo: LED display and buttons for operating the machine, including power and consistency settings.
- Unità base: Contains the compressor and motor. Features ventilation grilles on the sides.
- vassoio antigoccia: Collects any drips from the dispenser tap, located at the front base.

Figura 3.1: Lato view of the SPM Nina Slush Machine, highlighting the ventilation grilles on the base unit and the power switch.
4. Impostazione
4.1 Disimballaggio
- Estrarre con cautela la macchina dall'imballaggio.
- Rimuovere tutti i materiali di imballaggio, comprese eventuali pellicole o nastri protettivi.
- Inspect the machine for any signs of damage. If damaged, do not operate and contact customer support.
4.2 Posizionamento
- Place the machine on a clean, dry, stable, and level surface capable of supporting its weight (approx. 15 kg).
- Ensure there is at least 10 cm of clear space around all sides of the machine for proper ventilation. Do not place it near heat sources or in direct sunlight.
4.3 Pulizia iniziale
- Before first use, clean the reservoir, lid, and dispenser tap thoroughly with warm, soapy water. Rinse well and dry completely.
- Pulisci l'esterno dell'unità base con un pannoamp panno. Non usare detergenti abrasivi.
5. Funzionamento
5.1 Preparing the Slush Mixture
- Use a high-quality slush concentrate. Follow the manufacturer's instructions for the correct concentrate-to-water ratio. Incorrect ratios can affect freezing performance and potentially damage the machine.
- Prepare the mixture in a separate container before pouring it into the machine.
5.2 Riempimento del serbatoio
- Assicurarsi che la macchina sia scollegata.
- Carefully pour the prepared slush mixture into the reservoir. Do not overfill; leave some space at the top to allow for expansion as it freezes.
- Securely place the lid back on the reservoir.
5.3 Avvio della macchina
- Collegare la macchina a una presa di corrente dotata di messa a terra.
- Turn on the main power switch, usually located on the side or front panel.
- Use the LED control panel to select the desired operating mode (e.g., slush, chill). The machine will begin the freezing process. This typically takes 30-60 minutes depending on ambient temperature and mixture.
5.4 Erogazione di granita
- Once the slush has reached the desired consistency, place a cup under the dispenser tap.
- Pull the dispenser tap handle towards you to release the slush.
- Push the handle back to close the tap and stop dispensing.
5.5 Spegnimento
- Al termine, spegnere l'interruttore principale.
- Scollegare la macchina dalla presa di corrente.
6. Pulizia e manutenzione
Regular cleaning and maintenance ensure optimal performance and longevity of your slush machine.
6.1 Pulizia giornaliera
- After each use, empty any remaining mixture from the reservoir.
- Fill the reservoir with warm water and a small amount of mild detergent. Run the machine in 'chill' mode for a few minutes to circulate the cleaning solution.
- Dispense the cleaning solution through the tap.
- Rinse the reservoir thoroughly with clean water, dispensing it through the tap until no soap residue remains.
- Pulisci l'esterno della macchina con l'adamp panno. Pulire la vaschetta raccogli gocce.
6.2 Pulizia profonda (settimanale/bisettimanale)
- Scollegare la macchina.
- Carefully remove the reservoir and lid. Disassemble the dispenser tap components according to the diagram (if provided in a full manual).
- Wash all removable parts (reservoir, lid, tap components) in warm, soapy water. Use a brush for hard-to-reach areas. Rinse thoroughly and allow to air dry completely.
- Clean the evaporator barrel inside the machine with a soft brush and mild cleaning solution, then rinse with clean water.
- Rimontare tutti i pezzi, assicurandosi che siano montati correttamente.
6.3 Conservazione
- Ensure the machine is clean and dry before storing.
- Conservare in un luogo fresco e asciutto, lontano dalla luce solare diretta e da temperature estreme.
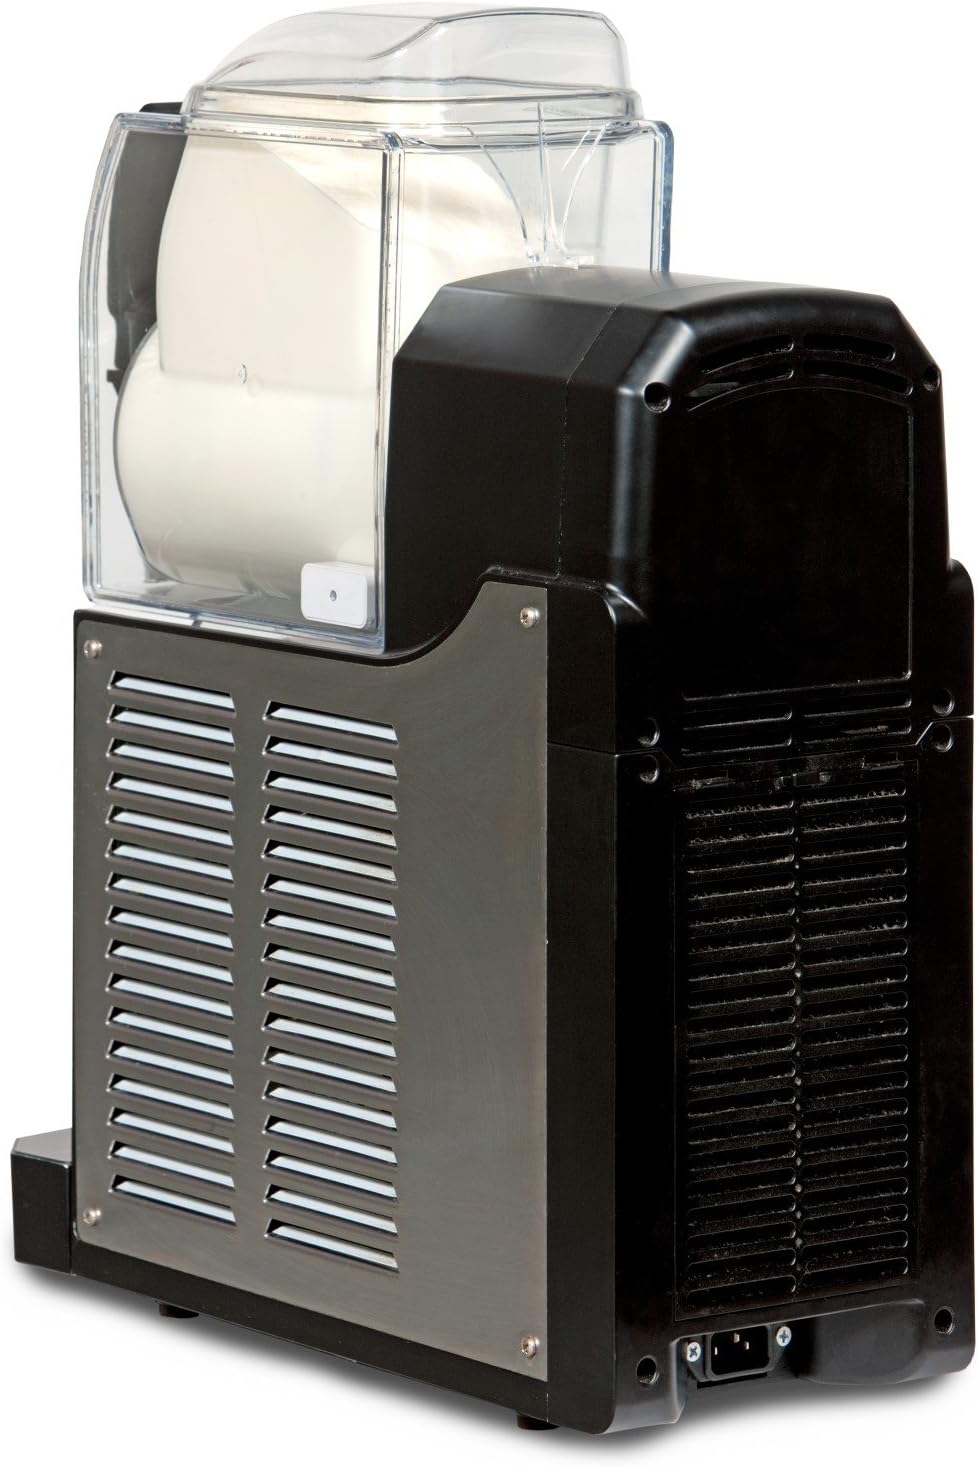
Figura 6.1: Posteriore view of the SPM Nina Slush Machine, illustrating the power input and additional ventilation grilles for proper airflow.
7. Risoluzione Dei Problemi
Consulta questa sezione per i problemi più comuni e le relative soluzioni. Se il problema persiste, contatta l'assistenza clienti.
| Problema | Possibile causa | Soluzione |
|---|---|---|
| La macchina non si accende | Nessuna alimentazione; Interruttore di alimentazione spento; Cavo di alimentazione danneggiato | Check power outlet and plug; Ensure power switch is ON; Inspect power cord for damage. |
| Slush not freezing or too watery | Incorrect mixture ratio; Ambient temperature too high; Insufficient ventilation; Machine set to 'chill' mode | Adjust concentrate-to-water ratio; Ensure proper ventilation; Select 'slush' mode; Allow more time for freezing. |
| Slush too hard | Incorrect mixture ratio; Temperature setting too low | Adjust concentrate-to-water ratio; Adjust consistency setting on control panel. |
| Leaking from dispenser tap | Tap components not assembled correctly; Worn seals | Disassemble and reassemble tap components; Check and replace seals if worn. |
| Rumore insolito durante il funzionamento | Machine not level; Obstruction in moving parts; Internal component issue | Ensure machine is on a level surface; Turn off and check for obstructions; Contact service if noise persists. |
8. Specifiche
Technical specifications for the SPM Nina 01.NINA01.BLK.FWH Slush Machine:
| Specificazione | Valore |
|---|---|
| Marca | SPM Drink Systems S.p.a. |
| Numero di modello | 01.NINA01.BLK.FWH |
| Colore | Nero |
| Dimensioni del prodotto (L x P x A) | Dimensioni: 16 x 38 x 47 cm |
| Peso | 15 kg |
| Capacità | 1.5 litri |
| Potenza/Watttage | 270 watt |
| Voltage | 230 Volt |
| Frequenza | Frequenza 50 Hz |
| Produttore | SPM |
| Refrigerante | R134A |
| Effective Noise Level | Sotto i 70 dB |