1. Introduzione
This manual provides essential information for the safe and effective installation, operation, and maintenance of the Technical Precision L6000 DEUTERIUM Light Bulb replacement. This bulb is designed as a direct replacement for the HITACHI L6000 DEUTERIUM lamp. Please read this manual thoroughly before proceeding with any procedures.
2. Informazioni importanti sulla sicurezza
ATTENZIONE: la mancata osservanza di queste istruzioni di sicurezza può provocare scosse elettriche, incendi, lesioni gravi o morte.
- Installazione professionale consigliata: Deuterium lamps operano ad alto volumetages and emit ultraviolet (UV) radiation. Installation should only be performed by qualified personnel familiar with the specific instrument and safety protocols.
- Disconnessione dell'alimentazione: Always ensure the instrument is completely powered off and disconnected from the main power supply before attempting any installation or maintenance.
- Alto volumetage: Internal components of the instrument and the lamp itself can retain high voltage even after power is disconnected. Exercise extreme caution.
- Radiazioni UV: Do not look directly at an operating deuterium lamp. Prolonged exposure to UV radiation can cause eye and skin damage. Ensure all instrument covers are properly installed during operation.
- Alta temperatura: Il lamp and surrounding components can become extremely hot during operation and remain hot for some time after being turned off. Allow sufficient time for cooling before handling.
- Maneggiare con cura: Avoid touching the glass envelope of the lamp with bare hands. Oils from skin can create hot spots and reduce lamp life. Use clean gloves or a lint-free cloth.
- Disposizione: Smaltire il vecchio lamps according to local regulations for hazardous waste, as they may contain mercury or other regulated substances.
3. Contenuto della confezione
Verify that all items are present and undamaged upon receipt.
- 1 x Technical Precision L6000 DEUTERIUM Light Bulb Replacement
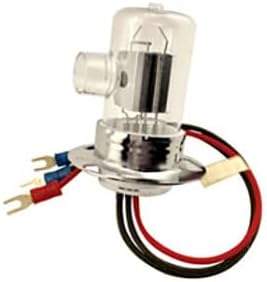
Image: The Technical Precision L6000 DEUTERIUM Light Bulb replacement, showing its glass envelope, metal base, and electrical connectors.
4. Specifiche del prodotto
| Caratteristica | Dettaglio |
|---|---|
| Marca | Precisione tecnica |
| Numero di modello | L6000 DEUTERIUM |
| Numero di parte | L6000 DEUTERIUM |
| Materiale | Copper (for connectors/base) |
| Lunghezza lampadina | 6.75 pollici |
| Componenti inclusi | Replacement Part (Bulb) |
| Batterie richieste | NO |
5. Configurazione e installazione
CAUTION: Refer to Section 2, "Important Safety Information," before proceeding. Installation should be performed by trained personnel.
- Preparare lo strumento: Power off and unplug the instrument from the main power source. Allow sufficient time for the existing lamp and surrounding components to cool down completely.
- Accedi alla lamp vano: Carefully open the instrument's lamp compartment according to the instrument manufacturer's instructions. This may involve removing screws or latches.
- Rimuovi la vecchia Lamp: Wearing clean gloves, carefully disconnect the electrical connectors from the old deuterium lamp. Gently unclip or unscrew the old lamp from its housing. Note its orientation for correct installation of the new lamp.
- Installa la nuova Lamp:
- Wearing clean gloves, carefully remove the new Technical Precision L6000 DEUTERIUM Light Bulb from its packaging. Avoid touching the glass envelope.
- Align the new lamp with the housing, ensuring it is seated correctly and in the same orientation as the old lamp.
- Metti in sicurezza lamp in place using the instrument's retaining clips or screws.
- Reconnect the electrical connectors to the new lamp, ensuring a secure connection.
- Chiudere il vano: Carefully close and secure the lamp compartment cover. Ensure all screws or latches are properly fastened.
- Accensione: Plug the instrument back into the power source and power it on. Follow the instrument manufacturer's instructions for lamp calibration or warm-up procedures.
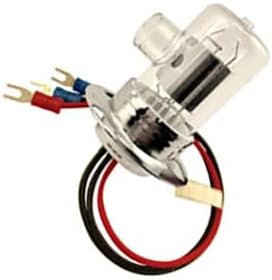
Immagine: Lato A view of the Technical Precision L6000 DEUTERIUM Light Bulb, highlighting the electrical connectors for proper installation.
6. Funzionamento
Once installed, the Technical Precision L6000 DEUTERIUM Light Bulb operates as part of your instrument's system. Refer to your instrument's specific user manual for detailed operating instructions, including:
- Lamp warm-up procedures.
- Lamp regolazioni dell'intensità.
- Calibration routines.
- Expected lamp life monitoring.
IMPORTANT: Always ensure the instrument's protective covers are in place during operation to prevent exposure to UV radiation.
7. Manutenzione
The Technical Precision L6000 DEUTERIUM Light Bulb is a consumable component and requires periodic replacement. Beyond replacement, minimal maintenance is required for the bulb itself.
- Pulizia: If the glass envelope of the lamp requires cleaning (e.g., due to accidental fingerprints), ensure the lamp is cool and disconnected from power. Use a clean, lint-free cloth dampened with isopropyl alcohol. Avoid abrasive materials.
- Frequenza di sostituzione: The lifespan of a deuterium lamp varies depending on usage and instrument type. Monitor your instrument's lamp hour counter and replace the lamp according to the instrument manufacturer's recommendations or when performance degradation is observed.
8. Risoluzione Dei Problemi
Se riscontri problemi dopo l'installazione del nuovo lamp, prendi in considerazione i seguenti passaggi comuni per la risoluzione dei problemi:
| Problema | Possibile causa | Soluzione |
|---|---|---|
| Lamp non si accende. |
|
|
| Low or unstable light output. |
|
|
For further assistance, please contact Technical Precision customer support.
9. Garanzia e supporto
Technical Precision stands behind the quality of its products. For specific warranty information regarding your L6000 DEUTERIUM Light Bulb replacement, please refer to the product packaging or contact Technical Precision directly.
Technical Precision Customer Support:
Per assistenza tecnica, risoluzione dei problemi o richieste di garanzia, visitare il sito Technical Precision Store on Amazon oppure fare riferimento alle informazioni di contatto fornite al momento dell'acquisto.