
1. Importanti istruzioni di sicurezza
Please read all instructions carefully before using the Yosoo Handheld Sewing Machine. Retain this manual for future reference.
- Always keep the machine away from water or damp ambienti per evitare scosse elettriche.
- Ensure hands are dry before handling the machine, especially when inserting batteries or connecting power.
- The needle is sharp. Exercise extreme caution when handling the needle area to avoid injury.
- Keep the machine out of reach of children. This is not a toy.
- Turn off the machine and remove batteries or disconnect power before cleaning, changing the needle, or performing any maintenance.
- Use only the recommended power source (4 AA batteries or compatible power adapter, not included).
- Do not attempt to sew materials thicker than 1.8mm to prevent damage to the machine.
2. Prodotto finitoview
The Yosoo Mini Portable Handheld Sewing Machine is designed for quick repairs and small sewing projects. Its compact size makes it ideal for travel and on-the-go use.
2.1 Contenuto della confezione
Verifica che tutti gli articoli siano presenti nel tuo pacco:
- Yosoo Handheld Sewing Machine
- Thread Spindle
- Infila ago
- Extra Bobbins (quantity may vary)
- Extra Needle
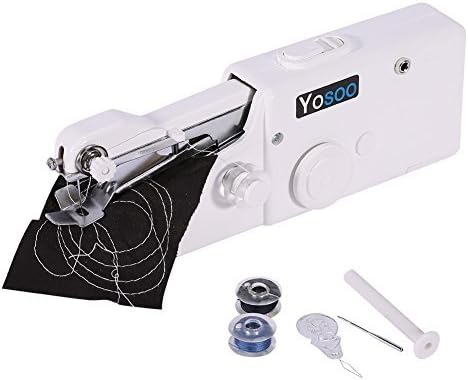
Image: Yosoo Handheld Sewing Machine shown with its standard accessories, including extra bobbins, a needle threader, and a thread spindle.
2.2 Identificazione delle parti
Familiarizza con i componenti principali della tua macchina da cucire:

Immagine: Lato A view of the Yosoo Handheld Sewing Machine, highlighting its overall structure and compact form factor.
- Interruttore di alimentazione: Located on the top, slides to turn the machine on/off.
- Vano batteria: On the underside, holds 4 AA batteries.
- Thread Spool Pin: For holding the main thread spool.
- Controllo della tensione: Regola la tensione del filo.
- Ago: The sewing component that pierces the fabric.
- Piedino premistoffa: Holds the fabric firmly in place while sewing.
- Trasportatore: Moves the fabric forward during stitching.
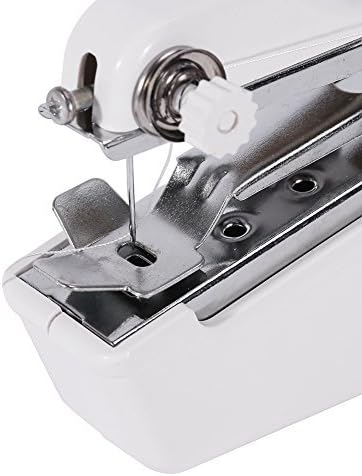
Image: A detailed close-up of the needle and presser foot assembly, showing the critical components for stitching.
3. Impostazione
3.1 Installazione della batteria
The machine requires 4 AA batteries (not included) or can be powered by a compatible DC 6V power adapter (not included).
- Locate the battery compartment on the underside of the machine.
- Aprire il coperchio del vano batterie.
- Inserire 4 batterie AA, assicurandosi che la polarità (+/-) sia corretta, come indicato all'interno del vano.
- Chiudere saldamente il coperchio del vano batterie.
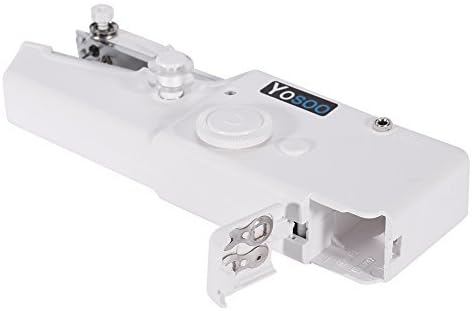
Image: The battery compartment on the underside of the sewing machine is shown open, ready for battery insertion.
3.2 Infilatura della macchina
Correct threading is crucial for proper operation.
- Place a spool of thread onto the thread spool pin.
- Guide the thread through the first thread guide (usually a small metal loop or hook).
- Pass the thread through the tension control disc. Ensure the thread is seated correctly within the discs.
- Continue guiding the thread through the remaining thread guides towards the needle.
- Use the needle threader to pass the thread through the eye of the needle from front to back. Pull about 10-15 cm of thread through the needle eye.
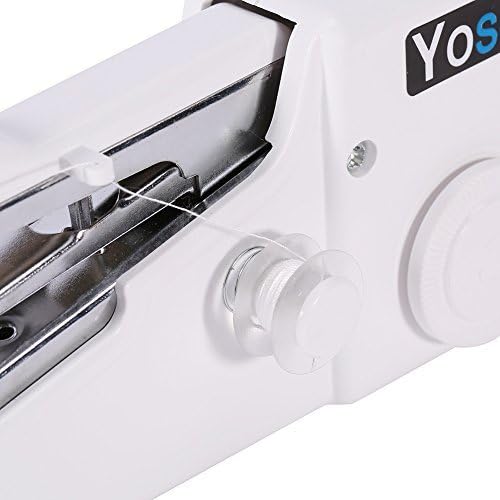
Immagine: un primo piano view of the thread spool correctly placed on its pin, ready for threading.
4. Istruzioni per l'uso
4.1 Preparing to Sew
- Ensure the machine is threaded correctly and batteries are installed.
- Lift the presser foot using the lever.
- Place the fabric under the presser foot, aligning the seam line with the needle.
- Abbassare il piedino premistoffa sul tessuto.
4.2 Inizio della cucitura
- Hold the fabric gently with one hand, guiding it straight.
- Slide the power switch to the 'ON' position. The machine will begin to stitch.
- Guide the fabric slowly and steadily. Do not pull or push the fabric forcefully, as this can bend the needle or cause skipped stitches.

Image: The handheld sewing machine in operation, demonstrating how it stitches fabric.
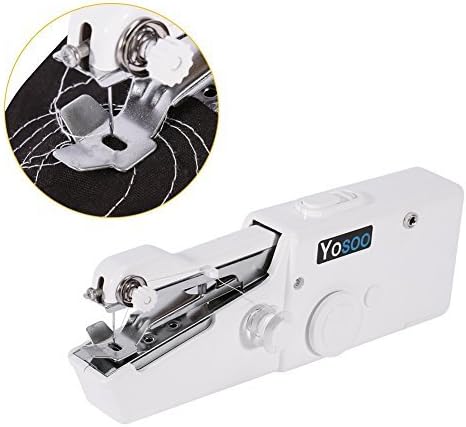
Immagine: Un dettaglio view of the needle and presser foot as the machine performs a stitch on fabric.
4.3 Finishing a Stitch
- When you reach the end of your seam, slide the power switch to the 'OFF' position.
- Sollevare il piedino.
- Gently pull the fabric away from the machine, leaving a few inches of thread.
- Cut the thread, leaving a tail of about 10-15 cm.
- Tie off the ends of the thread to secure the stitch.
5. Manutenzione
5.1 Pulizia
Regular cleaning helps maintain the machine's performance.
- Always turn off the machine and remove batteries before cleaning.
- Use a soft brush or cloth to remove lint and dust from the needle area and feed dogs.
- Do not use liquid cleaners or solvents, as they may damage the machine's components.
5.2 Sostituzione dell'ago
Replace the needle if it becomes bent, dull, or broken.
- Turn off the machine and remove batteries.
- Allentare l'ago clamp screw (usually located above the needle).
- Carefully pull out the old needle. Dispose of it safely.
- Inserire un nuovo ago con il lato piatto rivolto verso il retro della macchina, spingendolo verso l'alto il più possibile.
- Stringere l'ago clamp avvitare saldamente.
6. Risoluzione Dei Problemi
In caso di problemi, fare riferimento ai seguenti problemi comuni e alle relative soluzioni:
| Problema | Possibile causa | Soluzione |
|---|---|---|
| Macchina che non si avvia | Low or incorrectly installed batteries; Power switch off. | Check battery polarity and charge; Ensure power switch is ON. |
| Punti saltati | Incorrect threading; Bent or dull needle; Fabric too thick. | Re-thread the machine; Replace needle; Use appropriate fabric. |
| Rottura del filo | Too much tension; Poor quality thread; Burrs on needle or machine parts. | Adjust tension control; Use good quality thread; Inspect for burrs. |
| Tessuto non alimentato | Presser foot not lowered; Feed dogs obstructed. | Lower the presser foot; Clean any lint from feed dog area. |
7. Specifiche
- Marca: Yosoo
- Modello: Mini Portable Stitch Sewing Machine
- Colore: Bianco
- Materiale: Plastica
- Fonte di energia: 4 batterie AA (non incluse) o adattatore di alimentazione DC 6V (non incluso)
- Maximum Seam Thickness: 1.8mm
- Product Dimensions (approximate): 20.7 cm (lunghezza) x 7.3 cm (altezza) x 3.4 cm (larghezza)
- ASIN: B073JGFZ5Y
- Codice GTIN/UPC: 736691278618

Image: The Yosoo Handheld Sewing Machine with its approximate dimensions clearly marked for reference.