1. Introduzione
Grazie per l'acquistoasing the CONTEC SolarView Compact SV-CPT-MC310. This device is designed for efficient monitoring and data logging of solar power generation. It integrates essential functions such as power measurement, data display, and storage into a compact form factor. This manual provides detailed instructions for the proper setup, operation, and maintenance of your device.
Si prega di leggere attentamente questo manuale prima di utilizzare il prodotto per garantire prestazioni sicure e ottimali. Conservare il manuale per riferimento futuro.
2. Prodotto finitoview
The CONTEC SolarView Compact SV-CPT-MC310 is a versatile device for solar power monitoring. Its slim design houses comprehensive features including a screen display, network connectivity, RS-485 communication, and an SD card slot for data storage.
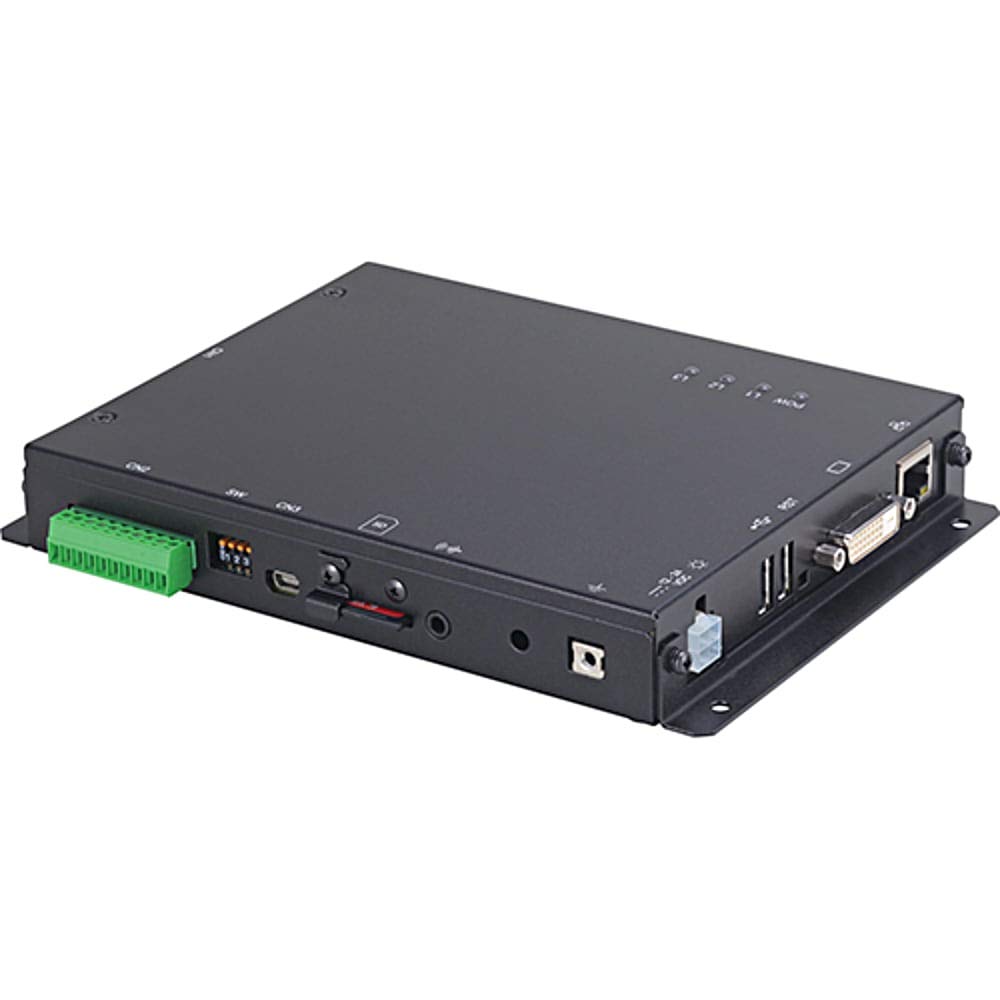
Figura 1: Davanti view of the CONTEC SolarView Compact SV-CPT-MC310. This image illustrates the compact size and the integrated display panel of the device, highlighting its user-friendly interface for monitoring solar power data.
3. Informazioni sulla sicurezza
Per evitare lesioni e danni al dispositivo, osservare sempre le seguenti precauzioni di sicurezza:
- Assicurarsi che il dispositivo sia installato da personale qualificato.
- Non esporre il dispositivo a temperature estreme, umidità o luce solare diretta.
- Scollegare l'alimentazione prima di eseguire qualsiasi procedura di manutenzione o installazione.
- Utilizzare solo gli adattatori e i cavi di alimentazione specificati.
- Do not attempt to open or repair the device yourself. Refer to authorized service personnel.
4. Impostazione
4.1 Disimballaggio e ispezione
Carefully remove the device from its packaging. Inspect for any signs of damage during transit. If any damage is found, contact your supplier immediately.
4.2 Montaggio del dispositivo
Il solareView Compact SV-CPT-MC310 is designed for indoor installation. Choose a location that is dry, well-ventilated, and free from direct sunlight or excessive heat sources. Ensure adequate space around the device for ventilation and cable connections.
- Individuare una superficie di montaggio adatta.
- Secure the device using appropriate screws or mounting brackets (not included).
4.3 collegamenti elettrici
Connect the power supply and communication cables as follows:
- Potenza in ingresso: Connect the DC power adapter to the device's power input port. Ensure the power source matches the device's voltage requisiti.
- Comunicazione RS-485: Connect the RS-485 cable to the designated port for communication with other devices or systems.
- Rete (Ethernet): For network connectivity, plug an Ethernet cable into the RJ45 port.
- Scheda SD: Insert a compatible SD card into the SD card slot for data logging. Ensure the card is correctly oriented.
Warning: Ensure all connections are secure before applying power.
5. Istruzioni per l'uso
5.1 Accensione e avvio iniziale
Once all connections are made, apply power to the device. The device will perform a self-test and the display will show the boot-up sequence. After successful boot, the main monitoring screen will appear.
5.2 Navigazione nell'interfaccia utente
The device features an integrated display and control buttons. Use the navigation buttons to scroll through menus and select options.
- Pulsanti su/giù: Navigate through menu items or adjust values.
- Pulsante Invio: Conferma la selezione o accedi a un sottomenu.
- Pulsante Indietro/Esci: Ritorna alla schermata precedente o esce da un menu.
5.3 Monitoring Solar Power Data
The main screen typically displays real-time data such as:
- Current Power Generation (W)
- Daily Energy Yield (Wh)
- Total Energy Yield (kWh)
- Stato del sistema
Refer to the on-screen menu for detailed historical data and system settings.
5.4 Registrazione ed esportazione dei dati
The device automatically logs data to the inserted SD card. To access or export data:
- Navigate to the "Data Management" or "Log" menu.
- Select the desired time range or data type.
- Choose the "Export" option (if available) to transfer data via network or remove the SD card and access data on a computer.
6. Manutenzione
6.1 Pulizia
Mantenere il dispositivo pulito e privo di polvere. Utilizzare un panno morbido e asciutto per pulire l'esterno. Non utilizzare detergenti liquidi o materiali abrasivi.
6.2 Aggiornamenti firmware
Periodically check the CONTEC website for firmware updates. Follow the provided instructions carefully for any update procedures to ensure optimal performance and access to new features.
6.3 Gestione scheda SD
Regularly back up data from the SD card. Consider replacing the SD card periodically, especially if it shows signs of wear or data corruption, to ensure reliable data logging.
7. Risoluzione Dei Problemi
| Problema | Possibile causa | Soluzione |
|---|---|---|
| Il dispositivo non si accende. | Nessuna alimentazione; adattatore di alimentazione difettoso; collegamento allentato. | Check power cable connection. Ensure power adapter is functional. Verify power outlet. |
| No data displayed. | Sensor not connected; communication error; incorrect settings. | Verify sensor connections. Check RS-485 or network settings. Restart the device. |
| Errore scheda SD. | SD card not inserted correctly; incompatible card; corrupted card. | Reinsert SD card. Try a different compatible SD card. Format the SD card (data will be lost). |
| Errore di connessione di rete. | Ethernet cable disconnected; incorrect network settings; router issue. | Check Ethernet cable. Verify network settings on the device. Restart router/modem. |
If the problem persists after attempting these solutions, please contact CONTEC technical support.
8. Specifiche
| Caratteristica | Dettaglio |
|---|---|
| Numero di modello | SV-CPT-MC310 |
| Dimensioni (L x P x A) | Dimensioni: 14 x 17 x 3 cm |
| Peso | 650 grammi |
| Interfacce di comunicazione | Network (Ethernet), RS-485 |
| Archiviazione dei dati | Scheda SD |
| Produttore | CONTEC |
9. Garanzia e supporto
9.1 Informazioni sulla garanzia
CONTEC warrants this product against defects in materials and workmanship for a period specified at the time of purchase. Please retain your proof of purchase. The warranty does not cover damage caused by improper installation, misuse, unauthorized repairs, or natural disasters.
For detailed warranty terms and conditions, please refer to the warranty card included with your product or visit the official CONTEC websito.
9.2 Supporto tecnico
If you require technical assistance or have questions regarding the operation of your SolarView Compact SV-CPT-MC310, please contact CONTEC technical support through their official websito o le informazioni di contatto fornite nella documentazione del prodotto.
When contacting support, please have your model number (SV-CPT-MC310) and a detailed description of the issue ready.