1. Introduzione
Thank you for choosing an AEG appliance. This instruction manual provides essential information for the safe and efficient operation, installation, and maintenance of your AEG L7WB65689 washer dryer. Please read this manual carefully before using the appliance and keep it for future reference.
2. Informazioni sulla sicurezza
For your safety and to ensure correct use, always observe the following warnings and precautions. Incorrect installation or use can cause injury or damage.
- Sicurezza elettrica: Assicurarsi che l'apparecchio sia correttamente collegato a terra. Non utilizzare prolunghe o adattatori per prese multiple. Scollegare l'apparecchio dalla corrente elettrica prima di pulirlo o sottoporlo a manutenzione.
- Sicurezza dell'acqua: Ensure water inlet and drain hoses are correctly connected to prevent leaks. Do not operate if there is a visible leak.
- Sicurezza dei bambini: Keep children and pets away from the appliance during operation. Packaging materials should be kept out of reach of children.
- Ventilazione: Assicurare un'adeguata ventilazione attorno all'apparecchio, soprattutto durante i cicli di asciugatura, per evitare il surriscaldamento.
- Materiali infiammabili: Do not wash or dry items that have been soiled with flammable substances (e.g., cooking oil, petrol).
- Uso dell'apparecchio: This appliance is for domestic use only. Do not overload the drum.
3. Installazione e configurazione
Un'installazione corretta è fondamentale per le prestazioni e la longevità del tuo elettrodomestico.
3.1 Disimballaggio
- Remove all packaging materials, including polystyrene blocks and plastic film.
- Remove the transport bolts from the rear of the appliance. Keep them for future transport.
3.2 Posizione
- Posizionare l'apparecchio su un pavimento solido e piano.
- Ensure there is sufficient space around the appliance for ventilation and maintenance.
- Avoid installing in areas where the temperature may drop below freezing.
3.3 Collegamento idrico
- Collegare il tubo di ingresso dell'acqua a un rubinetto dell'acqua fredda con filettatura da 3/4". Assicurarsi che il collegamento sia ben saldo per evitare perdite.
- Posizionare il tubo di scarico in una conduttura di scarico o sul bordo di un lavandino, assicurandosi che sia fissato saldamente per evitare che si sposti durante il funzionamento.
3.4 Collegamento elettrico
- Plug the appliance into a properly earthed power socket.
- Assicurare il volumetage la frequenza corrispondano ai valori nominali riportati sulla targhetta dell'apparecchio.
3.5 Livellamento dell'apparecchio
- Adjust the feet at the bottom of the appliance to ensure it is perfectly level. Use a spirit level to check.
- Un apparecchio livellato riduce le vibrazioni e il rumore durante il funzionamento.
4. Istruzioni per l'uso
Follow these steps for effective washing and drying.
4.1 Pannello di controllo Sopraview
The control panel features a rotary dial for program selection, buttons for additional options, and an LED display for status and settings.
4.2 Caricamento della biancheria
- Aprire lo sportello dell'apparecchio.
- Load laundry items loosely into the drum. Do not overload.
- Chiudere bene la porta.
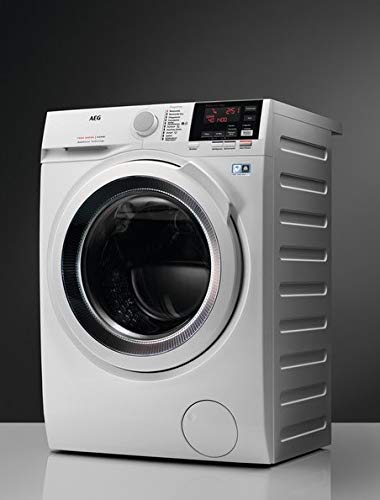
The image displays the internal drum of the AEG L7WB65689 washer dryer, highlighting its design for efficient washing and drying. Ensure laundry is loaded evenly into this drum.
4.3 Aggiunta di detersivo e ammorbidente
- Estrarre il cassetto del detersivo.
- Aggiungere la quantità appropriata di detersivo nello scomparto del lavaggio principale.
- Add fabric softener to its designated compartment (if desired).
- Spingere delicatamente il cassetto indietro.
4.4 Selezione di un programma
- Turn the rotary dial to select the desired washing or combined wash and dry program.
- Refer to the program chart (usually inside the detergent drawer or on the appliance) for detailed program descriptions.
4.5 Regolazione delle impostazioni
- Use the option buttons to adjust temperature, spin speed, or drying level as needed for the selected program.
- The LED display will show the current settings.
4.6 Avvio e fine di un programma
- Premere il pulsante Avvio/Pausa per avviare il programma selezionato.
- At the end of the program, an audible signal may sound, and the LED display will indicate completion.
- Aprire la porta e rimuovere la biancheria.
5. Manutenzione e pulizia
Una manutenzione regolare garantisce prestazioni ottimali e prolunga la durata del tuo elettrodomestico.
5.1 Pulizia del distributore del detersivo
- Estrarre completamente il cassetto del dispenser.
- Rimuovere eventuali parti rimovibili e sciacquarle sotto l'acqua corrente.
- Pulire l'alloggiamento del cassetto con una spazzola.
- Rimontare e reinserire il cassetto.
5.2 Pulizia del tamburo
- Periodically run a maintenance wash cycle (e.g., a hot wash with no laundry and a descaling agent) to clean the drum and remove residues.
- Leave the door ajar after use to allow the drum to air dry and prevent odors.
5.3 Pulizia del filtro
- Individuare il filtro della pompa di scarico, solitamente nella parte anteriore inferiore dell'elettrodomestico.
- Posizionare un contenitore poco profondo sotto per raccogliere l'acqua residua.
- Unscrew the filter cover and carefully remove any lint, debris, or foreign objects.
- Pulire il filtro sotto l'acqua corrente e riavvitarlo saldamente.
5.4 Pulizia dell'esterno
- Pulire le superfici esterne con un panno morbido, damp stoffa.
- Non utilizzare detergenti abrasivi o solventi.
6. Risoluzione Dei Problemi
If you encounter a problem with your appliance, consult this section before contacting service.
| Problema | Possibile causa | Soluzione |
|---|---|---|
| L'apparecchio non si avvia | Nessuna alimentazione; Sportello non chiuso; Programma non selezionato. | Controllare la spina di alimentazione e il fusibile; Assicurarsi che lo sportello sia ben chiuso; Selezionare un programma e premere Avvio. |
| Perdita d'acqua | Collegamenti dei tubi allentati; traboccamento del cassetto del detersivo. | Check and tighten water inlet/drain hoses; Do not overfill detergent drawer. |
| Rumore/vibrazione insolita | Transport bolts not removed; Appliance not level; Foreign objects in drum. | Remove transport bolts; Adjust feet to level appliance; Check drum for foreign objects. |
| Risultati di lavaggio scadenti | Sovraccarico; Dosaggio errato del detersivo; Programma sbagliato. | Ridurre le dimensioni del carico; Utilizzare la giusta quantità di detersivo; Selezionare il programma appropriato. |
| Scarsi risultati di asciugatura | Overloading; Lint filter blocked; Incorrect drying level. | Reduce load size; Clean the lint filter; Select a higher drying level. |
Se il problema persiste dopo aver provato queste soluzioni, contattare il servizio clienti AEG.
7. Specifiche tecniche
- Modello: L7WB65689
- Marca: AEG
- Reference/Model Number: 914 603 822
- Dimensioni (L x P x A): Dimensioni: 59.7 x 57.6 x 84.8 cm
- Capacità: 4 Kilograms (drying capacity)
- Tipo di caricamento: Caricamento frontale
- Alimentazione elettrica: Fare riferimento alla targhetta identificativa posta sull'apparecchio.
8. Garanzia e assistenza clienti
Your AEG L7WB65689 washer dryer comes with a manufacturer's warranty. Please refer to the warranty card provided with your appliance for specific terms and conditions.
For technical assistance, spare parts, or to schedule a service appointment, please contact AEG customer support. Have your appliance model number (L7WB65689) and serial number ready when you call.
Contact information for customer support can typically be found on the AEG official websito o nella documentazione fornita con il prodotto.