
Introduzione
Thank you for choosing the Bluesound WM200 Universal Wall Mount. This manual provides essential information for the safe and correct installation, operation, and maintenance of your wall mount. Please read these instructions thoroughly before installation and retain them for future reference.
The WM200 wall mount is specifically designed for use with Bluesound PULSE, PULSE 2, PULSE 2i, PULSE MINI, and PULSE MINI 2i speakers, offering a secure and aesthetically pleasing soluzione di montaggio.
Informazioni sulla sicurezza
- Leggi tutte le istruzioni: Before installation, carefully read and understand all instructions.
- Verify wall structure: Ensure the mounting surface can safely support the combined weight of the wall mount and your speaker. Consult a professional if unsure.
- Utilizzare strumenti adeguati: Use only the recommended tools and hardware for installation.
- Installazione sicura: Improper installation can result in serious injury or damage to equipment. Ensure all fasteners are tightened securely.
- Tenere fuori dalla portata dei bambini: Piccole parti possono essere un rischio di soffocamento.
Contenuto della confezione
Verificare che tutti i componenti siano presenti prima di iniziare l'installazione:
- 1 x Bluesound WM200 Universal Wall Mount
- Hardware di montaggio (viti, tasselli a muro)
- Manuale di istruzioni (questo documento)
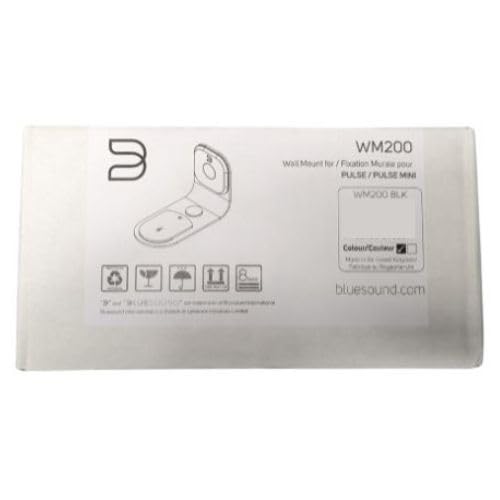
Figure 1: Bluesound WM200 Wall Mount product packaging.
Configurazione e installazione
Follow these steps to securely install your Bluesound WM200 Universal Wall Mount:
- Scegli la posizione: Select a suitable wall location, ensuring it is structurally sound and free from electrical wires or plumbing. Consider the optimal listening height and desired swivel range.
- Segnare i punti di foratura: Hold the wall mount against the wall at the desired height and use a pencil to mark the drilling points for the mounting screws. Ensure the mount is level.
- Fori di perforazione: Using an appropriate drill bit for your wall type (e.g., masonry for brick, wood bit for studs), drill pilot holes at the marked locations. If drilling into drywall without a stud, insert the provided wall anchors.
- Fissare il supporto a parete: Align the wall mount with the drilled holes. Insert the mounting screws and tighten them securely. Do not overtighten. The mount is constructed from durable steel for reliable support.
- Cavi del percorso: The WM200 features rubber mouldings designed for flexible wire management. Route your speaker's power and audio cables through these mouldings to keep them tidy and protected.
- Collega altoparlante: Carefully slide your compatible Bluesound speaker onto the wall mount. Ensure it is seated firmly and securely.

Figure 2: Bluesound WM200 Wall Mount with compatible speaker (speaker sold separately).
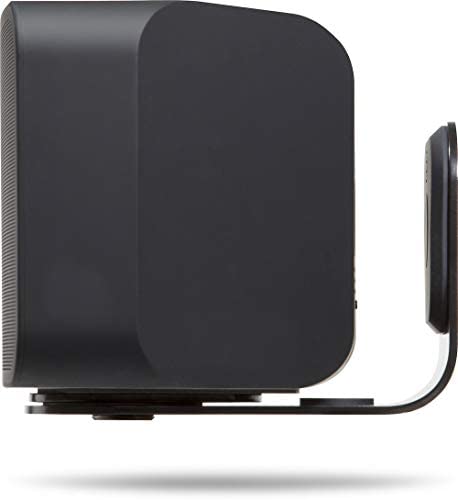
Figura 3: lato view of the WM200 mount securely holding a Bluesound speaker.
Operazione
The Bluesound WM200 Universal Wall Mount offers a 120° total swivel control. This allows you to adjust the direction of your speaker to optimize sound projection and listening experience. Gently pivot the speaker and mount assembly to achieve the desired angle.
Manutenzione
To ensure the longevity and appearance of your Bluesound WM200 Wall Mount, follow these simple maintenance guidelines:
- Pulizia: Pulisci la montatura con un panno morbido e asciutto per rimuovere la polvere. Per i segni ostinati, usa un panno leggermenteamp È possibile utilizzare un panno e asciugare immediatamente. Evitare detergenti abrasivi o solventi.
- Controlli periodici: Periodically check all mounting screws to ensure they remain tight and secure. Do not overtighten.
Risoluzione dei problemi
If you encounter any issues with your WM200 Wall Mount, consider the following:
- Il supporto sembra allentato: Ensure all mounting screws are securely fastened to the wall and that the speaker is correctly seated on the mount. Re-check the wall structure for stability.
- Speaker not fitting: Verify that your speaker model is compatible with the WM200 mount (PULSE, PULSE 2, PULSE 2i, PULSE MINI, PULSE MINI 2i).
- Difficoltà nella rotazione: Ensure no cables are obstructing the swivel mechanism. The swivel should operate smoothly with gentle force.
Specifiche
| Numero di modello | WM200 |
| Marca | Suono blu |
| Colore | Nero |
| Materiale | Acciaio |
| Tipo di montaggio | Montaggio a parete |
| Dimensioni articolo (L x P x A) | 19 x 13 x 9.5 centimetri |
| Peso dell'articolo | 1.02 chilogrammi |
| Controllo girevole | 120° total |
| Gestione del filo | Integrated rubber mouldings |

Figura 4: Esample installation of the Bluesound WM200 Wall Mount in a living space.
Informazioni sulla garanzia
Bluesound products are manufactured to the highest quality standards. This product is covered by a limited warranty against defects in materials and workmanship. The specific terms and duration of the warranty may vary by region. Please refer to the warranty card included with your product or visit the official Bluesound websito per informazioni dettagliate sulla garanzia.
Supporto
For technical assistance, troubleshooting, or further inquiries regarding your Bluesound WM200 Universal Wall Mount, please visit the official Bluesound support website or contact their customer service department. You can typically find contact information and FAQs on the Bluesound websito: