1. Introduzione
This manual provides detailed instructions for the proper setup, operation, and maintenance of your MASUNN Kinter MA-700 Mini FM Radio Amplifier. Please read this manual thoroughly before using the device to ensure optimal performance and safety.
2. Informazioni sulla sicurezza
Osservare le seguenti precauzioni di sicurezza per evitare scosse elettriche, incendi o danni all'unità:
- Non esporre l'unità alla pioggia o all'umidità.
- Non aprire il casing. Affidare tutti gli interventi di manutenzione a personale qualificato.
- Garantire un'adeguata ventilazione attorno all'unità.
- Utilizzare solo l'alimentatore specificato (DC 12V).
- Tenere l'unità lontano da fonti di calore e dalla luce solare diretta.
- Non posizionare oggetti pesanti sull'unità.
3. Contenuto della confezione
Verificare che tutti gli articoli siano presenti nel pacco:
- 1 x MA-700 Power Amppiù vivace
- 1 x telecomando
- 1 cavo audio da 3.5 mm
- (Note: Speaker wires and power adapter may be included depending on the specific package variant.)
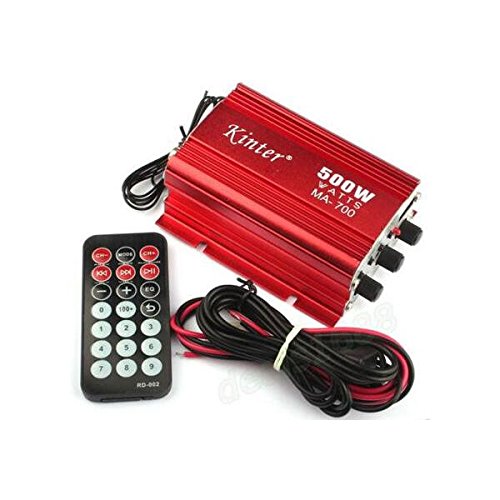
Figura 3.1: Oltreview of the MA-700 amplifier, remote control, and included cables.
4. Caratteristiche del prodotto
- Supports MP3 music playback from U disk (USB drive) and SD/MMC cards.
- Integrated FM stereo radio function.
- Professional four-channel integrated circuit power amplifier design for minimal distortion and strong output.
- Professional-level operational amplifier IC for transparent and bright sound.
- Features filtering and anti-large capacity power supply circuit.
- DSP sound field pattern across four channels.
- Two main channels and two towing channel outputs.
5. Prodotto finitoview
5.1 Pannello frontale

Figura 5.1: Comandi e ingressi del pannello frontale.
- Pulsante SUCCESSIVO: Short press for next track (MP3) or next station (FM).
- Pulsante SCAN/PLAY/PAUSE: Short press to play/pause (MP3). Long press to auto-scan FM stations.
- Pulsante PREC: Short press for previous track (MP3) or previous station (FM).
- Pulsante MODE: Switches between USB, AUX, and FM radio input modes.
- Porta USB: For connecting USB flash drives with MP3 audio files.
- Slot per scheda SD/MMC: For inserting SD or MMC cards with MP3 audio files (located near USB, not explicitly visible but implied by description).
- Manopola VOLUME: Regola il volume di uscita complessivo.
- Manopola TREBLE: Regola il livello audio ad alta frequenza.
- Manopola BASSO: Regola il livello audio delle basse frequenze.
5.2 Pannello posteriore

Figura 5.2: Collegamenti del pannello posteriore.
- Terminali di uscita ALTOPARLANTE: Connect your passive speakers here. Ensure correct polarity (+/-).
- Ingresso alimentazione CC 12V 5A: Connect the 12V DC power adapter (not included).
- REM INPUT: Remote turn-on input, typically for car audio systems.
- Indicatore LED: Spia luminosa di alimentazione.
- ANT (FM Antenna Input): Collegare un'antenna FM per la ricezione radio.
- Ingresso AUX (RCA): Connect external audio sources using RCA cables.
5.3 telecomando
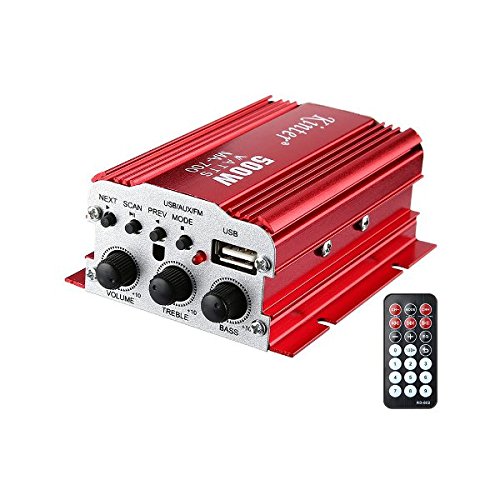
Figure 5.3: The MA-700 amplifier mostrato con il suo telecomando.
Il telecomando incluso consente un comodo utilizzo del amplifier's functions from a distance. Functions include power on/off, volume adjustment, track navigation, mode selection, and FM radio controls.
6. Impostazione
- Collegare gli altoparlanti: Connect your passive speakers to the SPEAKER output terminals on the rear panel. Ensure correct positive (+) and negative (-) polarity for each speaker. Incorrect wiring can lead to poor sound quality or damage.
- Collega la sorgente audio:
- Chiavetta USB: Inserire un'unità flash USB contenente MP3 files nella porta USB sul pannello frontale.
- Scheda SD/MMC: Insert an SD or MMC card containing MP3 files into the card slot on the front panel.
- Ingresso AUX: Connect an external audio device (e.g., smartphone, CD player) to the AUX RCA inputs on the rear panel using appropriate RCA cables, or use the 3.5mm audio cable if your device has a 3.5mm output and you have an adapter.
- Collegare l'antenna FM: For FM radio reception, connect an external FM antenna to the ANT input on the rear panel.
- Connetti alimentazione: Connect a DC 12V 5A power adapter (not included) to the DC 12V 5A power input on the rear panel. Ensure the power adapter is suitable for the amprequisiti del fornitore.
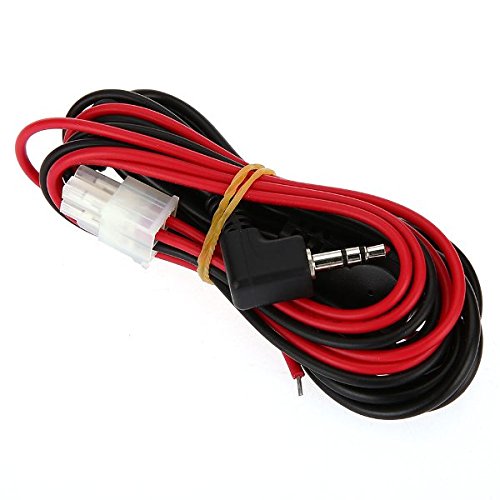
Figura 6.1: Esample of included 3.5mm audio cable and speaker wires (may vary).
7. Istruzioni per l'uso
7.1 Accensione/spegnimento
Once all connections are secure, connect the power adapter to a wall outlet. The LED indicator on the rear panel should illuminate. The unit can be powered on/off using the remote control or by disconnecting the power adapter.
7.2 Controllo del volume e del tono
- Manopola VOLUME: Ruotare in senso orario per aumentare il volume, in senso antiorario per diminuirlo.
- Manopola TREBLE: Regola le alte frequenze.
- Manopola BASSO: Regola le basse frequenze.
- Note: Volume can also be adjusted via the remote control.
7.3 Selezione della sorgente
Premere il tasto MODALITÀ button on the front panel or the remote control to cycle through available input sources: USB, SD/MMC, AUX, and FM Radio.
7.4 MP3 Playback (USB/SD/MMC)
When a USB drive or SD/MMC card with MP3 files is inserted and the correct mode is selected:
- RIPRODUCI/PAUSA: Short press the SCAN/PLAY/PAUSE button on the front panel or the corresponding button on the remote.
- SUCCESSIVO/PREV: Short press the NEXT or PREV buttons on the front panel or remote to skip tracks.
7.5 Funzionamento della radio FM
When FM mode is selected:
- Scansione automatica: Long press the SCAN/PLAY/PAUSE button on the front panel to automatically scan and save available FM stations.
- Navigazione della stazione: Use the NEXT or PREV buttons on the front panel or remote to cycle through saved stations.
8. Specifiche
| Caratteristica | Specificazione |
|---|---|
| Ingresso volumetage | CC 12V |
| Risposta in frequenza | 20 Hz - 20 kHz |
| Distorsione armonica | 0.05% and less (4W 1kHz) |
| High Control (Treble) | 12 dB |
| Controllo dei bassi | 12 dB |
| Livello del segnale | 220 MV 47 K |
| FM Frequency Response | 87.5 - 108 MHz |
| Progetto | Car (Compact) |
| Compatibile con | MP3 |
| Supporti | Altoparlante, telecomando |
| Funzioni | Song Track Navigation |
| Connettività | Cablato |
| Interfaccia | 3.5mm Audio (via cable), USB, SD/MMC, RCA |
| Sorgente audio | Electronic products with 3.5mm jack, USB drive, SD/MMC card |
| Materiale | Lega di alluminio |
| Dimensioni (L x P x A) | 15.50 x 12.00 x 4.00 cm / 6.1 x 4.72 x 1.57 pollici |
| Numero di canali | 4 |
9. Risoluzione Dei Problemi
| Problema | Possibile causa | Soluzione |
|---|---|---|
| Nessun potere | Power adapter not connected or faulty. Incorrect voltage. | Ensure power adapter is securely connected and functioning. Verify it is a DC 12V 5A adapter. |
| Nessuna uscita audio | Speakers not connected correctly. Volume too low. Incorrect input source selected. Faulty audio cable. | Check speaker wiring polarity. Increase volume. Press MODE to select correct input. Test with a different audio cable. |
| Scarsa ricezione FM | Antenna non collegata o posizionata male. Segnale debole. | Connect an external FM antenna. Adjust antenna position for better reception. |
| La scheda USB/SD non funziona | Scheda/unità non inserita correttamente. Files not in MP3 format. Incorrect mode selected. | Reinsert USB drive/SD card. Ensure files are MP3. Press MODE to select USB/SD mode. |
| Il telecomando non funziona | Battery depleted. Obstruction between remote and unit. | Replace remote control battery. Ensure clear line of sight to the ampricevitore IR del lificatore. |
10. Manutenzione
- Pulizia: Utilizzare un panno morbido e asciutto per pulire l'esterno dell'unità. Non utilizzare detergenti liquidi o solventi.
- Magazzinaggio: When not in use for extended periods, disconnect the power adapter and store the unit in a cool, dry place away from direct sunlight.
11. Garanzia e supporto
Per informazioni sulla garanzia o assistenza tecnica, consultare la documentazione fornita al momento dell'acquisto o contattare il rivenditore. Conservare la prova d'acquisto per eventuali reclami in garanzia.