
1. Introduzione
This instruction manual provides essential information for the installation, operation, and maintenance of the Hikvision DS-7604NI-K1/4P 4-Channel 4K PoE Network Video Recorder (NVR). Please read this manual thoroughly before using the product to ensure correct and safe operation. Keep this manual for future reference.
2. Informazioni sulla sicurezza
Osservare le seguenti precauzioni di sicurezza per evitare lesioni o danni al dispositivo:
- Alimentazione elettrica: Utilizzare solo l'adattatore di alimentazione specificato per questo dispositivo. Assicurarsi che il voltaggio di alimentazionetage è stabile e soddisfa i requisiti del dispositivo.
- Ventilazione: Non ostruire le aperture di ventilazione. Garantire un flusso d'aria adeguato per evitare il surriscaldamento.
- Ambiente: Avoid exposing the device to extreme temperatures, humidity, dust, or corrosive environments. Do not place heavy objects on the device.
- Installazione: Install the device on a stable surface. Avoid strong vibrations or impacts.
- Manutenzione: Non tentare di smontare o modificare il dispositivo. Per qualsiasi intervento di manutenzione, rivolgersi a personale qualificato.
3. Prodotto finitoview
The Hikvision DS-7604NI-K1/4P is a 4-channel Network Video Recorder designed for surveillance systems. It supports up to 4K resolution for live view, recording, and playback, and features Power-over-Ethernet (PoE) interfaces for direct connection and power supply to compatible IP cameras.
3.1 Contenuto della confezione
- Hikvision DS-7604NI-K1/4P NVR Unit
- Adattatore di alimentazione
- Mouse USB
- Viti per l'installazione dell'HDD
- Guida rapida
3.2 Pannello frontale
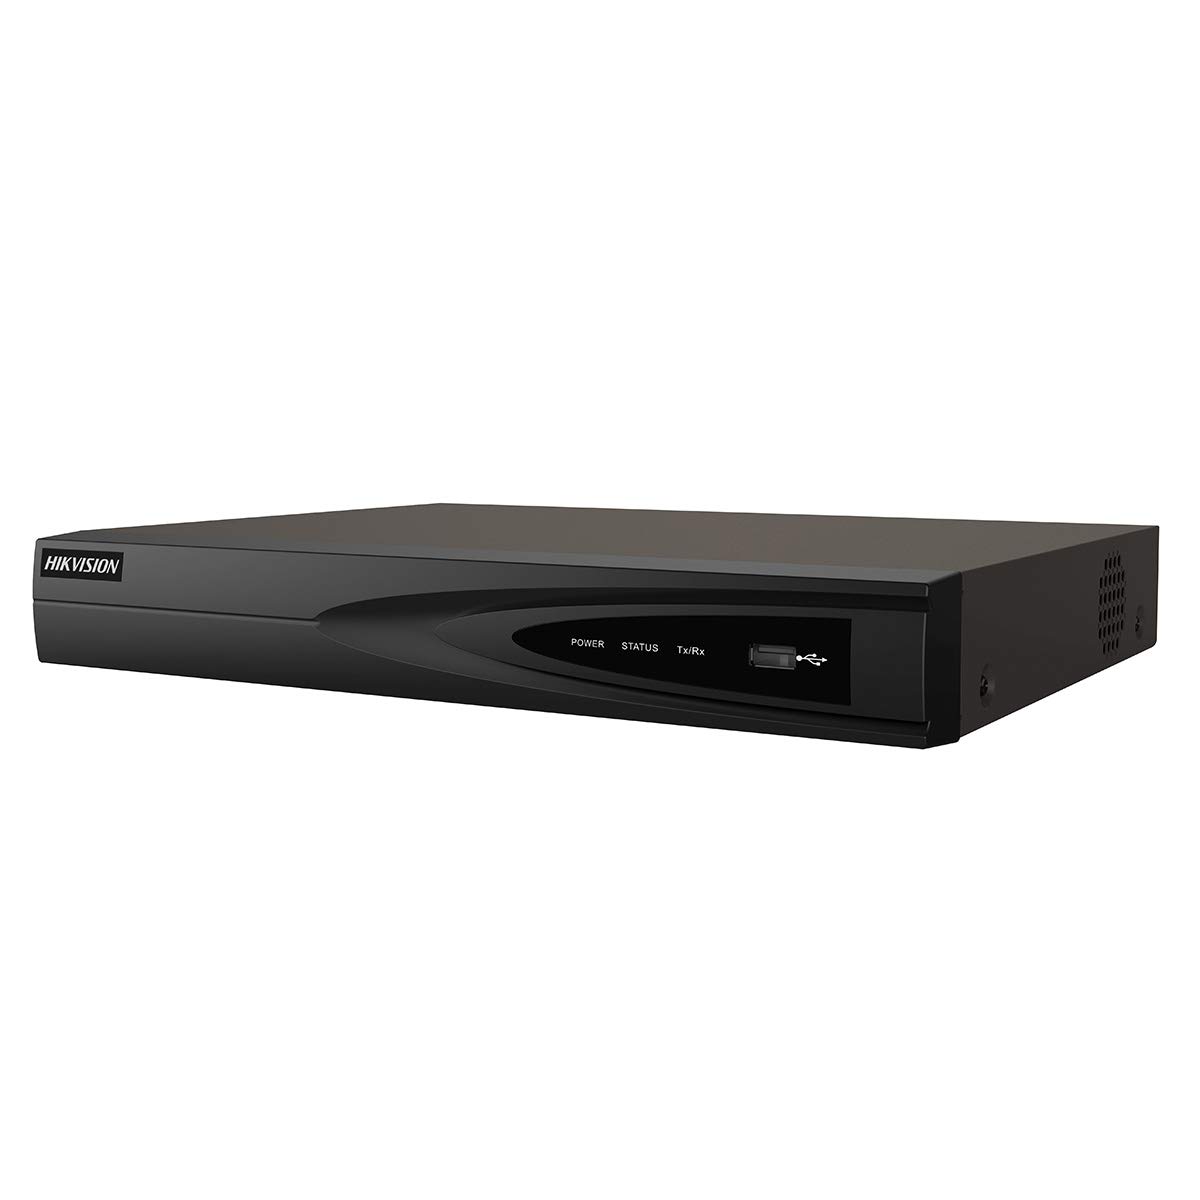
Immagine 1: anteriore view of the Hikvision DS-7604NI-K1/4P NVR. This image displays the front panel of the NVR, typically featuring status indicator lights and a USB port for peripheral connections.
3.3 Pannello posteriore
Il pannello posteriore include varie porte per la connettività:
- Porte PoE (x4): For connecting IP cameras and providing power.
- Porta LAN: For network connection to a router or switch.
- Uscita HDMI: For connecting to a monitor or TV for high-definition video output.
- Uscita VGA: For connecting to a monitor for video output.
- USB Ports (x2 total, typically one front, one rear): For mouse, USB drive, or other peripherals.
- Ingresso audio (RCA): For connecting an external audio source.
- Potenza in ingresso: Per collegare l'adattatore di alimentazione.
4. Impostazione
4.1 Installazione del disco rigido (facoltativa)
The NVR supports one internal SATA hard drive for video storage (up to 6 TB). If a hard drive is not pre-installed, follow these steps:
- Svitare e rimuovere il coperchio superiore dell'NVR.
- Collegare il cavo dati SATA e il cavo di alimentazione al disco rigido.
- Align the hard drive with the mounting holes and secure it with the provided screws.
- Riposizionare il coperchio superiore dell'NVR e fissarlo con le viti.
4.2 Collegamento delle periferiche
- Monitorare: Collegare un monitor alla porta di uscita HDMI o VGA dell'NVR.
- Topo: Collegare il mouse USB a una porta USB dell'NVR.
- Rete: Collegare la porta LAN dell'NVR al router o allo switch di rete tramite un cavo Ethernet.
- Telecamere: Connect IP cameras to the NVR's PoE ports. The NVR will automatically power and detect compatible Hikvision PoE cameras.
4.3 Accensione e configurazione iniziale
- Collegare l'adattatore di alimentazione all'ingresso di alimentazione dell'NVR e quindi a una presa di corrente.
- L'NVR si accenderà automaticamente.
- Upon first boot, the NVR will guide you through an initialization wizard. Follow the on-screen prompts to set up a strong password, network settings, and hard drive formatting (if applicable).
- Ensure the hard drive is formatted before recording can begin.
5. Funzionamento
5.1 Vivere View
After initial setup, the NVR will display the live video feed from connected cameras on the monitor. You can switch between single-camera view e griglia multi-camera view utilizzando i controlli sullo schermo o il mouse.
5.2 Registrazione
L'NVR supporta diverse modalità di registrazione:
- Registrazione continua: Registra video costantemente.
- Registrazione di rilevamento del movimento: Registra solo quando viene rilevato un movimento nella telecamera view.
- Registrazione programmata: Records based on a predefined schedule.
Configure recording settings via the NVR's menu interface (typically accessible by right-clicking on the live view screen and selecting 'Menu').
5.3 Riproduzione
per riview registrato footage:
- Accedere al menu "Riproduzione" dall'interfaccia principale dell'NVR.
- Selezionare la/le telecamera/e desiderata/e e l'intervallo di data/ora.
- Utilizzare i controlli di riproduzione (riproduzione, pausa, avanzamento rapido, riavvolgimento) per navigare attraverso il footage.
5.4 Accesso remoto
Per telecomando viewing and management, download the Hik-Connect app on your mobile device or use the Hik-Connect web portal. The NVR must be connected to the internet, and you will need to register the device with your Hik-Connect account. Refer to the Hik-Connect documentation for detailed instructions.
6. Manutenzione
6.1 Aggiornamenti firmware
Controllare periodicamente il sito ufficiale Hikvision webSito per gli aggiornamenti del firmware. L'aggiornamento del firmware può migliorare le prestazioni, aggiungere nuove funzionalità e aumentare la sicurezza. Seguire attentamente le istruzioni fornite con il pacchetto di aggiornamento del firmware.
6.2 Gestione del disco rigido
Regularly check the health status of your hard drive through the NVR's menu. If the hard drive shows errors or is nearing its end of life, consider replacing it to prevent data loss. You may also need to format the hard drive periodically, which will erase all recorded data.
6.3 Pulizia
Clean the exterior of the NVR with a soft, dry cloth. Do not use liquid cleaners or aerosols. Ensure ventilation openings are free from dust and debris.
7. Risoluzione Dei Problemi
| Problema | Possibile causa | Soluzione |
|---|---|---|
| Nessuna visualizzazione video sul monitor | Collegamento del cavo allentato, sorgente di ingresso errata sul monitor, NVR non acceso. | Controllare i collegamenti dei cavi HDMI/VGA. Assicurarsi che il monitor sia impostato sull'ingresso corretto. Verificare l'alimentazione dell'NVR. |
| Nessuna immagine della telecamera | Camera not powered, network issue, camera not added/activated. | Check PoE cable connection. Ensure camera is powered. Verify camera IP address and add it to the NVR. |
| Impossibile registrare il video | No hard drive, hard drive not formatted, hard drive full, recording schedule not set. | Install and format a hard drive. Check hard drive status. Configure recording schedule. |
| L'accesso remoto non funziona | NVR not connected to internet, incorrect network settings, Hik-Connect account issue. | Verify NVR network connection. Check network settings (IP, DNS). Ensure NVR is added to Hik-Connect. |
8. Specifiche
| Caratteristica | Specificazione |
|---|---|
| Numero di modello | DS-7604NI-K1/4P |
| Marca | Hikvision |
| Tecnologia di connettività | Etereo |
| Dispositivi compatibili | Telecamera |
| Dimensioni del prodotto (L x P x A) | Dimensioni: 8.5 x 29.8 x 42.1 cm |
| Capacità di archiviazione della memoria | 6 TB |
| Dimensioni del disco rigido | 6 TB |
| Numero di canali | 4 |
| Peso dell'articolo | 2.2 libbre |
| Formato multimediale video digitale | Disco rigido |
| Ingresso audio | RCA |
| Porte USB totali | 2 |
| Ingresso video | VGA, HDMI |
| Conteggio unità | 1.0 Conteggio |
| Produttore | Hikvision |
| Numero di identificazione commerciale globale | 06954273652883 |
| Numero di parte | KNVRDS7604NI-K1/4P |
9. Garanzia e supporto
Per informazioni sulla garanzia, supporto tecnico e richieste di assistenza, fare riferimento al sito ufficiale Hikvision webo contattare il rivenditore Hikvision autorizzato. Conservare la ricevuta d'acquisto come prova d'acquisto per eventuali reclami in garanzia.
Risorse online: Visit the official Hikvision support page for FAQs, downloads, and contact information.