1. Prodotto finitoview
This manual provides detailed instructions for the HZTWFC Crankshaft Position Sensor, model 96183235. This sensor is a critical component in your vehicle's engine management system, responsible for monitoring the rotational speed and position of the crankshaft. This information is vital for the Engine Control Unit (ECU) to accurately determine ignition timing and fuel injection.
The sensor is designed as a direct replacement for original equipment manufacturer (OEM) parts with interchange numbers 96183235, 89932001, SEB966, and SS10895.
Compatibilità:
- For Daewoo Lanos KLAT 1.4 (1997/05-2015/12, 1349 ccm, 55 KW, 75 PS)
- For Daewoo Lanos KLAT 1.5 (1997/05-2015/12, 1498 ccm, 63 KW, 86 PS)
- For Daewoo Lanos KLAT 1.6 16V (1997/05-2015/12, 1598 ccm, 78 KW, 106 PS)
- For Daewoo Lanos Stufenheck KLAT 1.4 (1997/05-2015/12, 1349 ccm, 55 KW, 75 PS)
- For Daewoo Lanos Stufenheck KLAT 1.5 (1997/05-2015/12, 1498 ccm, 63 KW, 86 PS)
- For Daewoo Lanos Stufenheck KLAT 1.6 16V (1997/05-2015/12, 1598 ccm, 78 KW, 106 PS)
- For Daewoo Nubira KLAJ 1.6 16V (1997/05-2015/12, 1598 ccm, 78 KW, 106 PS)
- For Daewoo Nubira Stufenheck KLAJ 1.6 16V (2000/07-2015/12, 1598 ccm, 76 KW, 103 PS)
- For Daewoo Nubira Stufenheck KLAJ 1.6 16V (1997/05-2015/12, 1598 ccm, 78 KW, 106 PS)
- For Daewoo Nubira Wagon KLAJ 1.6 16V (2000/12-2015/12, 1598 ccm, 76 KW, 103 PS)
- For Daewoo Nubira Wagon KLAJ 1.6 16V (1997/05-2015/12, 1598 ccm, 78 KW, 106 PS)
2. Informazioni sulla sicurezza
Always prioritize safety when working on any vehicle. Failure to follow these safety guidelines may result in personal injury or damage to the vehicle.
- Scollegare la batteria: Before beginning any electrical work or component replacement, disconnect the vehicle's negative battery terminal to prevent accidental electrical shorts or component damage.
- Indossare dispositivi di protezione: Indossare sempre dispositivi di protezione individuale adeguati, tra cui occhiali e guanti di sicurezza.
- Supporto veicoli: Ensure the vehicle is securely supported on jack stands if lifted. Never rely solely on a jack.
- Superfici calde: Engine components can be extremely hot. Allow the engine to cool down before working on it.
- Perdite di fluido: Be aware of potential fluid leaks (oil, coolant, fuel) and take appropriate precautions.
- Assistenza professionale: In caso di dubbi su una qualsiasi fase del processo di installazione, consultare un tecnico automobilistico qualificato.
3. Contenuto della confezione
Verificare che tutti i componenti siano presenti e integri al momento dell'apertura della confezione.
- 1 x HZTWFC Crankshaft Position Sensor (Model 96183235)
- Note: Additional mounting hardware or gaskets are typically not included with the sensor itself and may need to be purchased separately if required for your specific vehicle application.

Immagine 1: HZTWFC Crankshaft Position Sensor 96183235. This image shows the complete sensor unit with its integrated wiring and connector.
4. Caratteristiche del prodotto
- Conformità agli standard OEM: Manufactured to meet or exceed OEM specifications for fit, form, and function.
- Materiali di alta qualità: Constructed from durable materials for reliable performance and extended service life.
- Precise Signal Output: Designed to provide accurate crankshaft position and speed data to the ECU.
- Sostituzione diretta: Engineered for a straightforward installation, matching original part numbers 96183235, 89932001, SEB966, SS10895.

Immagine 2: Avvicinamento view of the sensor's main body and mounting point. This image highlights the robust construction and precise design of the sensor.
5. Configurazione e installazione
Installation of a crankshaft position sensor typically requires basic automotive tools and mechanical knowledge. Refer to your vehicle's specific service manual for detailed instructions and torque specifications. The following are general steps:
- Preparazione: Parcheggiare il veicolo su una superficie piana, inserire il freno di stazionamento e lasciare raffreddare completamente il motore. Scollegare il terminale negativo della batteria.
- Localizza il sensore: Identify the location of the existing crankshaft position sensor. This can vary significantly by vehicle model and engine configuration. Common locations include near the crankshaft pulley, on the engine block, or near the transmission bell housing.
- Scollegare il cablaggio: Scollegare con cautela il connettore elettrico dal vecchio sensore.
- Rimuovere il vecchio sensore: Use the appropriate wrench or socket to remove the bolt(s) securing the old sensor. Gently pull the sensor out of its mounting bore. Be prepared for a small amount of oil or fluid to escape.
- Ispezionare l'area di montaggio: Clean the sensor mounting bore and ensure there are no debris or old O-ring remnants.
- Installare il nuovo sensore: Apply a thin layer of clean engine oil to the O-ring of the new HZTWFC sensor (if applicable). Carefully insert the new sensor into the mounting bore. Ensure it seats properly.
- Sensore di sicurezza: Install and tighten the retaining bolt(s) to the manufacturer's specified torque. Overtightening can damage the sensor or engine block.
- Collegare il cablaggio: Ricollegare il connettore elettrico al nuovo sensore, assicurandosi che scatti saldamente in posizione.
- Passaggi finali: Reconnect the negative battery terminal. Start the engine and check for proper operation and any diagnostic trouble codes (DTCs). Clear any stored codes using an OBD-II scanner if necessary.
Importante: Always consult a professional mechanic or your vehicle's specific service manual for precise installation procedures.
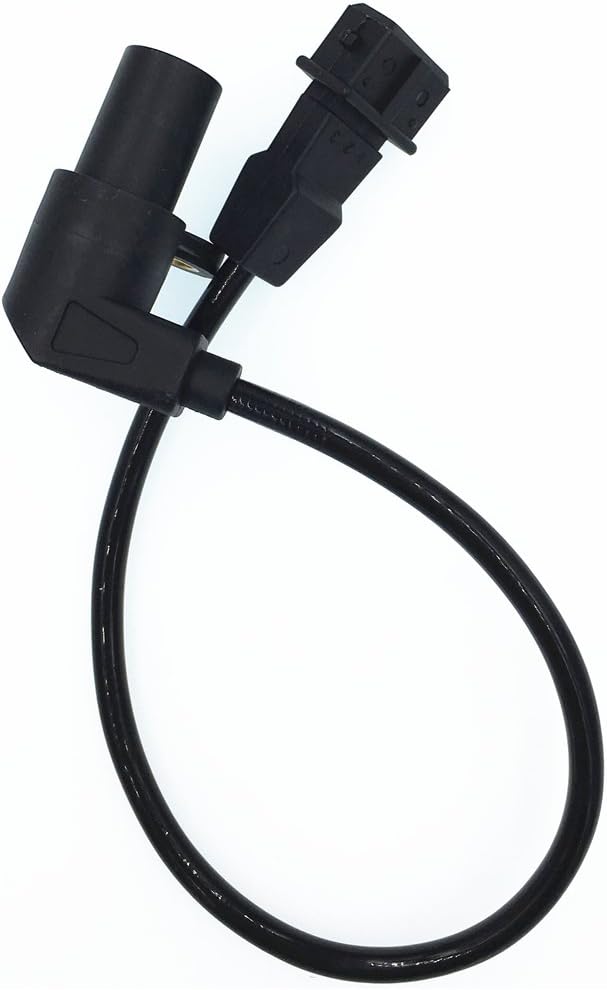
Immagine 3: View of the sensor showing the integrated wiring and electrical connector. This illustrates the connection point for the vehicle's wiring harness.
6. Funzionamento
The crankshaft position sensor is a passive component that generates an electrical signal based on the rotation of the crankshaft. As the crankshaft rotates, a reluctor wheel (or tone ring) with teeth passes by the sensor. The sensor detects these teeth, creating a series of pulses. The ECU interprets these pulses to determine:
- Engine Speed (RPM): By measuring the frequency of the pulses.
- Crankshaft Position: By identifying specific gaps or patterns in the teeth, which correspond to the position of the pistons.
This information is crucial for the ECU to precisely control fuel injection timing, ignition timing, and other engine functions, ensuring optimal engine performance, fuel efficiency, and emissions control.
7. Manutenzione
Crankshaft position sensors are generally maintenance-free components. However, regular vehicle maintenance practices can help ensure their longevity and proper function:
- Ispezioni regolari: During routine vehicle inspections, visually check the sensor and its wiring for any signs of damage, corrosion, or loose connections.
- Pulizia: Keep the engine bay clean to prevent excessive dirt and debris buildup around sensors, which could potentially interfere with their operation or cause damage to wiring.
- Evitare prodotti chimici aggressivi: When cleaning the engine, avoid spraying harsh chemicals directly onto electrical components and connectors.
8. Risoluzione Dei Problemi
A faulty crankshaft position sensor can cause various engine performance issues. Common symptoms include:
- Il motore gira ma non si avvia: If the ECU doesn't receive a crankshaft signal, it won't know when to fire the spark plugs or inject fuel.
- Intermittent Stalling: The engine may suddenly lose power or stall while driving.
- Minimo irregolare o mancate accensioni: Incorrect timing information can lead to erratic engine operation.
- Spia di controllo motore (CEL): The ECU will typically illuminate the CEL and store a diagnostic trouble code (DTC) related to the crankshaft position sensor (e.g., P0335).
- Risparmio di carburante ridotto: Inaccurate timing can lead to inefficient combustion.
Passaggi per la risoluzione dei problemi:
- Controllare i DTC: Use an OBD-II scanner to retrieve any stored trouble codes. This is the first and most important step.
- Ispezionare il cablaggio e il connettore: Visually check the sensor's wiring harness and connector for any signs of damage, fraying, corrosion, or loose connections.
- Sensor Resistance Test: If accessible, a multimeter can be used to check the sensor's resistance (refer to vehicle-specific specifications).
- Diagnosi professionale: If symptoms persist after basic checks, professional diagnosis using specialized diagnostic tools (e.g., oscilloscope to check sensor waveform) is recommended.

Immagine 4: Dettagliato view of the electrical connector pins. This shows the contact points for the vehicle's wiring, which should be clean and free of corrosion for proper signal transmission.
9. Specifiche
| Attributo | Valore |
|---|---|
| Marca | HZTWFC |
| Numero di modello | 96183235 |
| Numeri di parte OEM | 96183235, 89932001, SEB966, SS10895 |
| Tipo di montaggio | Montaggio a flangia |
| Tipo di uscita | Push-Pull |
| Usi specifici | Automobilistico |
| Peso dell'articolo | 7.1 once |
| Dimensioni del pacco | 5.91 x 3.94 x 3.94 pollici |
| Codice UPC | 704529321386 |
10. Garanzia e supporto
Garanzia:
The HZTWFC Crankshaft Position Sensor comes with a Garanzia di 1 anno from the date of purchase. This warranty covers manufacturing defects and ensures a worry-free shopping experience. Please retain your proof of purchase for warranty claims.
Supporto:
For technical assistance, troubleshooting, or warranty inquiries, please contact HZTWFC customer support. When contacting support, please have your product model number (96183235) and purchase details readily available.
Note: Always verify compatibility with your vehicle's year, make, and model before purchasing. Ensure the part number matches your existing component.