1. Introduzione
This manual provides detailed instructions for the installation, operation, and maintenance of your Akozon Digital Programmable Timer. Please read this manual carefully before use to ensure proper function and safety.

Figure 1: Akozon Digital Programmable Timer 12V
2. Prodotto finitoview e Caratteristiche
The Akozon Digital Programmable Timer is a weekly programmable electronic timer designed for precise control of various electrical equipment. Its robust design and advanced features ensure reliable operation.
- Controllo automatico: Automatically turns electrical equipment on and off according to preset schedules.
- Alta precisione: Equipped with a high-precision chip for accurate timing.
- Programmazione settimanale: Supports advanced programming for up to one week in advance.
- Programmi multipli: Features 16 ON/OFF settings (programs) for daily or weekly scheduling.
- Alimentazione di backup: Integrated high-performance rechargeable battery maintains time display and stores data for over 12 months during power outages.
- Costruzione durevole: Housing made of hard, durable plastic for extended lifespan.
- Schermo LCD: Clear LCD for easy viewing di tempo e stato del programma.
- Installazione su guida DIN: Designed for convenient installation on a DIN rail.
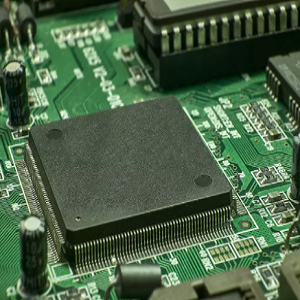
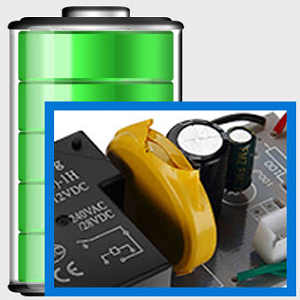
Figure 2: Internal components showing the high-precision chip and rechargeable backup battery.
3. Specifiche
| Numero di modello | Akozonqegcgmk04u-01 |
| Ingresso volumetage | 12 V CC/CA |
| Capacità di uscita | 25(16)A, 240VAC |
| Consumo energetico | <1Settembre |
| Intervallo di tempo | Da 1 minuto a 168 ore |
| Programmi | 16 ON/OFF settings (daily/weekly) |
| Errore di temporizzazione | <±2 seconds/day |
| Memoria per interruzione di corrente | >12 months (with internal rechargeable battery) |
| Temperatura di esercizio | -20°C a 55°C |
| Metodo di installazione | Guida DIN |
| Dimensioni (circa) | 36 mm (L) x 86 mm (A) x 65 mm (P) |
| Peso (circa) | 120g |
| Display | LCD |

Figura 3: Dimensioni dettagliate del prodotto e specifiche principali.
4. Informazioni sulla sicurezza
- Scollegare sempre l'alimentazione prima dell'installazione o della manutenzione.
- Per evitare scosse elettriche o danni al dispositivo, l'installazione deve essere eseguita da un elettricista qualificato.
- Assicurare il volume di inputtage matches the timer's specifications (12V DC/AC). Connecting to incorrect voltage potrebbe danneggiare l'unità.
- Do not expose the device to excessive moisture or extreme temperatures outside the specified operating range.
- Do not disassemble the timer; refer servicing to qualified personnel.
5. Configurazione e installazione
5.1 Installazione su guida DIN
The timer is designed for easy installation on a standard 35mm DIN rail. Simply clip the timer onto the rail in your distribution box.

Figura 4: Esample of the timer installed on a DIN rail within a distribution box.
5.2 Istruzioni per il cablaggio
Per un corretto collegamento, fare riferimento allo schema elettrico riportato di seguito. Assicurarsi che tutti i collegamenti siano saldi e conformi alle normative elettriche locali.
- Terminal 1 e 2: Power input (12V DC/AC).
- Terminal 3, 4, 5: Output contacts.
- 3: Normalmente chiuso (NC)
- 4: Comune (COM)
- 5: Normalmente aperto (NO)

Figure 5: Detailed wiring diagram showing connections for power input and output contacts.

Figura 6: Esamples of wiring methods, including direct load connection and connection via a contactor.
6. Istruzioni per l'uso
6.1 Initial Setup and Unlocking
- Upon first use, connect the timer to power (12V DC/AC).
- Premere il tasto RESET button to clear all previous settings and initialize the timer.
- The timer display may be locked. To unlock, press the C/R button four times. The lock icon will disappear from the display. If no operation occurs for 15 seconds, the timer will automatically lock again.
6.2 Impostazione dell'ora e del giorno correnti
After unlocking, set the current time and day:
- Premere il tasto P button (Program button) once.
- Premere il tasto D+ button to set the current day of the week (MO, TU, WE, TH, FR, SA, SU).
- Premere il tasto H+ pulsante per impostare l'ora corrente.
- Premere il tasto M+ pulsante per impostare i minuti correnti.
- Premere il tasto P nuovamente il pulsante per uscire dalla modalità di impostazione dell'ora.

Figura 7: primo piano view of the timer's control buttons.

Figure 8: Explanation of button functions and display elements, including day, hour, minute, and reset.
6.3 Controllo manuale
Premere il tasto MANUALE C/R button to cycle through manual control modes:
- SOPRA: L'uscita è costantemente attiva.
- AUTO: Timer operates according to programmed schedules.
- OFF: L'uscita è costantemente disattivata.
Selezionare AUTO for the timer to follow your programmed settings.
7. Programmazione degli orari di accensione/spegnimento
The timer supports up to 16 ON/OFF programs. Follow these steps to set your desired schedules:
- Premere il tasto P button to enter programming mode. The display will show "1 ON".
- Premere D+ per selezionare il/i giorno/i per questo programma. Puoi scegliere un singolo giorno, giorni feriali, fine settimana o tutti i giorni.
- Premere H+ per impostare l'ora di accensione.
- Premere M+ per impostare il minuto di accensione.
- Premere P di nuovo. Il display mostrerà "1 OFF".
- Premere D+ to select the day(s) for this OFF program (usually the same as ON, but can be different).
- Premere H+ to set the OFF hour.
- Premere M+ to set the OFF minute.
- Repeat steps 1-8 for additional ON/OFF programs (up to 16). Press P to advance to the next program number.
- Per uscire dalla modalità di programmazione, premere il tasto MANUALE C/R button. Ensure the timer is set to AUTO mode for programs to execute.
Note: If you need to cancel a program, press the C/R pulsante mentre viewing the specific ON or OFF program. This will clear the settings for that program.
8. Applicazioni
The Akozon Digital Programmable Timer is versatile and can be used in various applications, including:
- Controlling lamps and lighting systems (e.g., streetlights, garden lights, neon signs).
- Managing water heaters and preheaters.
- Automating agricultural facilities (e.g., irrigation systems).
- Controlling broadcasting equipment.
- Scheduling household appliances.
- Operating sprayers and bottling equipment.

Figura 9: Esamples of environments where the timer can be used, such as controlling outdoor lighting and industrial equipment.
9. Manutenzione
- Keep the timer clean and free from dust. Use a soft, dry cloth for cleaning.
- Non utilizzare detergenti abrasivi o solventi.
- Garantire un'adeguata ventilazione attorno al dispositivo per evitare il surriscaldamento.
- The internal battery is designed for long-term backup. If the timer consistently loses time or program settings after a power outage, the internal battery may need professional inspection.
10. Risoluzione Dei Problemi
| Problema | Possibile causa | Soluzione |
|---|---|---|
| Il display è vuoto. | Nessun alimentatore o batteria interna scarica. | Check power connections. Allow time for the internal battery to charge (connect to power for several hours). |
| Il timer non risponde alla pressione dei pulsanti. | Timer is locked. | Premere il tasto C/R button four times to unlock. |
| I programmi non vengono eseguiti. | Il timer non è in modalità AUTO. Impostazioni del programma errate. | Premere MANUALE C/R finché non viene visualizzato "AUTO". Review e le impostazioni corrette del programma. |
| L'ora o le impostazioni vengono perse dopo lo spegnimentotage. | Internal backup battery is not charging or is depleted. | Ensure the timer is connected to power for sufficient time to charge the internal battery. If the issue persists, contact customer support. |
| Output is always ON or OFF, ignoring programs. | Il timer è in modalità manuale ON o OFF. | Premere MANUALE C/R finché non viene visualizzato "AUTO". |
11. Garanzia e supporto
Akozon products are manufactured to high-quality standards. For warranty information or technical support, please refer to the contact details provided with your purchase or visit the official Akozon websito.
Conservare la prova d'acquisto per eventuali richieste di garanzia.