1. Introduzione
Grazie per l'acquistoasing the DBPOWER RD810 Portable Mini Projector. This manual provides essential information for the safe and optimal use of your projector. Please read it thoroughly before operating the device and retain it for future reference.
This projector is designed for home entertainment, offering a portable solution for displaying videos, photos, and presentations. Ensure all safety guidelines are followed to prevent damage to the device or personal injury.
2. Contenuto della confezione
Please verify that all components are present in your package. If any items are missing or damaged, contact DBPOWER customer support.
- DBPOWER RD810 Portable Mini Projector
- Telecomando
- Cavo di alimentazione
- Cavo HDMI
- cavo AV
- Manuale d'uso
3. Prodotto finitoview
Familiarize yourself with the various parts of your DBPOWER RD810 projector.

Figura 3.1: Fronte view of the DBPOWER RD810 Projector, showing the lens and ventilation.
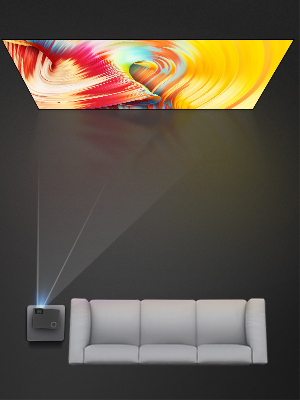
Figura 3.2: lato view of the projector, illustrating input ports such as HDMI, USB, and VGA.
Componenti chiave:
- Lente: Proietta l'immagine sullo schermo.
- Anello di messa a fuoco: Regola la nitidezza dell'immagine.
- Keystone Correction Knob: Corregge la distorsione trapezoidale dell'immagine.
- Pannello di controllo: Pulsanti sul dispositivo per la navigazione di base e le impostazioni.
- Porte di ingresso: HDMI, USB, VGA for connecting various devices.
- Porta di alimentazione: Per collegare il cavo di alimentazione.
- Griglie di ventilazione: Essential for heat dissipation. Do not block.
4. Impostazione
4.1 Posizionamento
- Place the projector on a stable, flat surface (Tabletop Mount).
- Ensure there is adequate space around the projector for proper ventilation.
- Position the projector perpendicular to the projection surface for the best image quality.
4.2 Collegamento di alimentazione
- Collegare il cavo di alimentazione alla porta di alimentazione del proiettore.
- Collegare l'altra estremità del cavo di alimentazione a una presa di corrente.
- La spia di alimentazione sul proiettore dovrebbe illuminarsi.
4.3 Collegamento dei dispositivi di input
The projector supports HDMI, USB, and VGA connectivity.
- HDMI: Connect an HDMI cable from your source device (e.g., laptop, DVD player, game console) to the HDMI port on the projector.
- USB: Inserire un'unità USB nella porta USB per riprodurre i contenuti multimediali files directly. Note: The USB port is primarily for media playback and charging, not for direct computer connection for display.
- VGA: Collegare un cavo VGA dal computer alla porta VGA del proiettore.
- Uscita audio: If desired, connect external speakers to the projector's audio output port for enhanced sound.
5. Istruzioni per l'uso
5.1 Accensione/Spegnimento
- Accensione: Press the power button on the projector or the remote control. The projector lamp si accenderà.
- Spegni: Press the power button again. The projector will initiate a shutdown sequence. Do not unplug the power cable until the fan has stopped and the projector has fully cooled down.
5.2 Regolazione della messa a fuoco e della distorsione trapezoidale
- Messa a fuoco: Rotate the focus ring located around the lens until the projected image appears sharp and clear.
- Correzione trapezoidale: If the image appears trapezoidal (wider at the top or bottom), adjust the keystone correction knob until the image is rectangular.
5.3 Selezione della sorgente di input
After connecting your input device, you need to select the correct source:
- Premere il pulsante "Source" sul telecomando o sul pannello di controllo del proiettore.
- Use the arrow keys to navigate through the input options (HDMI, USB, VGA).
- Premere 'OK' o 'Invio' per confermare la selezione.
5.4 Navigazione nel menu
Use the 'Menu' button on the remote or projector to access settings. Navigate with arrow keys and confirm with 'OK' or 'Enter'. Common settings include Picture Mode, Aspect Ratio, Sound Settings, and Time Settings.
6. Manutenzione
6.1 Pulizia delle lenti
Use a soft, lint-free cloth or lens cleaning paper to gently wipe the lens. Avoid using abrasive cleaners or excessive force, which can scratch the lens surface.
6.2 Pulizia della ventilazione
Regularly check and clean the ventilation grilles to prevent dust buildup, which can lead to overheating. Use a soft brush or a vacuum cleaner with a brush attachment to remove dust from the vents.
6.3 Conservazione
Quando non viene utilizzato per lunghi periodi, conservare il proiettore in un ambiente fresco, asciutto e privo di polvere. Utilizzare l'imballaggio originale o una custodia protettiva per evitare danni.
7. Risoluzione Dei Problemi
| Problema | Possibile causa | Soluzione |
|---|---|---|
| Nessun potere | Power cable not connected; Power outlet faulty; Projector overheated. | Ensure power cable is securely connected; Test power outlet; Allow projector to cool down. |
| Nessuna immagine | Incorrect input source selected; Input cable loose or faulty; Source device not outputting signal. | Select correct input source; Check cable connections; Ensure source device is on and configured to output. |
| Immagine sfocata | Focus not adjusted; Keystone not adjusted; Projector too far/close to screen. | Adjust focus ring; Adjust keystone correction knob; Reposition projector. |
| Nessun suono | Volume too low; Mute enabled; External speakers not connected/configured; Source device audio settings. | Increase volume; Disable mute; Connect external speakers if desired; Check audio settings on source device. |
| Il telecomando non funziona | Batteries depleted; Obstruction between remote and projector; Remote sensor blocked. | Replace batteries; Remove obstructions; Ensure remote sensor on projector is clear. |
8. Specifiche
| Caratteristica | Specificazione |
|---|---|
| Marca | dBpower |
| Nome del modello | RD810 |
| Numero di modello | 810X |
| Tecnologia di connettività | HDMI, USB, VGA |
| Risoluzione del display nativa | 800x480 |
| Risoluzione massima dello schermo | 1920x1080 |
| Tipo di visualizzazione | LCD |
| Rapporto di contrasto | 1000:1 |
| Durata operativa della sorgente luminosa | 30,000 ore |
| Cosatage | 24 watt |
| Metodo di controllo | Controllo remoto tramite pulsanti |
| Tipo di montaggio | Supporto da tavolo |
| Fattore di forma | Portatile |
9. Garanzia e supporto
DBPOWER products are designed and manufactured to the highest quality standards. For information regarding warranty coverage, technical support, or service inquiries, please refer to the warranty card included with your product or visit the official DBPOWER website. Please have your model number (RD810 / 810X) and purchase details ready when contacting support.