
1. Introduzione
The j5create JCD384 USB-C 10-in-1 Multi-Port Docking Station is designed to expand the connectivity of your USB-C enabled laptop, PC, or tablet. This docking station provides a comprehensive solution for connecting multiple displays, USB peripherals, Ethernet, and memory cards, enhancing your productivity and simplifying your workspace. It supports 4K HDMI and VGA outputs for versatile display options, along with USB 3.0 ports for high-speed data transfer and Power Delivery for charging your host device.
2. Caratteristiche principali
- Multi-Display Connectivity: Connect your laptop to an additional monitor via HDMI (4K) or VGA (1080p).
- Espansione USB: Features two USB 3.1 Gen 1 Type-A ports for peripherals and one USB Type-A port with BC 1.2 for fast-charging mobile devices.
- Trasferimento dati ad alta velocità: USB 3.1 Gen 1 ports offer up to 5 Gbps transfer speed, significantly faster than USB 2.0.
- Lettore di schede di memoria: Direct access to SD and MicroSD memory cards for convenient data storage and transfer.
- Porta Ethernet: Provides a stable and reliable wired network connection.
- Potenza erogata: USB-C 3.1 port with Power Delivery allows charging of your host device while using the hub.
3. Guida all'installazione
Follow these steps to set up your j5create JCD384 docking station:
- Connetti al dispositivo host: Plug the integrated USB-C cable from the docking station into an available USB-C port on your laptop, PC, or tablet. Ensure your host device's USB-C port supports DisplayPort Alternate Mode and Power Delivery for full functionality.
- Collegare l'adattatore di alimentazione (facoltativo ma consigliato): If your host device requires charging or if you are connecting power-intensive peripherals, connect your original USB-C power adapter to the USB-C Power Delivery port on the docking station. This will charge your host device and provide power to connected peripherals.
- Collegare schermi esterni:
- For HDMI display: Connect an HDMI cable from your monitor to the HDMI port on the docking station.
- For VGA display: Connect a VGA cable from your monitor to the VGA port on the docking station.
Note: The docking station supports either HDMI or VGA output at one time, not simultaneously for extended desktop. For mirrored display, both can be used.
- Collegare le periferiche USB: Plug your USB devices (e.g., keyboard, mouse, external hard drive) into the available USB 3.0 Type-A ports. The orange USB Type-A port supports BC 1.2 for faster charging of mobile devices.
- Collegare il cavo Ethernet: For a wired network connection, plug an Ethernet cable into the RJ-45 Gigabit Ethernet port on the docking station.
- Inserire le schede di memoria: Insert your SD or MicroSD cards into the corresponding slots for data access.

Figura 1: Oltreview of the j5create JCD384 docking station with connected peripherals.
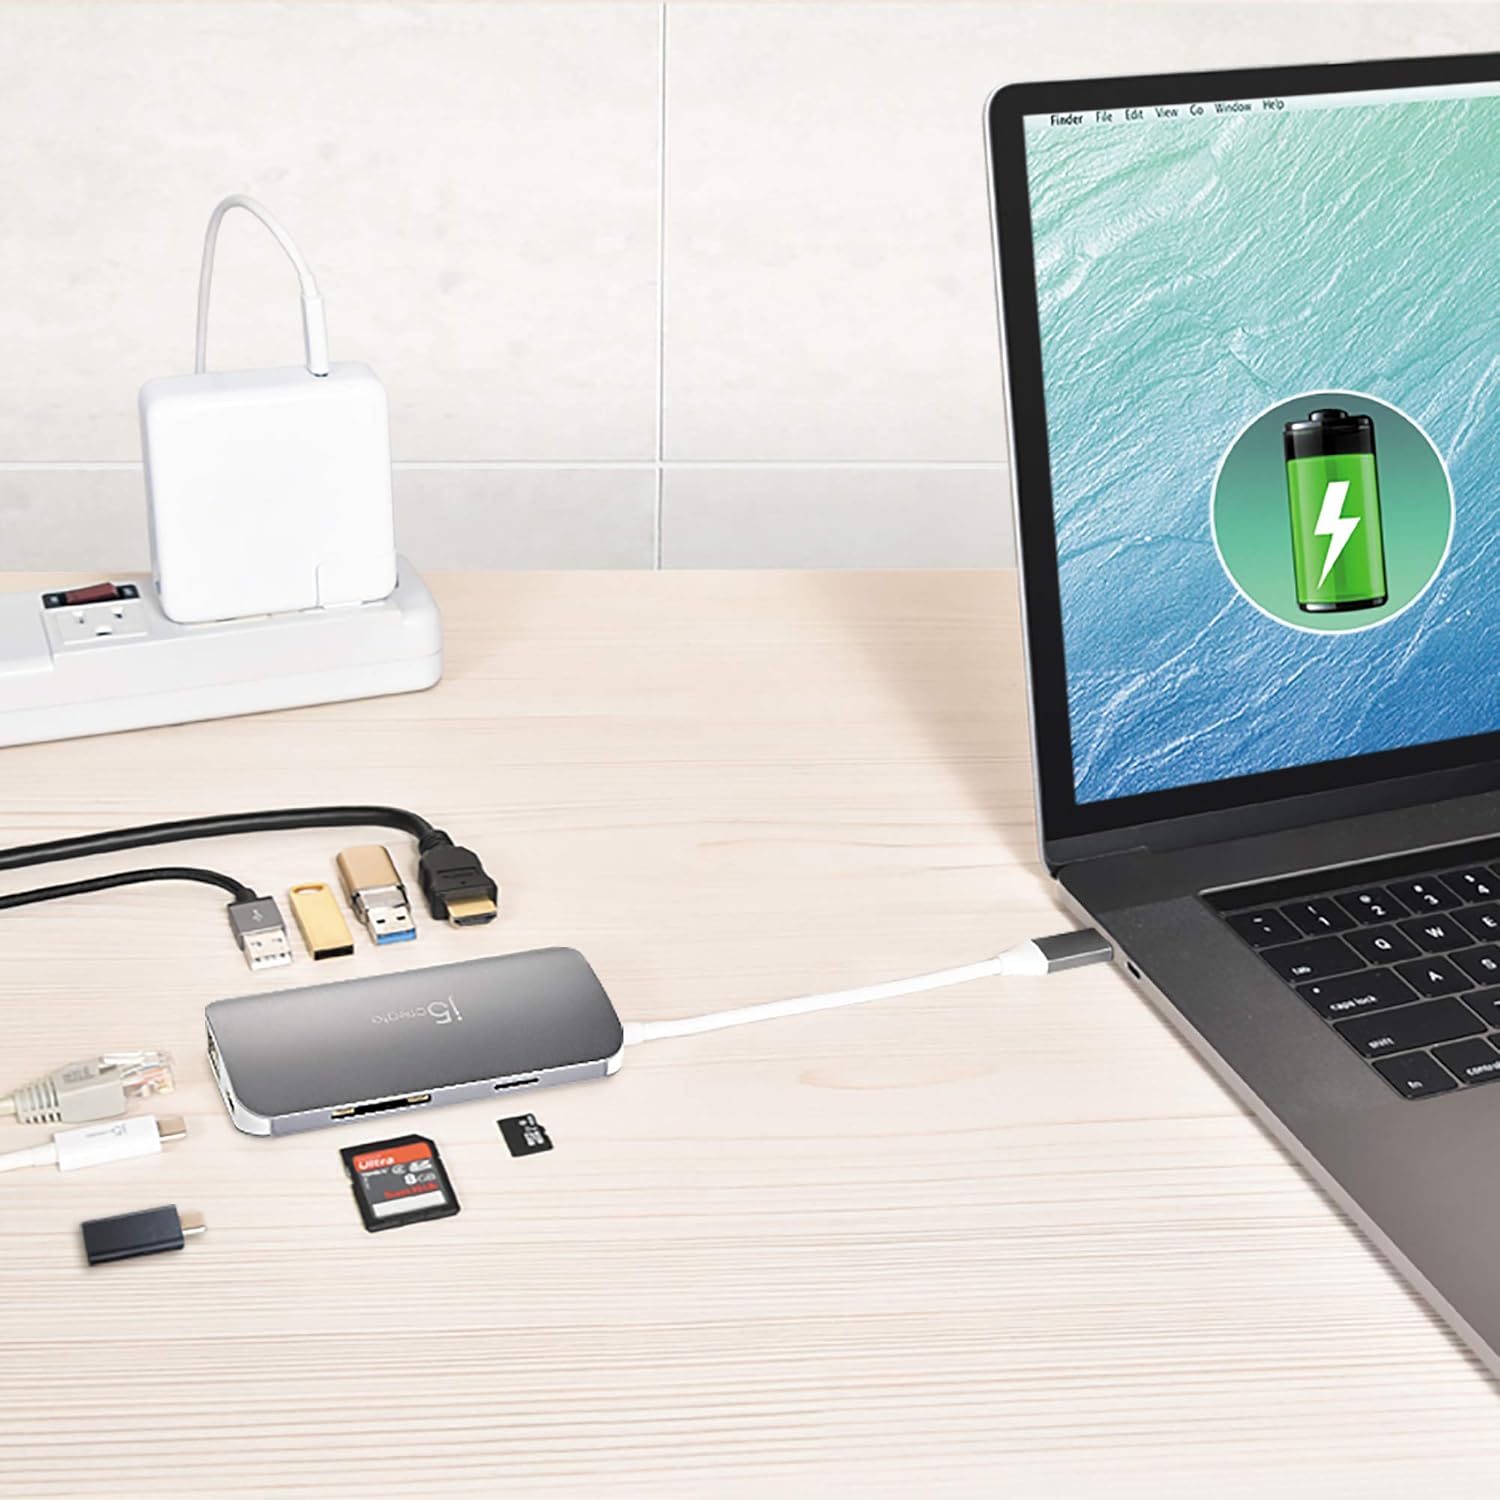
Figure 2: The docking station connected to a laptop, demonstrating power delivery and peripheral connections.
4. Istruzioni per l'uso
Once the docking station is set up, it operates largely plug-and-play. Your operating system should automatically detect and configure most connected devices.
4.1 Configurazione del display
After connecting your monitor(s), you may need to adjust display settings in your operating system:
- Finestre: Right-click on the desktop, select "Display settings," and configure your displays (extend, duplicate, or second screen only).
- Mac OS: Go to "System Preferences" > "Displays" to arrange or mirror your displays.

Figure 3: A laptop connected to an external monitor, showcasing multi-display functionality.

Figure 4: A tablet and projector connected to a 4K UHD monitor, illustrating diverse display connections.
4.2 USB Device Usage
Simply plug your USB devices into the available USB 3.0 ports. For charging mobile devices, use the orange USB Type-A port which supports BC 1.2 for faster charging.
4.3 Memory Card Access
Insert your SD or MicroSD card into the appropriate slot. The card will appear as a removable drive in your file explorer, allowing you to transfer files.
4.4 Connessione Ethernet
Once connected, your host device should automatically detect the wired network. If not, check your network settings.
5. Specifiche
| Caratteristica | Dettaglio |
|---|---|
| Numero di modello | JCD384 |
| Marca | j5creare |
| Colore | Grigio |
| Materiale | Alluminio |
| Interfaccia Hardware | MicroSD, Secure Digital Card, USB 3.0, HDMI, VGA, Ethernet, USB-C |
| Dispositivi compatibili | PC, Laptops, Tablets, Smartphones (with USB-C DisplayPort Alt Mode) |
| Porte USB totali | 3 (2x USB 3.0 Type-A, 1x USB Type-A with BC 1.2) |
| Velocità di trasferimento dati | 5 Gigabit al secondo (USB 3.0) |
| Numero di porte | 9 (HDMI, VGA, Ethernet, 3x USB 3.0, SD, MicroSD, USB-C PD) |
| Supporto del sistema operativo | Più sistemi operativi |
| Peso dell'articolo | 88 grammi |
| Codice UPC | 847626002458 |

Figura 5: superiore e inferiore views of the docking station, showing various ports.

Figura 6: lato view highlighting the VGA port and integrated USB-C cable.

Figura 7: lato view displaying the Ethernet and USB-C Power Delivery ports.
6. Risoluzione Dei Problemi
Se riscontri problemi con la docking station, fai riferimento alle seguenti soluzioni comuni:
- Nessuna uscita di visualizzazione:
- Assicurati che la porta USB-C del dispositivo host supporti la modalità alternativa DisplayPort.
- Check all cable connections (USB-C to host, HDMI/VGA to monitor).
- Verificare che la sorgente di ingresso del monitor sia selezionata correttamente.
- Try connecting only one display at a time to isolate the issue.
- Aggiorna i driver grafici sul dispositivo host.
- Dispositivi USB non riconosciuti:
- Assicurarsi che la docking station sia collegata saldamente al dispositivo host.
- Prova a collegare il dispositivo USB direttamente al dispositivo host per verificare che funzioni.
- If using a high-power USB device, ensure the docking station is connected to an external power source via its USB-C PD port.
- Some wireless peripherals (e.g., Logitech adapters) may have compatibility issues with certain hubs.
- Connessione Ethernet lenta:
- Check your Ethernet cable for damage and ensure it's securely connected.
- Verify your network drivers are up to date.
- Prova con un cavo Ethernet o una porta diversa sul router/modem.
- Dispositivo host non in carica:
- Assicurati che l'adattatore di alimentazione USB-C originale sia collegato alla porta USB-C PD della docking station.
- Verifica che la porta USB-C del tuo dispositivo host supporti Power Delivery.
- Controllare che l'adattatore di alimentazione e il cavo non siano danneggiati.
7. Manutenzione
To ensure the longevity and optimal performance of your j5create JCD384 docking station, follow these maintenance guidelines:
- Pulizia: Utilizzare un panno morbido e asciutto per pulire l'esterno della docking station. Evitare l'uso di detergenti liquidi o spray, poiché potrebbero danneggiare il dispositivo.
- Magazzinaggio: Conservare la docking station in un luogo fresco e asciutto, lontano dalla luce solare diretta e da temperature estreme.
- Gestione: Handle the device with care. Avoid dropping it or subjecting it to strong impacts. Do not pull on the integrated USB-C cable forcefully.
- Ventilazione: Assicurarsi che la docking station abbia una ventilazione adeguata per evitare il surriscaldamento, soprattutto durante l'uso prolungato con più dispositivi collegati.
8. Garanzia e supporto
The j5create JCD384 USB-C 10-in-1 Multi-Port Docking Station comes with a manufacturer's warranty. Please refer to the warranty card included in your product packaging for specific terms and conditions, including warranty duration and coverage details.
For technical support, product registration, or further assistance, please visit the official j5create website or contact their customer service department. Contact information can typically be found on the j5create websito o nella documentazione del prodotto.