

1. Introduzione
Thank you for choosing the CIARRA 30-inch Range Hood (Model CAS75206). This manual provides essential information for the safe and efficient installation, operation, and maintenance of your new range hood. Please read this manual thoroughly before installation and use, and keep it for future reference.
This wall-mount range hood is designed to effectively remove smoke, grease, and odors from your kitchen, ensuring a fresh and clean cooking environment. It features a powerful 450 CFM suction, dimmable LED lighting, and versatile ducted or ductless convertible ventilation modes.
2. Importanti istruzioni di sicurezza
Per ridurre il rischio di incendi, scosse elettriche o lesioni, osservare quanto segue:
- Leggere tutte le istruzioni prima di installare o utilizzare questo apparecchio.
- I lavori di installazione e il cablaggio elettrico devono essere eseguiti da personale qualificato, nel rispetto di tutti i codici e gli standard applicabili, comprese le costruzioni ignifughe.
- Per una corretta combustione e l'espulsione dei gas attraverso il camino delle apparecchiature a combustione di carburante è necessaria aria a sufficienza per evitare il ritorno di aria.
- Quando si taglia o si fora un muro o un soffitto, fare attenzione a non danneggiare i cavi elettrici o altri servizi nascosti.
- I ventilatori canalizzati devono sempre essere indirizzati verso l'esterno.
- Non utilizzare questa unità con alcun dispositivo di controllo della velocità a stato solido.
- Questa unità deve essere collegata a terra.
- Pulire frequentemente i filtri antigrasso. Evitare che il grasso si accumuli sulla ventola o sul filtro.
- Never leave surface units unattended at high settings. Boilover causes smoking and greasy spillovers that may ignite.
- Accendere sempre la cappa durante la cottura a fuoco alto o quando si fiammeggia il cibo.
- Utilizzare una padella di dimensioni adeguate. Utilizzare sempre pentole adatte alle dimensioni dell'elemento di superficie.
3. Prodotto finitoview
3.1. Dimensioni e caratteristiche del prodotto
The CIARRA Range Hood (Model CAS75206) is a 30-inch wall-mount unit constructed from durable stainless steel. It features a powerful 450 CFM motor for efficient smoke and odor removal, dimmable LED lighting for enhanced visibility, and a soft-touch control panel for ease of use.

Figura 3.1: Fronte view of the CIARRA Range Hood.
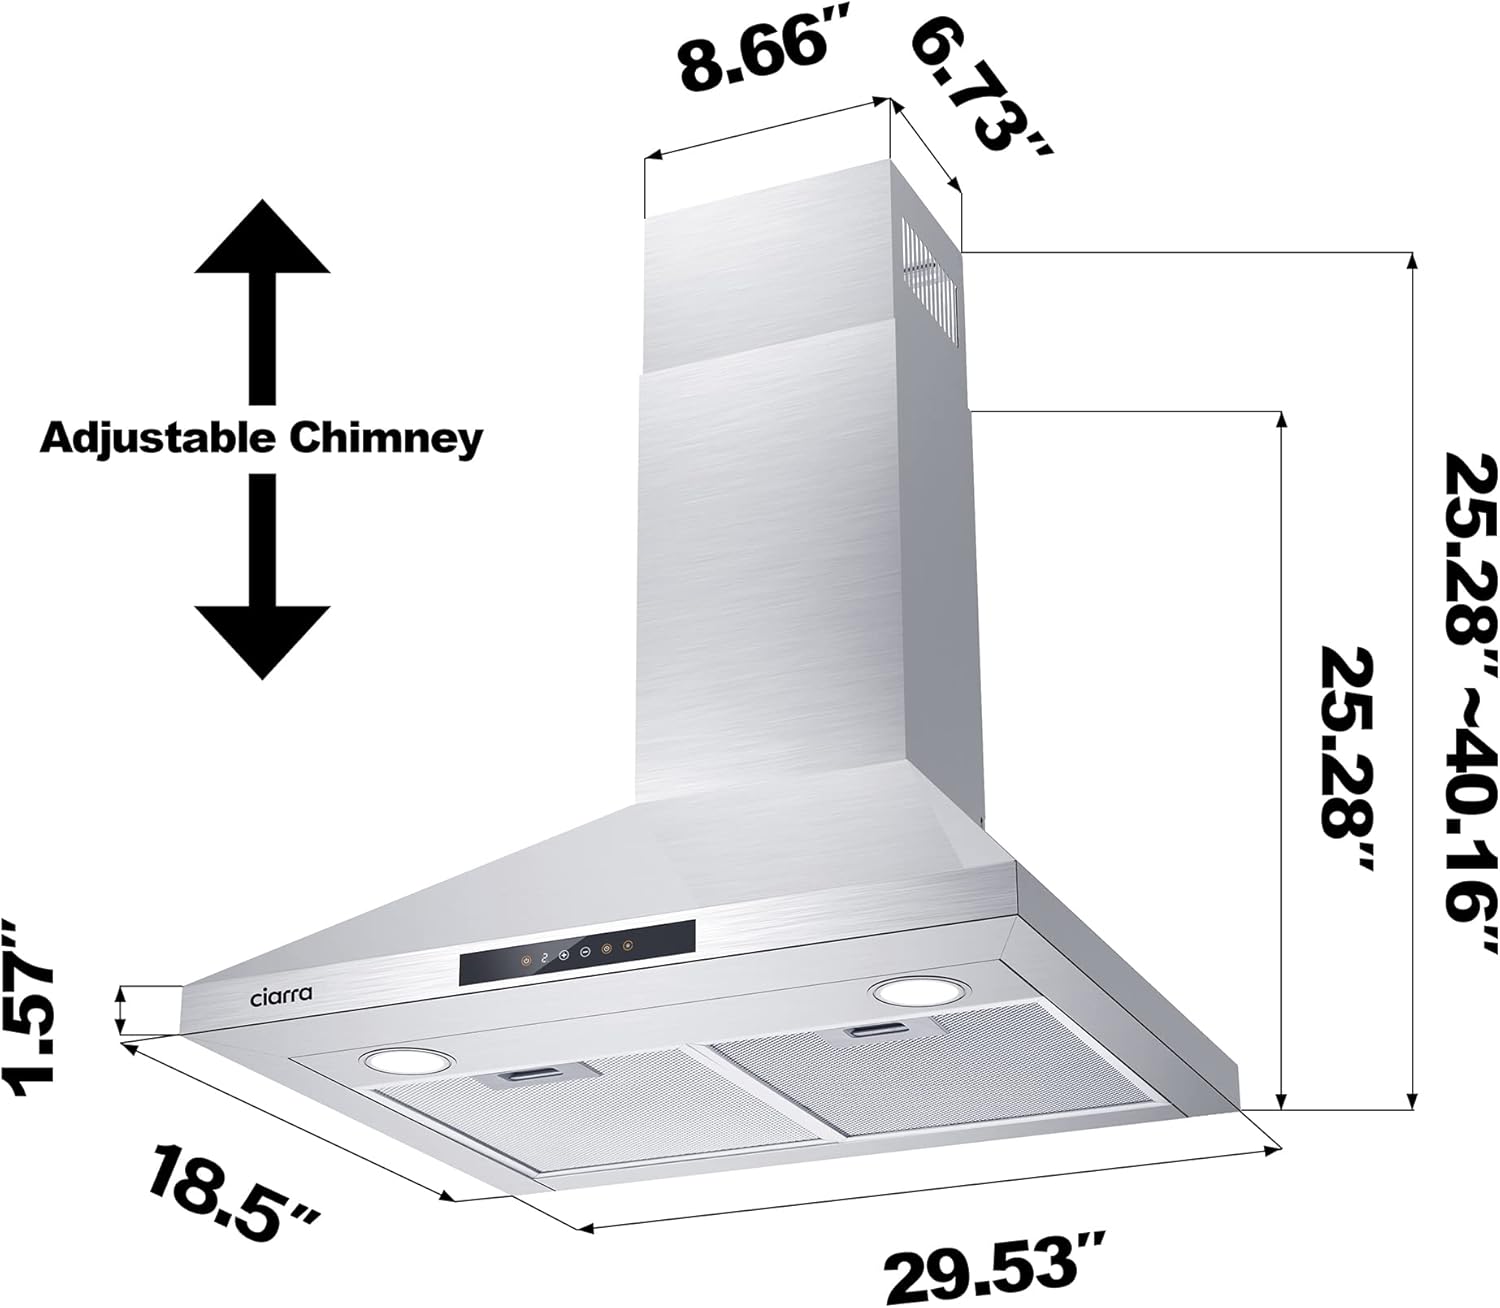
Figure 3.2: Detailed dimensions of the CIARRA Range Hood, including adjustable chimney height.
3.2. Key Components and Included Accessories
The product package includes the main range hood unit and the following accessories for installation:
- Main Range Hood Unit
- Adjustable Chimney Sections
- 5-Layer Aluminum Mesh Filters (Dishwasher Safe)
- LED Lights (Pre-installed)
- Manuale di installazione (PDF disponibile online)
- Mounting Hardware (Screws, Wall Anchors, Hanging Plates)
- Flexible Air Duct (for ducted installation)
- Staffe di supporto

Figura 3.3: Oltreview of included installation components: manual, zip ties, screws, wall anchors, hanging brackets, and flexible air duct.
3.3. Specifiche tecniche
| Specificazione | Valore |
|---|---|
| Capacità del flusso d'aria | 450 piedi cubi al minuto (CFM) |
| Materiale | Acciaio inossidabile |
| Livello di rumore | 8.5 Sones (max at highest speed) |
| Tipo di montaggio | Montaggio a parete |
| Tipo di controlli | Tocco |
| Voltage | 110 Volt |
| Numero di velocità | 3 |
| Tipo di sorgente luminosa | LED (2-level dimmable) |
| Tipo di filtro | Mesh (5-layer Aluminum) |
| Tipo di ventilazione | Exhaust (Ducted) or Recirculation (Ductless) |
| Dimensioni del prodotto | 19.69"P x 29.53"L x 25.28"A |
| Numero di modello | CAS75206 |
4. Configurazione e installazione
Proper installation is crucial for the performance and safety of your range hood. Refer to the detailed steps below. For a visual guide, please watch the installation video.
4.1. Disimballaggio e ispezione iniziale
- Carefully unpack the range hood and all components from the box.
- Inspect all parts for any shipping damage or missing items. If any issues are found, contact customer support immediately.
Video 4.1: Detailed installation guide for CIARRA Range Hoods, covering all steps from unpacking to final setup.
4.2. Wall Preparation and Mounting
- Determine the desired installation height. Use a spirit level to draw a horizontal straight line on the wall at this height.
- Place the hanging plate on the marked line, ensuring its circular mounting hole aligns with the line. Mark the three circular positioning holes.
- Drill three holes at the marked positions.
- Drive the expansion rubber plugs into the drilled holes until they are flush with the wall surface.
- Fix the hanging plate to the wall using screws.
- Temporarily hang the main range hood unit on the hanging plate.
- Dismantle the grease filters from the hood.
- Mark the positioning holes on both sides of the inner rear plate of the hood with a pencil.
- Rimuovere la cappa dal muro.
- Drill two holes at the marked positions for the inner rear plate.
- Drive expansion rubber plugs into these holes.
- Re-hang the main range hood unit on the hanging plate.
- Fix the machine to the wall from the inside using screws through the inner rear plate.
- Install the grease filters back into the hood.
4.3. Installazione del camino
- Fix the support bracket of the chimney to the back of the chimney sections using screws.
- Place the chimney assembly onto the top cover plate of the hood.
- Adjust the chimney to be level using a spirit level.
- Mark the oblong holes on the chimney's support bracket with a pencil.
- Rimuovere il camino.
- Drill two holes at the marked positions for the chimney support bracket.
- Drive expansion rubber plugs into these holes.
- Fix the chimney support bracket to the wall with screws.
- Insert the air duct into the air outlet of the hood.
- Install the chimney assembly into the top cover plate, guiding the air duct through the chimney.
- Lift the air duct and the upper chimney section, then lock both sides of the upper chimney with screws.
- Lock both sides of the bottom of the chimney to the top cover plate with screws.
Video 4.2: Instructions for installing the CACF003 Carbon Filter, essential for ductless operation.
Note on Ductless Operation: If you intend to use the range hood in ductless (recirculation) mode, you will need to purchase and install CACF003 carbon filters (sold separately). Refer to the carbon filter installation video for detailed instructions.

Figure 4.1: Visual comparison of ducted operation (left) and ductless operation with carbon filters (right).
5. Istruzioni per l'uso
The CIARRA Range Hood features a soft-touch control panel for easy operation of its various functions.
5.1. Power and Fan Speed Control
- Premere il tasto Pulsante di accensione (⏻) to turn the hood ON or OFF.
- Utilizzare il pulsante '+' to increase the fan speed (3 speeds available).
- Utilizzare il pulsante '-' to decrease the fan speed.
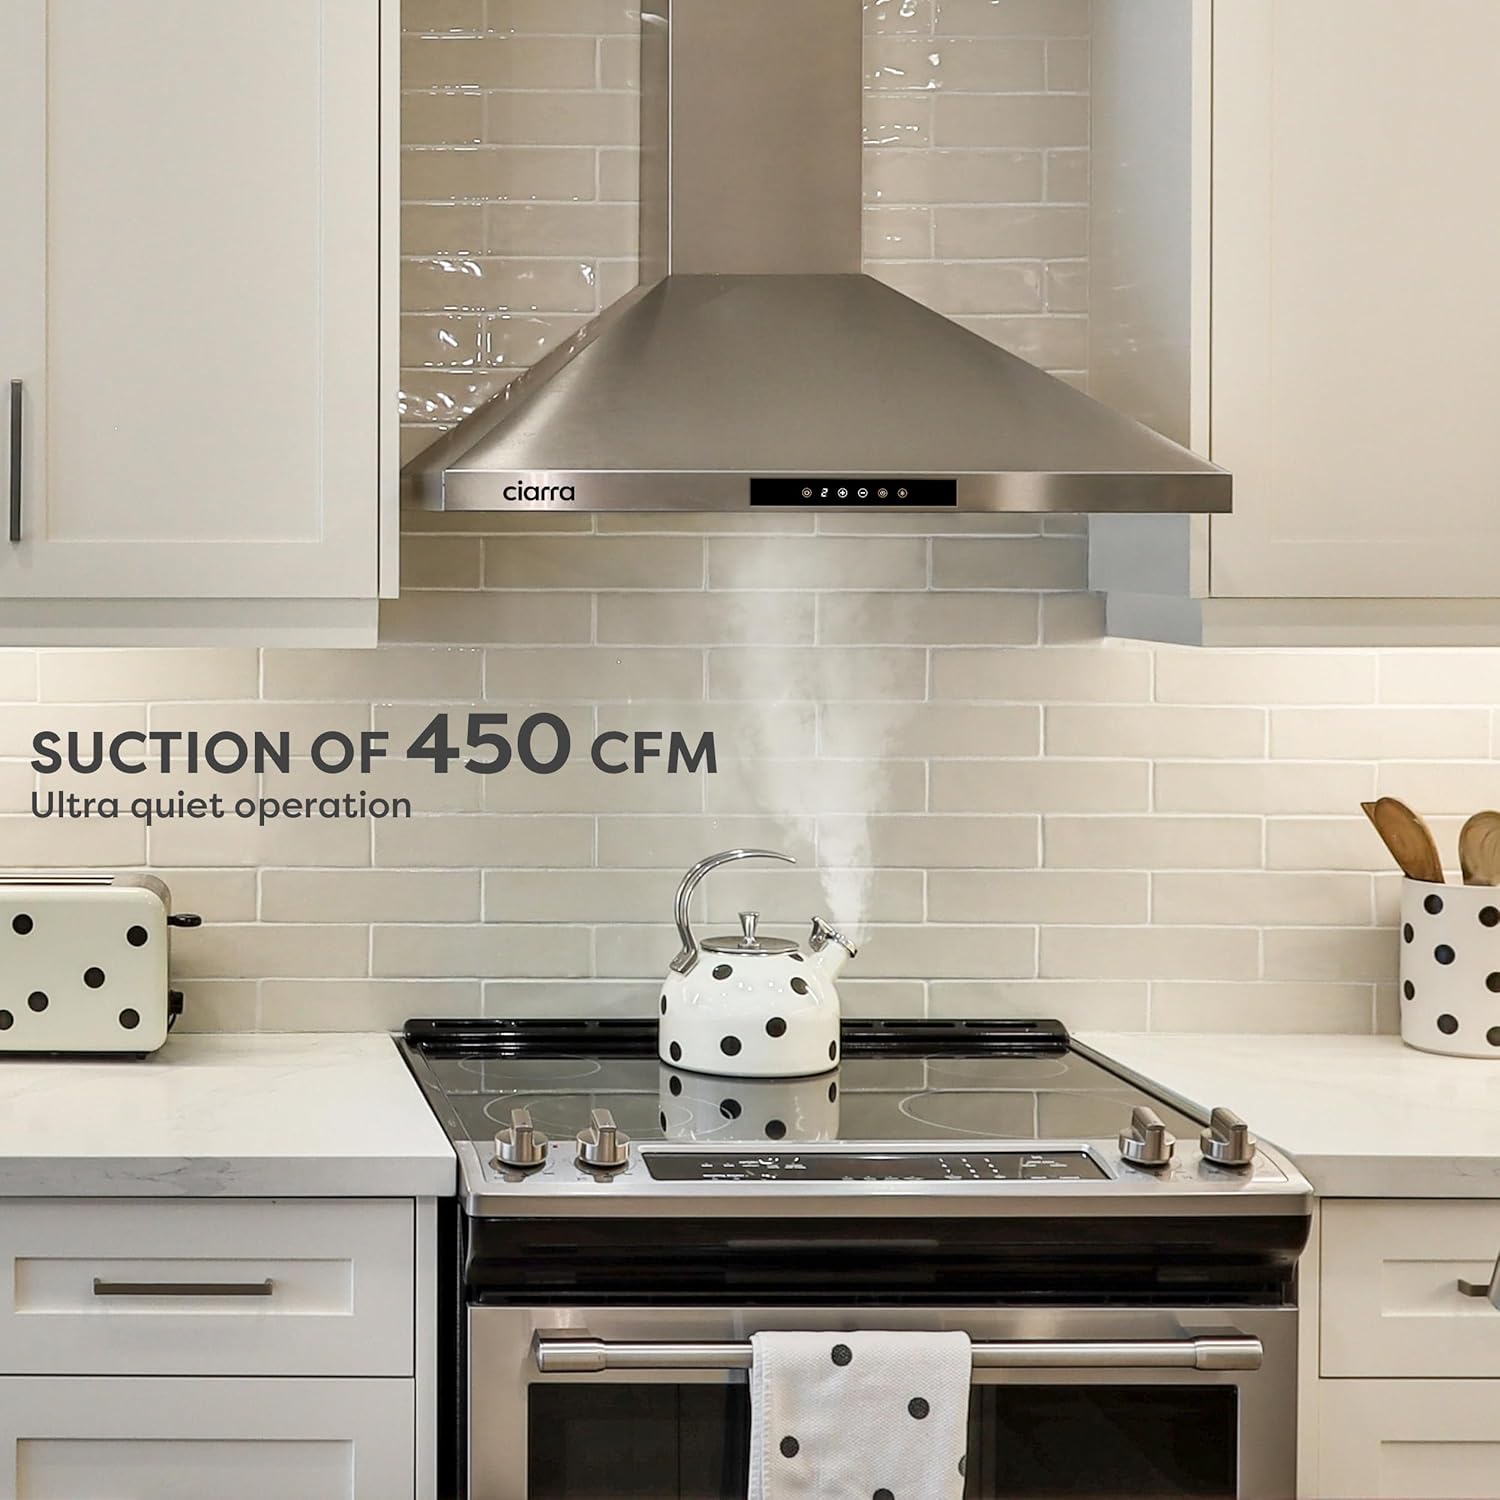
Figure 5.1: The 450 CFM powerful suction effectively removes smoke and odors.
Video 5.1: Demonstration of Timer and Clean & Fresh Function operation.
5.2. Dimmable LED Lighting
- Premere il tasto Pulsante luce (💡) to turn the LED lights ON/OFF.
- The LED lights have 2 dimmable levels. Press the light button repeatedly to cycle through brightness settings.

Figure 5.2: Dimmable LED lights provide adjustable illumination for your cooking area.
5.3. Auto Shut-Off Timer Function
- Premere il tasto Pulsante timer (⏱) repeatedly to set the auto shut-off time.
- Each press cycles through preset times: 5, 10, 15, 20 minutes.
- Pressing a fifth time will cancel the timer function.
- When the timer function is active, an orange ring around the timer button will flash.

Figure 5.3: Visual guide for setting the auto shut-off timer function.
5.4. Clean & Fresh Function
- The Clean & Fresh function runs the fan at level 1 speed for 5 minutes per hour over a 24-hour period. This helps to remove excess moisture and odors, keeping your kitchen fresh.
- To activate: Turn on the cooker hood, press the timer button (⏱) for 3 seconds, then press the power button (⏻).
- This function is suitable for both extraction (ducted) and recirculation (ductless) modes.

Figure 5.4: The 24-hour Clean & Fresh function maintains air quality by running the fan periodically.
6. Manutenzione
Una manutenzione regolare garantisce prestazioni ottimali e longevità della cappa.
6.1. Pulizia dei filtri antigrasso
- The 5-layer aluminum mesh filters should be cleaned regularly to prevent grease buildup, which can affect performance and pose a fire hazard.
- The filters are dishwasher safe. Alternatively, they can be washed by hand with warm water and mild detergent.
- To remove: Press the lock on the filter and pull it downward.
- To reinstall: Align the filter with the slots and push it upwards until it clicks into place.

Figure 6.1: Close-up of the 5-layer aluminum mesh filter, designed to effectively separate grease and fumes.
6.2. Replacing Carbon Filters (Ductless Mode Only)
- If using the hood in ductless mode, the CACF003 carbon filters need periodic replacement (typically every 3-6 months, depending on usage).
- To replace: First, detach the grease filters. Plug the activated carbon filter into the motor unit and turn it in a clockwise direction to secure. Repeat for the other side.
- Refer to Video 4.2 in the Setup section for a visual guide on carbon filter installation.
6.3. Pulizia esterna
- Clean the exterior stainless steel surfaces regularly with a soft cloth and a non-abrasive stainless steel cleaner.
- Avoid using abrasive cleaners or scouring pads, as they can scratch the surface.
7. Risoluzione Dei Problemi
Prima di contattare il servizio clienti, verifica i seguenti problemi comuni e le relative soluzioni:
| Problema | Possibile causa | Soluzione |
|---|---|---|
| La cappa non funziona | Nessuna alimentazione; Cavo di alimentazione scollegato; Interruttore automatico scattato. | Check power connection; Ensure plug is securely inserted; Reset circuit breaker. |
| Scarse prestazioni di aspirazione | Grease filters clogged; Carbon filters saturated (ductless); Air duct obstructed; Fan speed too low. | Clean or replace filters; Check for duct obstructions; Increase fan speed. |
| Rumore eccessivo | Loose parts; Fan motor imbalance; Improper installation of ductwork. | Check for loose screws or components; Ensure ductwork is properly secured and sealed. |
| Le luci non funzionano | LED module faulty; Loose wiring. | Contact qualified technician for replacement; Check wiring connections. |
8. Garanzia e supporto
For warranty information, please refer to the documentation included with your purchase or visit the official CIARRA websito. Sono disponibili anche piani di protezione per una copertura estesa.
If you encounter any issues not covered in this manual or require further assistance, please contact CIARRA customer support. You can also find additional resources, including the full installation manual in PDF format, on the Amazon product page or CIARRA's official websito.
Guida utente online: Manuale Scarica il PDF