
1. Introduzione
The AAXA P2-A is a compact, portable pico projector featuring Android OS, Wi-Fi, and Bluetooth connectivity. Designed for versatility, it supports Full HD 1080P resolution, making it suitable for various applications including home cinema, presentations, and mobile entertainment. This manual provides essential information for setting up, operating, maintaining, and troubleshooting your P2-A projector.
2. Cosa c'è nella scatola
Si prega di verificare che tutti gli articoli siano presenti nel pacco:
- Proiettore Pico LED intelligente Android AAXA P2-A
- mini-HDMI Cable
- cavo AV
- Cavo USB
- scheda microSD
- Telecomando
- Adattatore di alimentazione
3. Prodotto finitoview
Familiarize yourself with the physical features and connection ports of your AAXA P2-A projector.
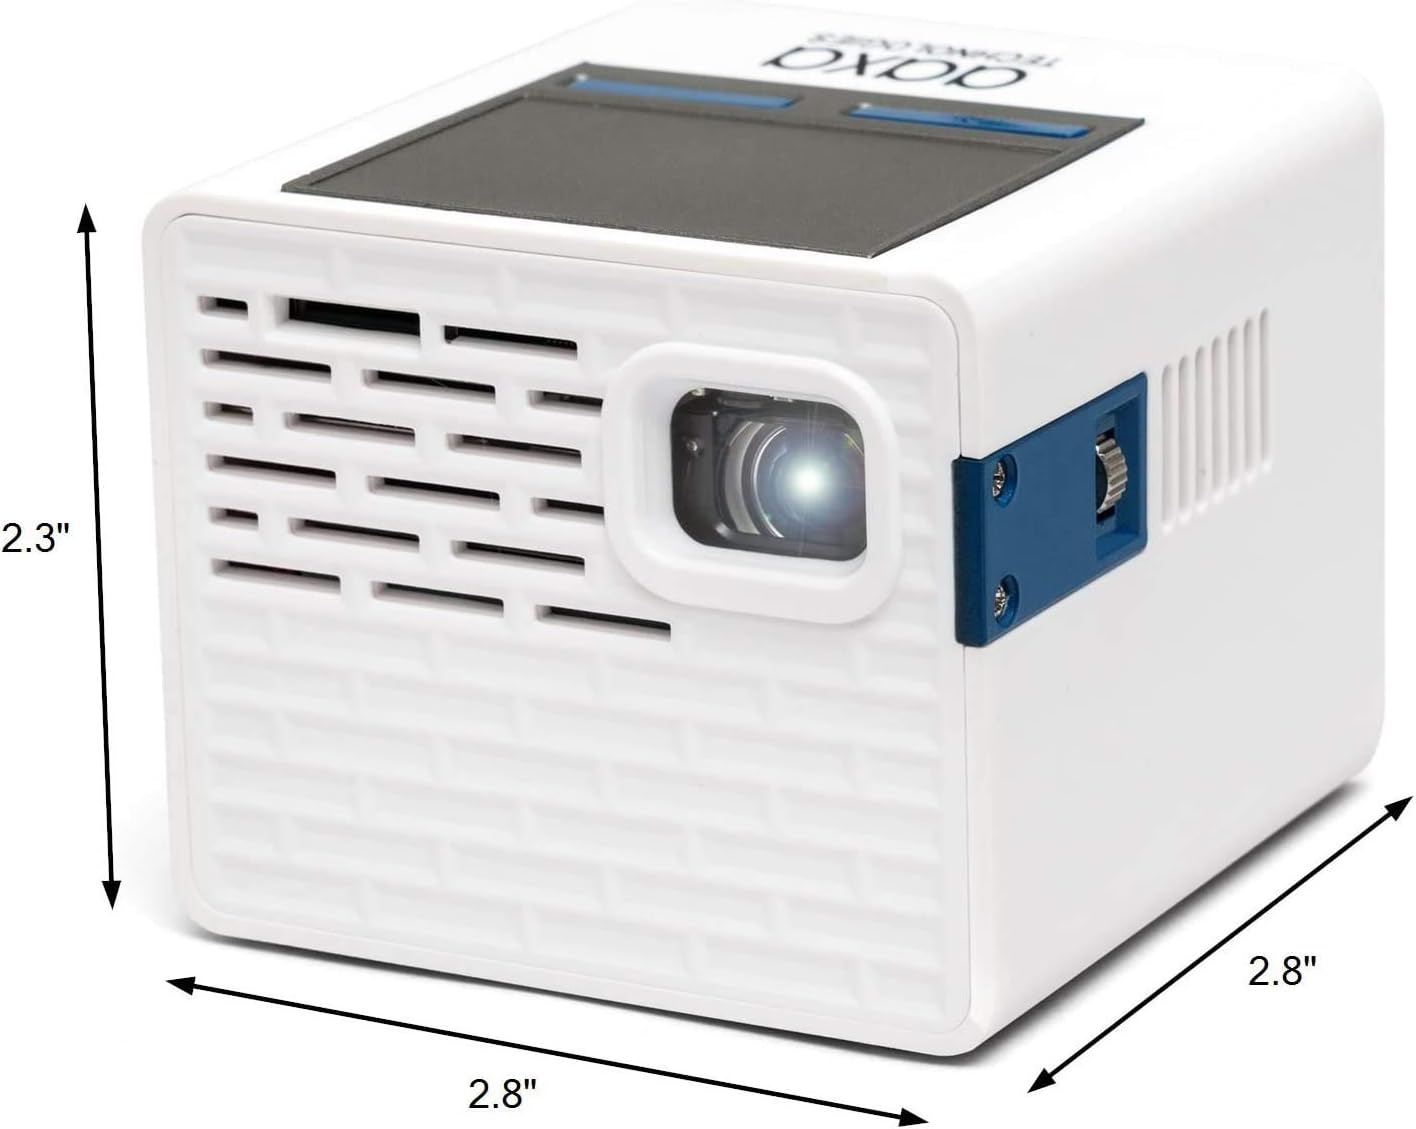
Figure 3.1: AAXA P2-A Pico Projector dimensions. The projector measures approximately 2.8 inches in width, 2.8 inches in depth, and 2.3 inches in height, highlighting its compact design.

Figura 3.2: Oltreview of the AAXA P2-A Pico Projector's ports and controls. This image displays the Trackpad, MicroSD slot, Focus Wheel, Bluetooth/WiFi (built-in), IR Remote Sensor, HDMI port, Video In, AV port, MicroUSB (for firmware reflash only), 3.5mm Audio Out, Composite A/V, Speakers, USB port, DC Power input, and Power Button.
4. Impostazione
4.1 Posizionamento iniziale
Place the projector on a stable, flat surface. For optimal image quality, position the projector perpendicular to the projection surface (wall or screen). Ensure there are no obstructions blocking the lens or ventilation ports.

Figure 4.1: The AAXA P2-A Pico Projector shown mounted on a small tripod, demonstrating a common setup for stable projection and adjustable positioning.
4.2 Accensione/Spegnimento
- Connetti alimentazione: Plug the included power adapter into the DC Power port on the projector and then into a wall outlet.
- Accensione: Tenere premuto il pulsante di accensione sul proiettore o sul telecomando finché il dispositivo non si accende.
- Spegni: Press and hold the Power Button again until the shutdown prompt appears, then confirm. Alternatively, use the power option in the Android interface.
4.3 Regolazione della messa a fuoco
Locate the Focus Wheel on the side of the projector. Rotate the wheel until the projected image appears sharp and clear on your screen or wall.
5. Istruzioni per l'uso
5.1 Navigazione
The P2-A can be navigated using the integrated touchpad on top of the unit or the included remote control. For enhanced control, a USB mouse and keyboard can be connected.
5.2 Sistema operativo Android e app
The projector runs on an Android operating system, allowing you to download and use various applications. Connect to a Wi-Fi network to access online content and app stores.

Figure 5.1: The AAXA P2-A Pico Projector displaying the Netflix application interface, demonstrating its capability to run streaming apps directly via its Android OS.
5.3 Smartphone Mirroring
The P2-A supports smartphone mirroring. This feature typically requires Airplay for iOS devices or a compatible third-party Android app. Refer to the projector's settings or AAXA's official website for specific instructions and recommended applications.
6. Connettività
The AAXA P2-A offers multiple connectivity options for various devices:
- HDMI: Connect laptops, gaming consoles, Blu-ray players, and other HDMI-enabled devices using the mini-HDMI port.
- USB: Plug in USB drives for media playback or connect a USB mouse/keyboard for easier navigation.
- MicroSD: Insert a microSD card to access stored media filedirettamente.
- AV: Utilizzare il cavo AV in dotazione per collegare dispositivi più vecchi con uscite video composito e audio stereo.
- Bluetooth: Pair with Bluetooth speakers or headphones for external audio output.
- Wifi: Connect to a wireless network for internet access, app downloads, and online streaming.
- Uscita audio da 3.5 mm: Collega altoparlanti esterni o cuffie tramite il jack audio da 3.5 mm.
7. Manutenzione
Una corretta manutenzione garantisce la longevità e le prestazioni ottimali del proiettore.
- Pulizia della lente: Utilizzare un panno morbido e privo di lanugine, specificamente progettato per lenti ottiche. Non utilizzare detergenti abrasivi o panni che potrebbero graffiare le lenti.
- Pulizia dell'esterno: Pulire l'esterno del proiettore con un panno morbido e asciutto. Per lo sporco ostinato, leggermente dampLavare il panno con acqua. Evitare prodotti chimici aggressivi.
- Ventilazione: Ensure the ventilation ports are clear of dust and debris to prevent overheating. Do not block the vents during operation.
- Magazzinaggio: Quando non in uso, conservare il proiettore in un luogo fresco e asciutto, lontano dalla luce solare diretta e da temperature estreme.
8. Risoluzione Dei Problemi
Per i problemi più comuni e le relative soluzioni, fare riferimento alla tabella sottostante.
| Problema | Possibile causa | Soluzione |
|---|---|---|
| Nessuna immagine proiettata | Cavo di alimentazione scollegato, proiettore spento, sorgente di ingresso non selezionata, copriobiettivo inserito. | Controllare il collegamento dell'alimentazione, accendere il proiettore, selezionare la sorgente di ingresso corretta, rimuovere il copriobiettivo. |
| L'immagine è sfocata | Messa a fuoco non regolata, proiettore troppo vicino/lontano dallo schermo. | Adjust the Focus Wheel. Reposition the projector for optimal distance. |
| Nessun suono | Volume troppo basso, dispositivo audio esterno non collegato, uscita audio selezionata non corretta. | Increase volume. Ensure external speakers/headphones are connected and selected as output. |
| Il telecomando non funziona | Batteries depleted, IR sensor blocked, remote not pointed correctly. | Replace batteries. Ensure clear line of sight to the projector's IR sensor. |
| Problemi di connettività Wi-Fi/Bluetooth | Network issues, device not in pairing mode, interference. | Restart projector and router. Ensure devices are in pairing mode. Reduce interference. |
9. Specifiche
Detailed technical specifications for the AAXA P2-A Pico Projector.
| Caratteristica | Specificazione |
|---|---|
| Marca | Tecnologie AAXA |
| Nome del modello | P2-A |
| Tipo di visualizzazione | GUIDATO |
| Risoluzione nativa | 1920 x 1080 (Full HD 1080P support) |
| Risoluzione massima dello schermo | 1080p (1920x1080) |
| Luminosità | 130 lumen |
| Tecnologia di connettività | Bluetooth, HDMI, USB |
| Caratteristica speciale | Pico, Built-in Speakers |
| Fattore di forma | Portatile |
| Tipo di montaggio | Supporto da tavolo |
| Tipo di controllore | Controllo dell'app |
| Dispositivi compatibili | Console di gioco, laptop, smartphone, tablet |
| Connettività Hardware | USB, mini HDMI |
| Metodo di controllo | Applicazione |
| Peso dell'articolo | 0.25 chilogrammi |
10. Garanzia e supporto
10.1 Informazioni sulla garanzia
The AAXA P2-A Pico Projector comes with a 90-day limited warranty. This warranty covers manufacturing defects under normal use. Please retain your proof of purchase for warranty claims. The warranty does not cover damage caused by misuse, accidents, unauthorized modifications, or normal wear and tear.
10.2 Assistenza clienti
For technical assistance, troubleshooting beyond this manual, or warranty inquiries, please contact AAXA Technologies customer support. Refer to the official AAXA Technologies websito per le informazioni di contatto e le risorse di supporto più aggiornate.