1. Introduzione
This manual provides comprehensive instructions for the setup, operation, maintenance, and troubleshooting of your Easytry123 Universal Remote Control. This remote is designed as a replacement for various Optoma DLP 3D Projector models, ensuring seamless control over your device.
Compatible Optoma Projector Models include: TW635-3D, DW326, S311, W311, W501, WX31, X302, X303, X31, X501, W556-3D, DS339, DX339, DW339, TX635-3D.
2. Prodotto finitoview
2.1 Disposizione del telecomando

Immagine: Frontale view of the remote control, displaying all buttons and their labels. Key buttons include Power, Source, Menu, Volume, Keystone, Zoom, and input selections like HDMI1, HDMI2, VGA1, VGA2, Video, 3D.
2.2 Funzioni dei pulsanti
- Energia: Accende o spegne il proiettore.
- Fonte: Cycles through available input sources (e.g., HDMI, VGA, Video).
- Menu: Opens the projector's on-screen display (OSD) menu.
- Navigazione (Su, Giù, Sinistra, Destra, Invio): Utilizzato per navigare nei menu e confermare le selezioni.
- Volume (+/-): Regola il livello di uscita audio.
- Page (+/-): Used for presentation control or specific menu navigation.
- Keystone: Adjusts the image's vertical keystone correction.
- Zoom (+/-): Adjusts the digital zoom level of the projected image.
- Input Selectors (HDMI1, HDMI2, VGA1, VGA2, Video, 3D): Directly selects the corresponding input source or activates 3D mode.
- Congelare: Pauses the current image display.
- Disattivazione AV: Disattiva temporaneamente l'audio e oscura lo schermo.
- Risincronizzazione: Resynchronizes the input signal.
- Interruttore: Alterna tra diverse modalità di visualizzazione o funzioni.
- Luminosità (+/-): Regola la luminosità dell'immagine.
3. Impostazione
3.1 Installazione della batteria
Il telecomando richiede due batterie AAA (non incluse) per funzionare. Per installare le batterie, seguire questi passaggi:
- Individuare il vano batterie sul retro del telecomando.
- Press down on the latch and slide the battery compartment cover downwards to remove it.
- Inserire due batterie AAA, assicurandosi che i terminali positivo (+) e negativo (-) siano allineati correttamente con le marcature all'interno del vano.
- Riposizionare il coperchio del vano batteria finché non scatta in posizione.

Immagine: Posteriore view del telecomando, evidenziando il coperchio del vano batterie nella parte inferiore.
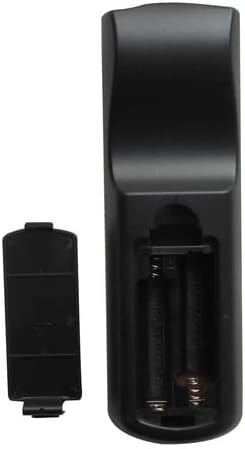
Image: The remote control's battery compartment with the cover removed, revealing two empty slots for AAA batteries and the positive/negative terminals.

Immagine: Un angolo view of the remote control with the battery cover detached, illustrating the correct orientation for inserting AAA batteries into the compartment.
4. Istruzioni per l'uso
Point the remote control directly at the projector's IR receiver for optimal performance.
4.1 Accensione/spegnimento
Premere il tasto Energia button once to turn the projector on. Press it again to turn the projector off. Confirm any power-off prompts on the projector screen if applicable.
4.2 Selezione della sorgente di input
Premere il tasto Fonte button repeatedly to cycle through available input sources (e.g., HDMI1, HDMI2, VGA1, VGA2, Video). Alternatively, use the dedicated input buttons (e.g., HDMI1, VGA1) for direct selection.
4.3 Regolazione del volume
Utilizzare il Volume + button to increase the audio volume and the Volume - pulsante per diminuirlo.
4.4 Navigazione nei menu
Premere il tasto Menu button to open the projector's on-screen display (OSD). Use the Su giù sinistra destra arrow buttons to navigate through menu options. Press Entrare to confirm a selection or access a sub-menu. Press Menu di nuovo per uscire dall'OSD.
4.5 Correzione trapezoidale
Utilizzare il Chiave di volta buttons to correct trapezoidal distortion in the projected image, ensuring a rectangular display.
4.6 Funzione Zoom
Premere il tasto Ingrandimento + button to digitally enlarge the image or Ingrandisci - to reduce it.
4.7 3D Mode Activation
If your projector and content support 3D, press the 3D button to activate or deactivate 3D display mode.
5. Manutenzione
5.1 Pulizia del telecomando
Per pulire il telecomando, strofinare delicatamente la superficie con un panno morbido e asciutto. Per lo sporco ostinato, strofinare leggermenteampImmergere il panno in acqua. Evitare l'uso di prodotti chimici aggressivi o detergenti abrasivi, poiché potrebbero danneggiare la finitura del telecomando o i componenti interni.
5.2 Sostituzione della batteria
Replace batteries when the remote's response becomes sluggish or stops functioning. Always replace both batteries simultaneously with new AAA batteries. Do not mix old and new batteries, or different types of batteries. Dispose of used batteries responsibly according to local regulations.
6. Risoluzione Dei Problemi
- Il telecomando non risponde:
- Assicurarsi che le batterie AAA nuove siano installate correttamente.
- Verificare che non vi siano ostacoli tra il telecomando e il ricevitore IR del proiettore.
- Verify that you are within the effective range of the projector's IR receiver.
- Funzionalità limitata:
- While this remote is compatible with listed Optoma models, some advanced or specific functions of your original projector remote may not be replicated. Refer to your projector's original manual for specific features.
- Ensure the projector is powered on and not in a standby mode that restricts remote commands.
7. Specifiche
- Fonte di energia: 2 x batterie AAA (non incluse)
- Tecnologia di connettività: Infrarossi (IR)
- Dispositivi compatibili: Optoma DLP 3D Projectors (specific models listed in Introduction)
- Numero massimo di dispositivi supportati: 1 (dedicated to the paired projector)
8. Garanzia e supporto
For any issues not covered in this manual or for further assistance, please contact the manufacturer, Easytry123, through your purchase platform. Keep your purchase receipt as proof of purchase for any warranty claims.