Affilato
Sharp Atomic Clock Instruction Manual
Modello: 8541848315
Introduzione
The Sharp Atomic Clock provides precise timekeeping and temperature monitoring for your home or office. Featuring a large, easy-to-read display, this clock automatically synchronizes with the atomic time signal (WWVB) broadcast from Fort Collins, Colorado, ensuring accuracy without manual adjustments. It also includes a wireless outdoor sensor to display both indoor and outdoor temperatures.
Caratteristiche del prodotto
- Atomic Time Accuracy: Automatically synchronizes with the WWVB atomic time signal for precise timekeeping.
- Jumbo 3" Easy-to-Read Numbers: Large digital display for clear visibility of time, date, and temperature.
- Indoor/Outdoor Temperature Display: Monitors both indoor ambient temperature and outdoor temperature via a wireless sensor.
- Sensore esterno senza fili: Transmits outdoor temperature data to the main unit.
- Alimentato a batteria: Operates on batteries for flexible placement (batteries not included).
- Regolazione automatica dell'ora legale (DST): Automatically adjusts for daylight saving time changes.
- Fusi orari selezionabili: Allows selection of various US time zones.
- Formato 12/24 ore: Possibilità di visualizzare l'ora nel formato 12 o 24 ore.
- Celsius/Fahrenheit Display: Passa dalle unità di temperatura Celsius a Fahrenheit e viceversa.
Contenuto della confezione
Prima di procedere con la configurazione, assicurarsi che tutti gli elementi siano presenti.
- Sharp Atomic Clock Main Unit
- Sensore esterno wireless
- Manuale di istruzioni
Note: Batteries are not included. The main unit requires 2 AA batteries, and the outdoor sensor requires 2 AA batteries.
Impostare
1. Installazione della batteria
- Open the battery compartment on the back of the main clock unit.
- Insert 2 AA batteries, observing the correct polarity (+ and -).
- Chiudere il coperchio del vano batterie.
- Open the battery compartment on the wireless outdoor sensor.
- Insert 2 AA batteries into the outdoor sensor, observing the correct polarity.
- Close the outdoor sensor's battery compartment cover.
2. Sincronizzazione iniziale e impostazioni
After battery installation, the clock will attempt to receive the WWVB atomic time signal and connect to the outdoor sensor. This process may take several minutes or up to 24 hours depending on your location and environmental interference.
- Fuso orario: Press the "TIME ZONE" button (often labeled "UP TIME ZONE") on the back of the clock to cycle through available time zones (PST, MST, CST, EST). Select your desired time zone.
- Formato 12/24 ore: Press the "12/24" button to switch between 12-hour and 24-hour display.
- Celsius/Fahrenheit: Press the "°C/°F" button to toggle between Celsius and Fahrenheit temperature display.
- Outdoor Sensor Pairing: If the outdoor temperature does not appear, press the "CHANNEL" button on the main unit to search for the sensor signal. Ensure the outdoor sensor is within range and not obstructed.
For optimal signal reception, place the clock away from large metal objects, electronic devices, and areas with heavy concrete or brick walls. The outdoor sensor should be placed in a shaded, dry location, protected from direct sunlight and precipitation, for accurate readings.
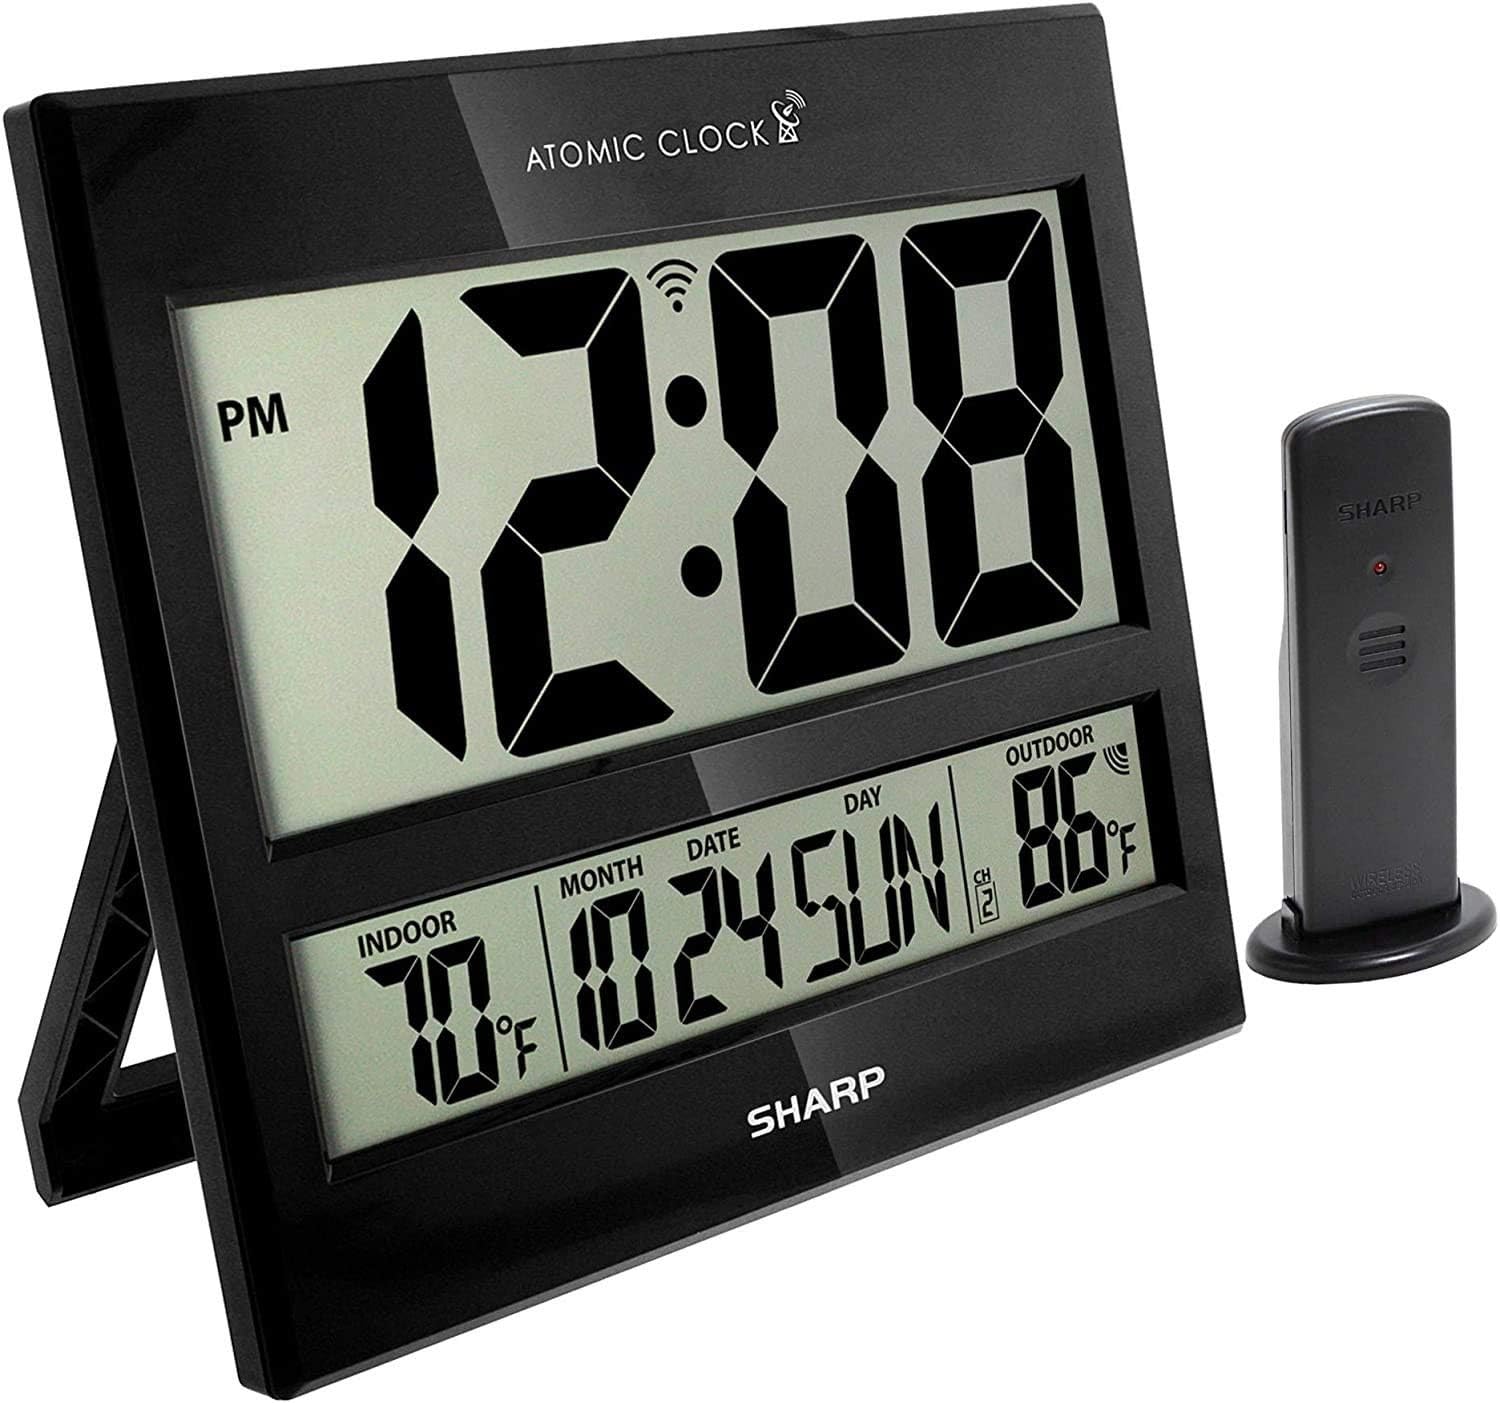
Image: The Sharp Atomic Clock main unit displaying time, indoor temperature, date, and outdoor temperature, alongside its wireless outdoor sensor.
Operazione
Visualizza informazioni
The clock's large LCD screen displays the following information:
- Tempo: Current time in selected 12-hour or 24-hour format.
- Indicatore PM: Displays "PM" for afternoon hours in 12-hour format.
- Indicatore del segnale atomico: Shows the status of the WWVB atomic time signal reception.
- Temperatura interna: Temperatura attuale misurata dall'unità principale.
- Month/Date/Day: Current calendar information.
- Temperatura esterna: Current temperature measured by the wireless outdoor sensor.
- Outdoor Sensor Channel: Indicates the channel the outdoor sensor is transmitting on.
- Indicatore di batteria scarica: An icon will appear when batteries are low and need replacement.
Funzioni dei pulsanti (pannello posteriore)
| Pulsante | Funzione |
|---|---|
| CALENDARIO | Press and hold for 2 seconds to manually set calendar (Year, Month, Date, Language). Use UP/DOWN buttons to change values. |
| TEMPO | Press and hold for 2 seconds to manually set time (DST ON/OFF, Hour, Minute). Use UP/DOWN buttons to change values. |
| 12/24 | Passa dalla visualizzazione dell'ora in formato 12 ore a quella in formato 24 ore. |
| CANALE | Press to switch between outdoor sensor channels (1, 2, 3). Press and hold for 2 seconds to pair with the outdoor sensor. |
| ° C / ° F | Alterna la visualizzazione della temperatura in gradi Celsius e Fahrenheit. |
| ONDA | Initiates a manual search for the WWVB atomic time signal. |
| RESET | Resets the clock to factory default settings. Requires a pointed object (e.g., paperclip). |
| UP / TIME ZONE | Increases values during manual setting. Press to cycle through time zones. |
| GIÙ | Decreases values during manual setting. |
Manutenzione
- Sostituzione della batteria: Replace batteries in both the main unit and outdoor sensor when the low battery indicator appears on the display. Always replace all batteries at the same time with new ones.
- Pulizia: Clean the clock and sensor with a soft, dry cloth. Do not use abrasive cleaners or solvents.
- Posizionamento del sensore esterno: Periodically check the outdoor sensor's location to ensure it remains protected from extreme weather conditions, direct sunlight, and moisture.
Risoluzione dei problemi
- Clock not syncing with atomic time:
- Ensure the clock is placed away from electronic interference (TVs, computers, microwaves).
- Try placing the clock near a window facing Fort Collins, Colorado (if applicable to your region).
- Press the "WAVE" button to initiate a manual signal search.
- Per la sincronizzazione iniziale potrebbero essere necessarie fino a 24 ore.
- Outdoor temperature not displaying or incorrect:
- Check batteries in the outdoor sensor.
- Ensure the outdoor sensor is within the effective transmission range (typically up to 100 feet, line of sight).
- Press the "CHANNEL" button on the main unit to re-establish connection.
- Verify the outdoor sensor is placed in a location protected from direct sunlight and rain, which can affect readings.
- Il display è scuro o vuoto:
- Replace all batteries in the main unit with fresh ones.
- Assicurarsi che le batterie siano inserite con la polarità corretta.
- Ora o data errate:
- Verificare che sia selezionato il fuso orario corretto.
- Check if Daylight Saving Time (DST) setting is correct for your region.
- If atomic signal is not received, manually set the time and date using the "TIME" and "CALENDAR" buttons.
Specifiche
| Caratteristica | Dettaglio |
|---|---|
| Marca | Affilato |
| Numero di modello | 8541848315 |
| Codice UPC | 049353998732 |
| Colore | Gloss Black |
| Tipo di visualizzazione | LCD digitale |
| Caratteristica speciale | Atomic Time Synchronization (WWVB), Indoor/Outdoor Temperature |
| Dimensioni del prodotto | 13"W x 1.5"H (Main Unit) |
| Fonte di alimentazione | Alimentato a batteria |
| Numero di batterie richieste | Main Unit: 2 AA; Outdoor Sensor: 2 AA |
| Materiale | Plastica |
| Tipo di montaggio | Wall Mount / Tabletop Stand |
| Uso interno/esterno | Indoor (Main Unit), Outdoor (Sensor) |
Garanzia e supporto
Sharp products are manufactured to high-quality standards. For warranty information, technical support, or service inquiries, please refer to the contact information provided with your product packaging or visit the official Sharp websito. Conservare la ricevuta d'acquisto come prova d'acquisto per eventuali reclami in garanzia.
Ask a question about this manual
Ask about setup, troubleshooting, compatibility, parts, safety, or missing instructions. Manuals+ will review the question and use this page’s manual context to help answer it.