
1. Introduzione
This manual provides detailed instructions for the setup, operation, and maintenance of your Zerone Digital Alarm Clock, Model Zeronek1gfg26oth-02. Please read this manual thoroughly before using the product to ensure proper function and longevity.
2. Informazioni e precauzioni di sicurezza
- Use the clock in a dry environment. Avoid prolonged exposure to wet conditions, high temperatures, or areas with rapid temperature changes.
- Handle the clock with care to prevent damage.
- When using batteries, ensure they are high-quality AAA alkaline batteries. If the display dims or blinks, replace the batteries promptly. Prevent battery leakage by replacing old batteries.
- If the clock is not powered, verify that batteries are correctly inserted or the USB power source is connected.
- When using a USB power adapter, ensure it is a compatible DC 5V/500mA adapter.
3. Contenuto della confezione
Upon opening the package, please verify that all accessories are present:
- Digital Wooden Clock (1 pc)
- User's Manual (1 pc)
- USB Charging Cable (1 pc)
4. Prodotto finitoview
The Zerone Digital Alarm Clock features a modern cube design with an LED display that shows time and temperature. It includes multiple alarm settings and adjustable brightness.

Figura 4.1: Davanti view of the Zerone Digital Alarm Clock displaying the time.

Figura 4.2: Key features indicated by icons: Clock, Alarm, Thermometer, and Sound Control.
4.1. Componenti e pulsanti
The clock features a minimalist design with control buttons located on the back panel.
- Pulsante IMPOSTA: Utilizzato per immettere e confermare le impostazioni.
- Pulsante SU: Used to increase values or navigate settings.
- Pulsante GI: Used to decrease values or navigate settings. Also controls sound control mode.
- Pulsante di reset: A small recessed button to reset the clock to factory defaults.
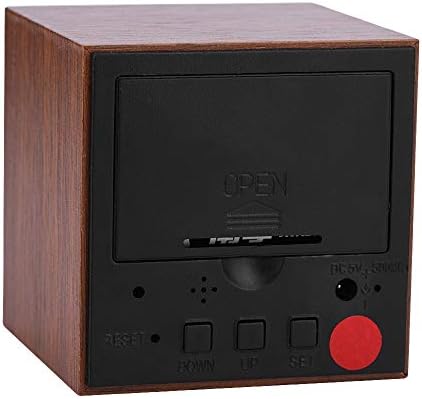
Figura 4.3: Posteriore view of the clock with the battery cover closed, showing the USB power input and control buttons.
5. Impostazione
5.1. Alimentazione dell'orologio
The clock can be powered by either 3 AAA batteries or a DC 5V/500mA USB power supply.
- Potenza della batteria: Open the battery compartment cover on the back of the clock. Insert 3 AAA alkaline batteries, ensuring correct polarity (+/-). Close the cover securely.
- Alimentazione USB: Connect the provided USB charging cable to the DC 5V/500mA port on the back of the clock and plug the other end into a compatible USB power adapter (not included) or a USB port.
Note: When powered by batteries, the sound control mode is recommended to conserve power. The display will not show continuously in this mode.
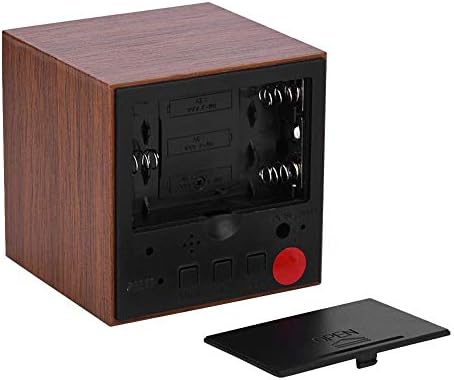
Figura 5.1: Posteriore view with the battery compartment open, showing slots for 3 AAA batteries.
6. Istruzioni per l'uso
6.1. Modalità di visualizzazione
The clock has two main display modes:
- DP-1: Displays Time, Temperature, Year, Month, and Date in a rotating sequence.
- DP-2: Displays Time continuously.
To switch between DP-1 and DP-2, press the IMPOSTATO brevemente il pulsante.
6.2. Impostazione di ora e data
Per entrare nella modalità di impostazione, tenere premuto il tasto IMPOSTATO button for 3 seconds. The display will show the first setting item (YEAR) flashing.
- Mentre un elemento lampeggia, utilizzare il UP or GIÙ pulsanti per regolare il valore.
- Premere il tasto IMPOSTATO button briefly to move to the next setting item.
- The setting sequence is: YEAR → MONTH → DATE → 12/24H Format → HOUR → MINUTE → ALARM 1 (AL1) → ALARM 2 (AL2) → ALARM 3 (AL3).
- After setting the last item (AL3), the clock will exit the setting mode automatically.
6.3. Impostazione degli allarmi
The clock supports three independent alarms (AL1, AL2, AL3). Each alarm sounds for 1 minute.
- Enter the setting mode by pressing and holding the IMPOSTATO pulsante per 3 secondi.
- Premere IMPOSTATO repeatedly until you reach the AL1, AL2, or AL3 setting.
- When the alarm hour or minute is flashing, use the UP or GIÙ pulsanti per impostare l'orario desiderato per la sveglia.
- Premere IMPOSTATO per confermare e passare all'impostazione della sveglia successiva o uscire.
6.4. Regolazione della luminosità
The clock offers three levels of brightness (L1, L2, L3), with L3 being the brightest and L1 the dimmest. Additionally, the display automatically reduces brightness by half between 18:00 (6 PM) and 07:00 (7 AM).
- Premere e tenere premuto il tasto UP button for 3 seconds to enter brightness adjustment mode. The current brightness level (e.g., "L3") will be displayed.
- Utilizzare il UP or GIÙ buttons to cycle through the brightness levels (L1, L2, L3).
- Una volta impostata la luminosità desiderata, tenere premuto il tasto UP button for 3 seconds again to exit brightness adjustment mode.
6.5. Activating Sound Control Mode
Sound control mode (power-saving mode) is recommended when the clock is powered by batteries. In this mode, the display turns off and activates when a sound is detected (e.g., a clap or tap).
To toggle sound control mode:
- Premere il tasto GIÙ brevemente il pulsante.
- "ON:SD" indicates sound control is active.
- "--:SD" indicates sound control is off, and the display will remain continuously on (if in DP-2 mode).
6.6. Switching Temperature Unit (Celsius/Fahrenheit)
The clock supports both Celsius (C) and Fahrenheit (F) temperature displays.
To switch the temperature unit:
- Premere il tasto UP button briefly. The display will toggle between "--:C" (Celsius) and "--:F" (Fahrenheit).
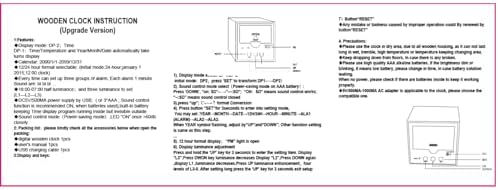
Figura 6.1: Reference image of the original instruction sheet.
7. Manutenzione
- Pulire l'orologio con un panno morbido e asciutto. Non utilizzare detergenti abrasivi o solventi.
- Avoid exposing the clock to water or excessive moisture, as this can damage the internal circuitry.
- Se l'orologio non verrà utilizzato per un periodo prolungato, rimuovere le batterie per evitare perdite.
8. Risoluzione Dei Problemi
| Problema | Possibile causa | Soluzione |
|---|---|---|
| Display is dim or blinking. | Batteria scarica. | Replace AAA batteries or connect to USB power. |
| Display is off, no time shown. | Sound control mode is active and no sound detected; no power. | Tap the clock or make a sound to activate display. Check battery installation or USB power connection. Disable sound control mode by pressing GIÙ button until "--:SD" is shown. |
| Clock not responding to button presses. | Temporary software glitch or improper operation. | Use a thin object (like a paperclip) to press the recessed RESET button on the back of the clock. This will restore default settings. |
| Time or date is incorrect after power loss. | Batteries removed or depleted while USB power was disconnected. | Reimpostare l'ora e la data seguendo le istruzioni nella Sezione 6.2. |
9. Specifiche
| Caratteristica | Specificazione |
|---|---|
| Marca | Zerone |
| Numero di modello | Zeronek1gfg26oth-02 |
| Materiale | MDF, PVC |
| Colore | Marrone |
| Tipo di visualizzazione | LED digitale |
| Dimensioni del prodotto | 6 x 6 x 6 cm (2.36"W x 2.36"H) |
| Peso dell'articolo | 3.87 once |
| Fonte di alimentazione | 3 x AAA Batteries (not included) OR DC 5V/500mA USB |
| Livelli di luminosità | 3 (L1, L2, L3) |
| Funzione di allarme | Yes, 3 groups of alarms |
| Visualizzazione della temperatura | Yes (Celsius/Fahrenheit) |
| Formato ora | 12-hour or 24-hour mode |
| Caratteristiche speciali | Voice Control Mode, Automatic Half Luminance (18:00-07:00) |

Figura 9.1: Dimensions of the Zerone Digital Alarm Clock.
10. Garanzia e supporto
Per informazioni sulla garanzia o assistenza tecnica, fare riferimento alla confezione del prodotto o contattare il rivenditore presso il quale è stato acquistato. Conservare la ricevuta d'acquisto come prova d'acquisto.